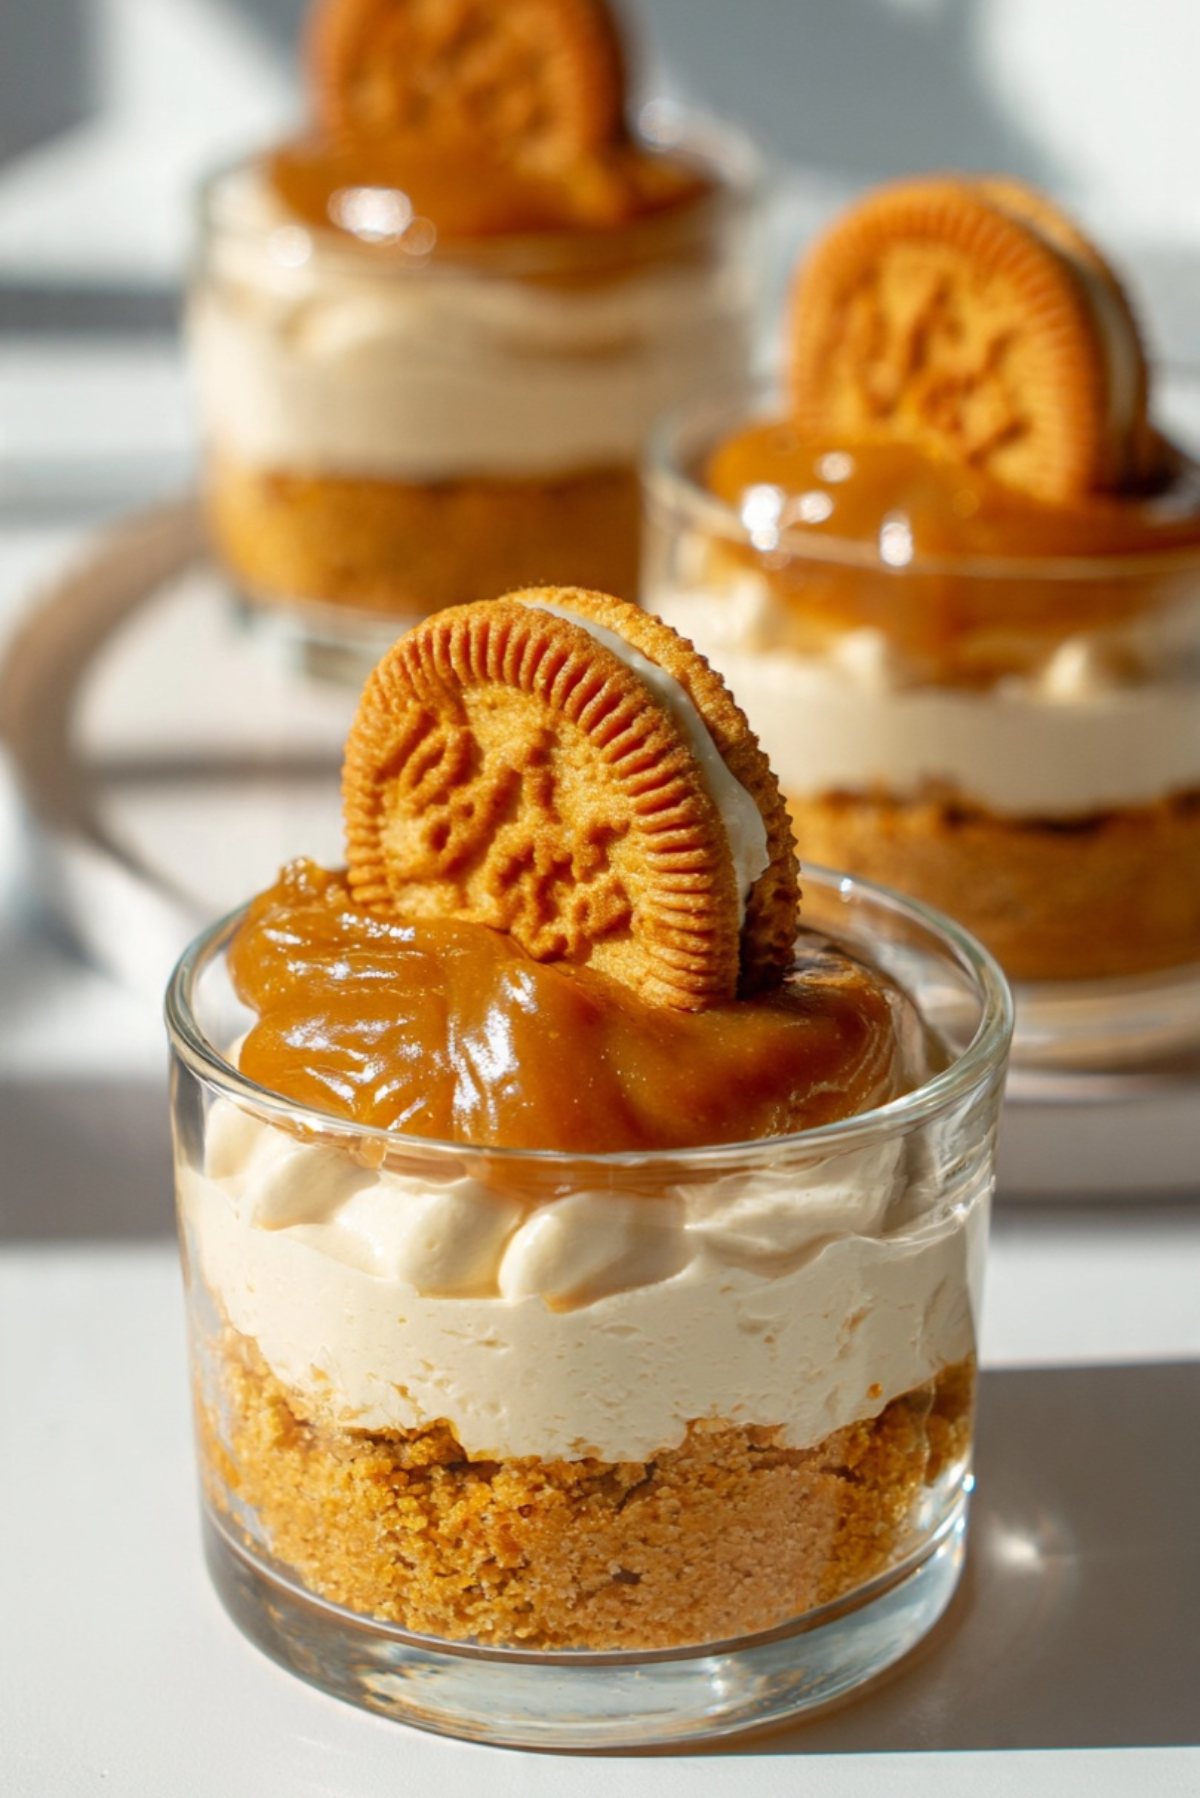
No-Bake Lotus Cheesecake Cups
There is something so comforting about a dessert that looks fancy but secretly takes almost no effort. These no-bake Lotus cheesecake cups are creamy, dreamy, and layered with that unmistakable caramelized biscuit flavor. The first time I made them, I remember thinking, why did I ever bother turning on the oven? Trust me, you are going to love this. It is smooth, sweet, slightly spiced from the biscuits, and completely irresistible.
The Creamy Layered Dessert That Feels Bakery Worthy
What makes these cheesecake cups special is the balance of textures. You get a buttery biscuit base, a velvety smooth cheesecake layer, and a glossy Lotus spread topping that melts slightly with every spoonful. Served in individual cups, they feel elegant and fun at the same time. This one is a total game changer for dinner parties or late night cravings.
A Sweet Treat Inspired by a Cult Favorite Biscuit
Lotus Biscoff biscuits, known for their caramelized flavor and subtle spice, have become a dessert star in recent years. Originally enjoyed with coffee, they quickly found their way into cheesecakes, milkshakes, and layered desserts. Turning them into a no-bake cheesecake cup is a natural evolution, simple ingredients, big flavor, and zero oven stress.
Why You Will Make These Again and Again
Before we dive into the details, here is why this dessert deserves a spot in your regular rotation.
Versatile: Perfect for parties, holidays, or a simple family dessert.
Budget-Friendly: Uses basic ingredients that are easy to find.
Quick and Easy: No oven required, just mix, layer, and chill.
Customizable: Add chocolate chips or extra biscuit crumbs on top.
Crowd-Pleasing: Creamy cheesecake and Lotus flavor is always a hit.
Make-Ahead Friendly: Ideal for preparing the night before.
Great for Leftovers: They store beautifully in the refrigerator.
Pro Tips for Ultra Creamy Cheesecake Cups
A few small details make all the difference.
- Use full fat cream cheese for the richest texture.
- Whip the cream until soft peaks form for a light but stable filling.
- Chill for at least 3 hours so the layers set properly.
- Warm the Lotus spread slightly before topping for a smooth finish.
Simple Tools You Will Need
No complicated equipment here.
Mixing Bowls: For preparing the base and filling.
Electric Mixer: To whip the cream and blend the filling smoothly.
Spatula: For folding ingredients gently.
Serving Cups or Glasses: Clear cups show off the beautiful layers.
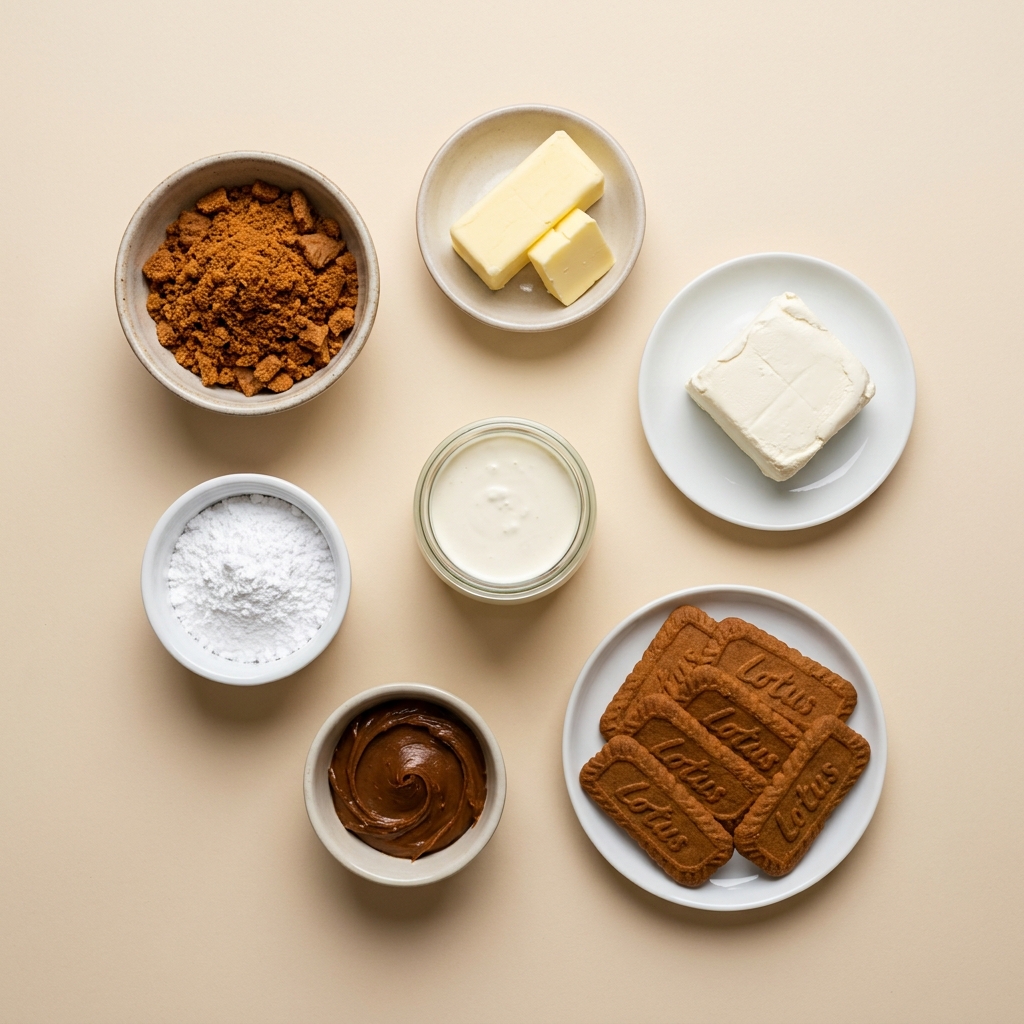
Ingredients You Will Need For These Creamy Cups
Each layer brings its own delicious role to the dessert.
- Lotus Biscuits: 2 cups crushed, about 20 biscuits, for the base.
- Unsalted Butter: 1/2 cup melted, to bind the biscuit crumbs.
- Cream Cheese: 16 ounces softened, for a rich filling.
- Powdered Sugar: 1/2 cup, for sweetness without graininess.
- Heavy Whipping Cream: 1 cup cold, whipped to soft peaks.
- Lotus Spread: 3/4 cup, for flavor in the filling.
- Lotus Spread: 1/2 cup, warmed slightly for topping.
- Lotus Biscuits: 6 whole biscuits, for garnish.
Easy Ingredient Substitutions
You can adjust based on preference.
Lotus Biscuits: Substitute with graham crackers if needed.
Lotus Spread: Use any caramelized cookie butter alternative.
Heavy Whipping Cream: Use whipped topping for a quicker option.
The Star of the Show
Let us highlight what truly makes these cups shine.
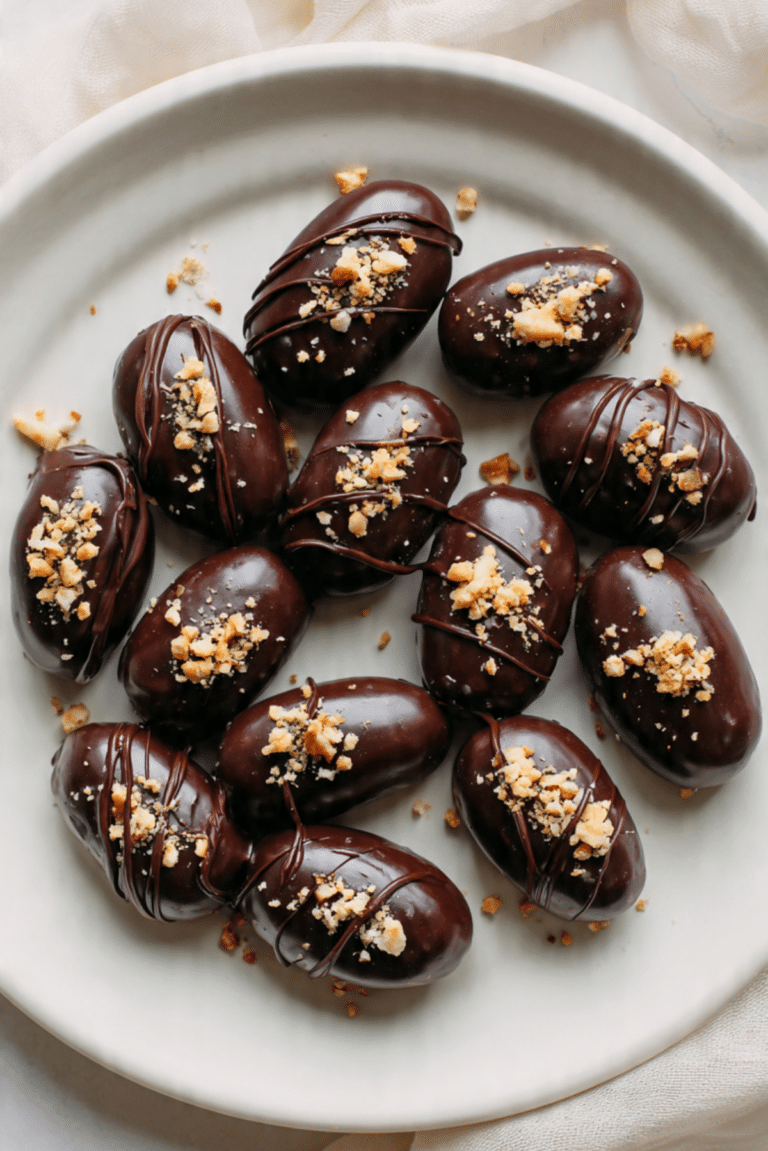
Lotus Spread: Its deep caramel flavor with a hint of spice transforms a simple cheesecake into something unforgettable.
Let Us Layer These Beauties Together
Now comes the fun part, assembling those gorgeous layers.
- Preheat Your Equipment: No oven needed, but prepare your serving cups and clear space in the refrigerator.
- Combine Ingredients: In a bowl, mix crushed Lotus biscuits with melted butter until evenly coated.
- Prepare Your Cooking Vessel: Spoon the biscuit mixture evenly into the bottom of each cup and press down firmly.
- Assemble the Dish: In another bowl, beat cream cheese and powdered sugar until smooth. Add 3/4 cup Lotus spread and mix well. Gently fold in whipped cream until fully combined. Spoon or pipe the filling over the biscuit base.
- Cook to Perfection: Instead of cooking, chill the cups in the refrigerator for at least 3 hours to set.
- Finishing Touches: Pour the warmed 1/2 cup Lotus spread over each cheesecake layer and smooth gently.
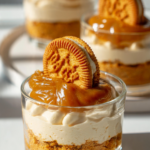
- Serve and Enjoy: Garnish with a whole Lotus biscuit and serve chilled.
Texture and Flavor in Every Spoonful
The base is crumbly yet buttery, the filling is airy and smooth, and the topping adds a glossy, rich finish. Every spoonful gives you that contrast between creamy and crunchy. Let me tell you, it is worth every bite.
Helpful Tips for Perfect Results
- Press the base firmly so it holds together.
- Do not overmix once the whipped cream is added.
- Chill overnight for the best texture.
What to Avoid
- Using low fat cream cheese, it can affect texture.
- Skipping chill time, the layers need time to set.
- Overheating the Lotus spread, warm gently only.
Nutrition Snapshot
Servings: 6
Calories per serving: 520
Note: These values are approximate.
Time Breakdown
Prep Time: 20 minutes
Cook Time: 0 minutes
Total Time: 20 minutes plus 3 hours chilling
Make Ahead and Storage Tips
These cheesecake cups can be made up to 24 hours in advance. Store covered in the refrigerator for up to 3 days. Freezing is possible, but allow them to thaw slowly in the refrigerator before serving.
How to Serve Them Beautifully
Serve in clear glass cups to show off the layers. Add extra crushed biscuits or a drizzle of spread on top for an elegant finish.
Creative Leftover Ideas
Crumble leftover cheesecake into a parfait with whipped cream. Blend into a milkshake for a decadent treat.
Extra Tips for Flavor and Ease
Add a pinch of salt to the filling to balance sweetness. For extra crunch, sprinkle crushed biscuits on top just before serving.
Make It a Showstopper
Use a piping bag for neat layers. Wipe the inside of the glass clean for a polished presentation.
Variations to Try
- Add a layer of chocolate ganache between base and filling.
- Mix mini chocolate chips into the cheesecake layer.
- Top with whipped cream rosettes.
- Add chopped nuts for crunch.
- Swirl extra spread into the filling for a marbled effect.
FAQ’s
Q1: Can I make this in one large dish?
Yes, assemble in a small baking dish and slice to serve.
Q2: How long does it need to chill?
At least 3 hours for proper setting.
Q3: Can I freeze them?
Yes, freeze and thaw in the refrigerator before serving.
Q4: Can I reduce the sugar?
You can slightly reduce powdered sugar if preferred.
Q5: Can I use whipped topping instead of cream?
Yes, though texture may be slightly lighter.
Q6: Do I need gelatin?
No, the whipped cream helps it set.
Q7: How do I crush the biscuits?
Use a food processor or place in a bag and crush with a rolling pin.
Q8: Can I add fruit?
Strawberries or bananas can be layered in.
Q9: How do I keep layers neat?
Pipe the filling and smooth each layer carefully.
Q10: Is it very sweet?
It is sweet and rich, but balanced by the slight spice of the biscuits.
Conclusion
These no-bake Lotus cheesecake cups are creamy, indulgent, and surprisingly easy to make. With their beautiful layers and rich caramelized flavor, they feel special enough for celebrations but simple enough for any day of the week. Once you try them, you will see why they disappear so quickly from the fridge.
PrintNo-Bake Lotus Cheesecake Cups
Creamy, layered no-bake Lotus cheesecake cups with a buttery biscuit base, smooth cheesecake filling, and glossy Lotus spread topping. An easy, oven-free dessert that feels indulgent and elegant.
Ingredients
- 2 cups crushed Lotus biscuits (about 20 biscuits)
- 1/2 cup unsalted butter, melted
- 16 ounces cream cheese, softened
- 1/2 cup powdered sugar
- 1 cup heavy whipping cream, cold
- 3/4 cup Lotus spread (for filling)
- 1/2 cup Lotus spread, slightly warmed (for topping)
- 6 whole Lotus biscuits, for garnish
Instructions
- Prepare serving cups and clear space in the refrigerator for chilling.
- In a bowl, mix crushed Lotus biscuits with melted butter until evenly coated.
- Spoon the biscuit mixture evenly into the bottom of each cup and press down firmly to form the base.
- In another bowl, beat cream cheese and powdered sugar until smooth and creamy.
- Add 3/4 cup Lotus spread to the cream cheese mixture and blend until fully combined.
- In a separate bowl, whip the cold heavy whipping cream until soft peaks form.
- Gently fold the whipped cream into the cream cheese mixture until smooth and airy.
- Spoon or pipe the cheesecake filling over the biscuit base in each cup.
- Refrigerate for at least 3 hours to allow the layers to set.
- Pour the slightly warmed 1/2 cup Lotus spread over each chilled cheesecake layer and smooth gently.
- Garnish each cup with a whole Lotus biscuit and serve chilled.
Notes
- Use full fat cream cheese for the creamiest texture.
- Chill overnight for the best structure and flavor.
- Warm the Lotus spread gently for easy pouring, do not overheat.
- Store covered in the refrigerator for up to 3 days.