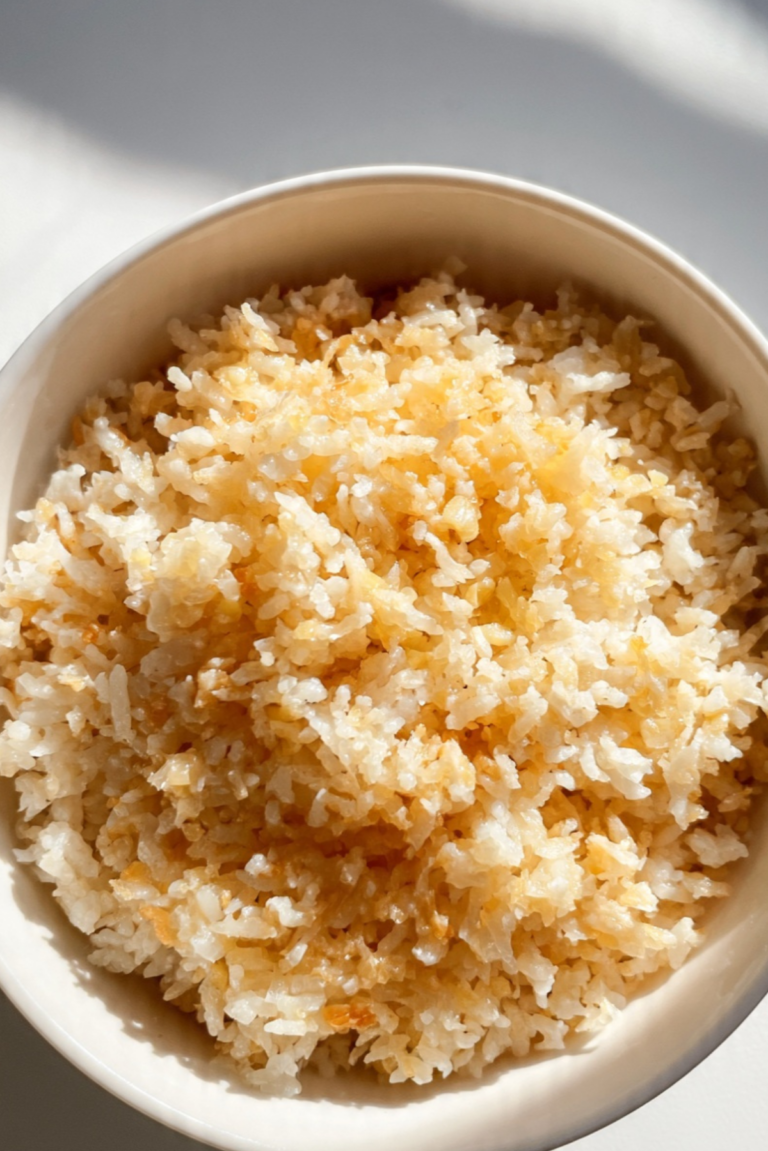
Microwavable Grilled Cheese
There are days when you just want something warm, cheesy, and comforting without turning on the stove. That is exactly where this Microwavable Grilled Cheese steps in. It is simple, fast, and surprisingly satisfying. The bread turns soft and warm, the cheese melts into that gooey center we all crave, and in just minutes you have a cozy bite that feels like a little hug. Trust me, you’re going to love this for busy afternoons or late night cravings.
The Ultimate Quick Fix for Cheesy Cravings
We usually think of grilled cheese as something made in a skillet, slowly crisped to golden perfection. But sometimes speed matters more than crunch. This version focuses on melty cheese and warm bread, giving you comfort without the wait. It may not have that pan fried crust, but it absolutely delivers on creamy, stretchy goodness.
A Classic Sandwich with a Modern Shortcut
Grilled cheese has been around for decades, especially popular in American households since sliced bread and processed cheese became staples. It started as an affordable comfort meal and quickly became iconic. This microwavable method simply adapts that tradition to modern convenience, making it accessible to students, busy parents, or anyone without access to a stovetop.
Why This Easy Sandwich Always Delivers
Before we step into the kitchen, here is why this quick method works so well.
Versatile: You can use different cheeses or breads depending on what you have.
Budget-Friendly: Only two main ingredients are required.
Quick and Easy: Ready in just a few minutes with minimal cleanup.
Customizable: Add a slice of tomato or a sprinkle of herbs if you like.
Crowd-Pleasing: Melted cheese between warm bread rarely disappoints.
Make-Ahead Friendly: You can assemble it in advance and microwave when ready.
Great for Leftovers: Extra slices can be reheated gently for another quick snack.
Simple Chef Tips for the Best Melt
Even in the microwave, technique matters.
- Use freshly sliced cheese for better melting.
- Microwave in short intervals to prevent rubbery texture.
- Cover loosely with a microwave safe lid to trap gentle steam.
- Let it rest for 30 seconds after heating so the cheese settles.
Tools You Will Need
This recipe keeps things minimal.
Microwave: The star appliance for quick heating.
Microwave-Safe Plate: Provides even heating and easy cleanup.
Butter Knife: For spreading butter evenly.
Ingredients You Will Need for This Quick Comfort Sandwich
The beauty here is in simplicity, but quality still counts.
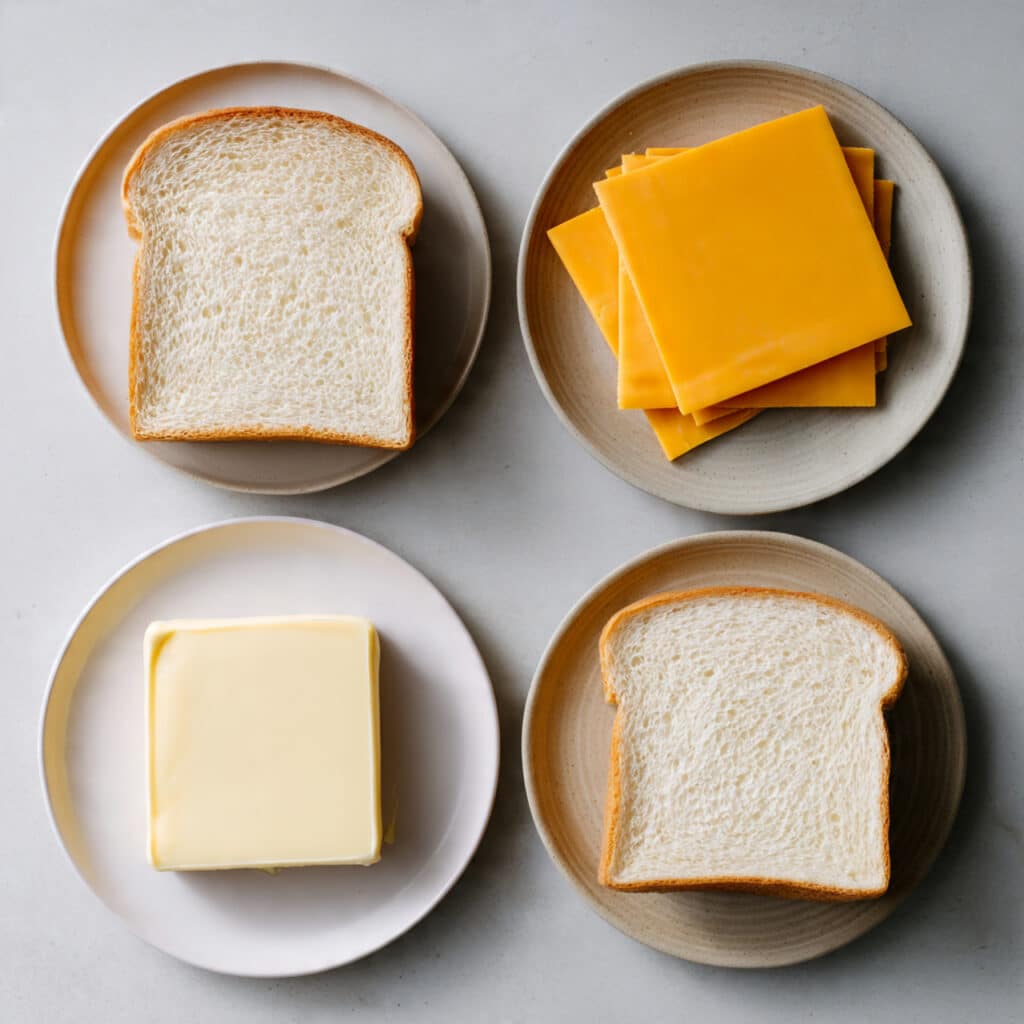
- White or Sandwich Bread: 2 slices, soft and fresh for the best texture.
- Cheddar Cheese: 2 slices, provides rich flavor and smooth melt.
- Unsalted Butter: 1 tablespoon, softened, adds flavor and slight moisture.
Easy Ingredient Substitutions
You can easily adjust based on what is in your kitchen.
Cheddar Cheese: Mozzarella, American, or Colby for different melt levels.
White Bread: Whole wheat or sourdough for added flavor.
Unsalted Butter: Light mayonnaise spread thinly for extra richness.
The Ingredient That Makes the Magic
Cheddar Cheese: A good quality cheddar melts beautifully and brings sharp, savory depth that balances the soft bread.
Let’s Make This Simple Sandwich
Here are the steps you are going to follow.
- Preheat Your Equipment: No preheating needed, but place a microwave-safe plate nearby.
- Combine Ingredients: Spread softened butter evenly on one side of each slice of bread.
- Prepare Your Cooking Vessel: Place one slice of bread butter side down on the plate.
- Assemble the Dish: Lay the cheese slices evenly over the bread, then top with the second slice, butter side facing up.
- Cook to Perfection: Microwave on medium power for 45 to 60 seconds, checking at 30 seconds, until the cheese is fully melted.
- Finishing Touches: Let the sandwich rest for 30 seconds before slicing.
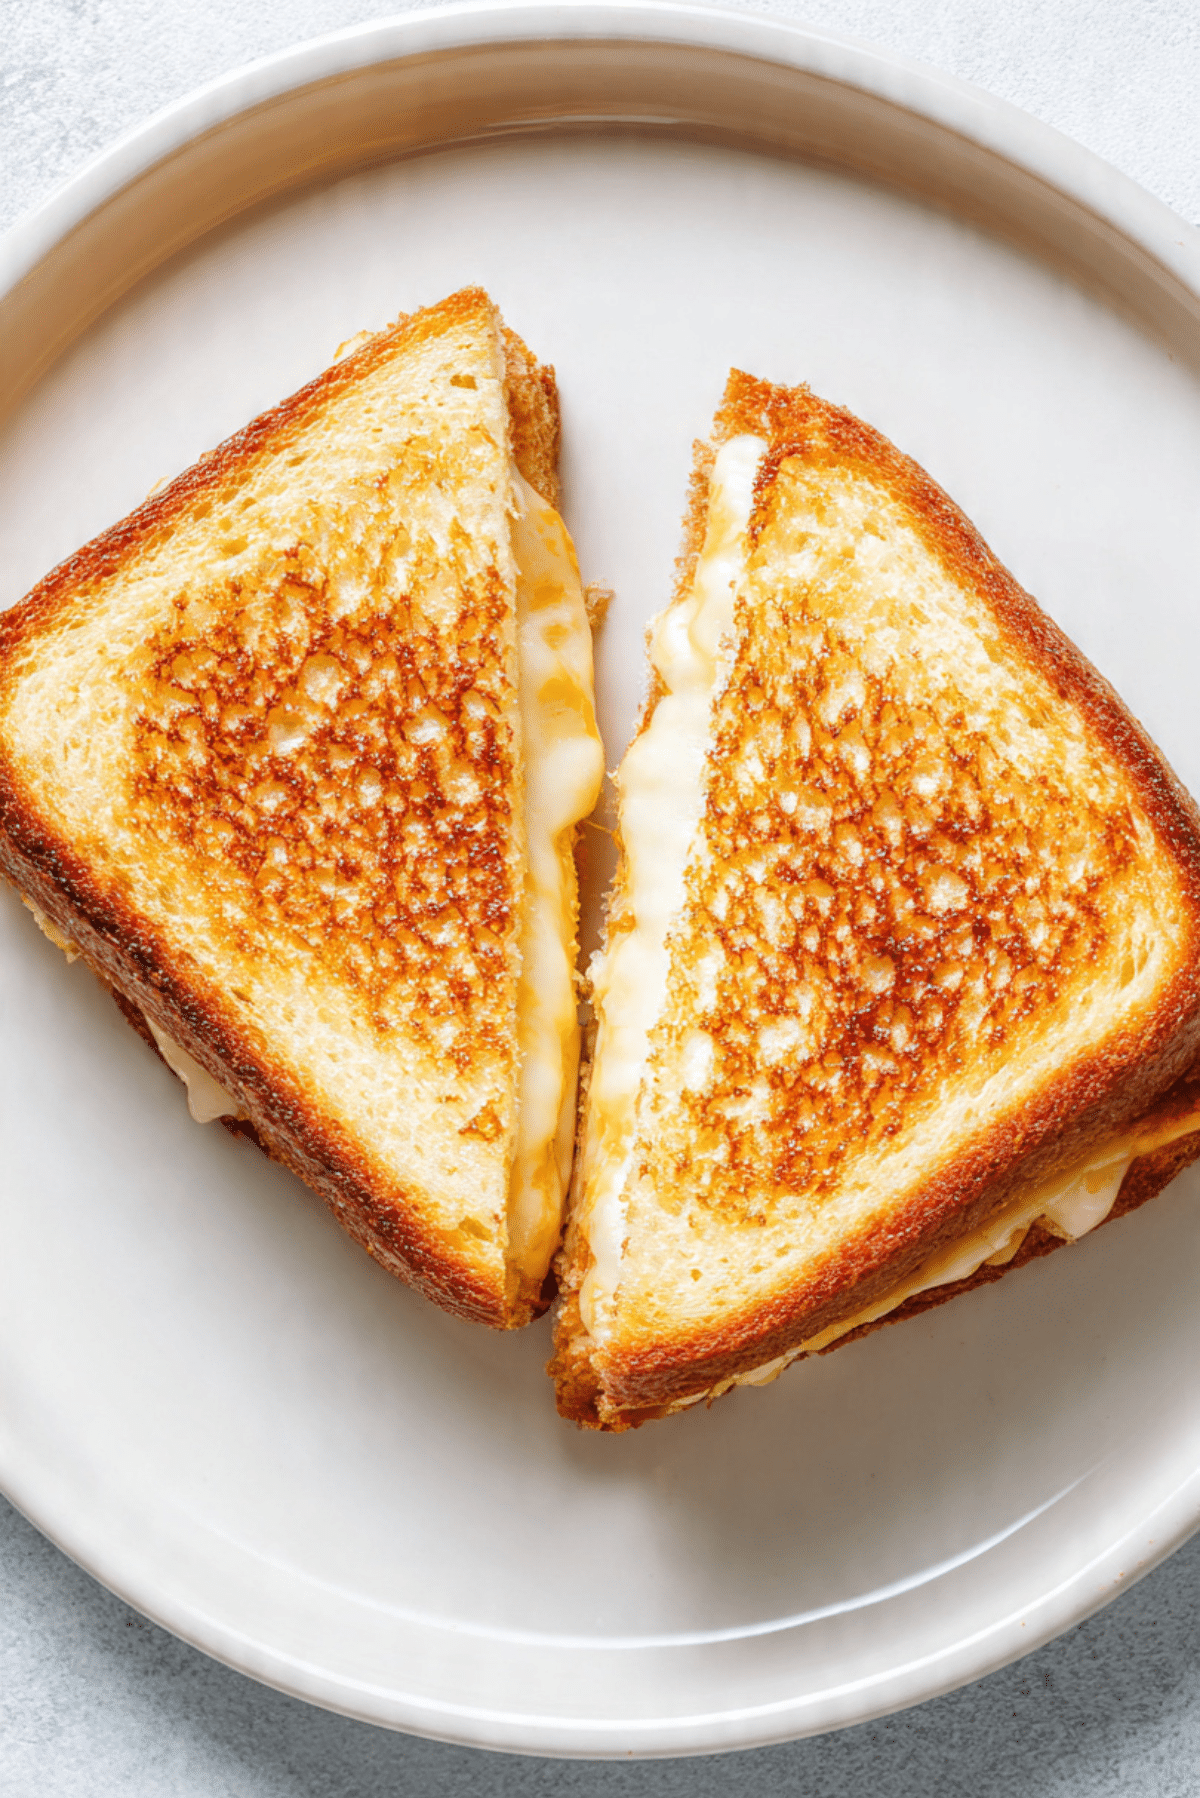
- Serve and Enjoy: Cut diagonally and enjoy while warm and gooey.
Texture and Flavor Breakdown
The bread becomes warm and tender, slightly softened from the steam. Inside, the cheese melts into a creamy layer that stretches gently when pulled apart. The butter adds richness, and the cheddar brings that sharp, savory note that makes each bite comforting and satisfying.
Helpful Tips for Better Results
- Use medium microwave power to avoid overcooking.
- Do not overheat, or the bread may turn tough.
- For slightly firmer bread, toast it lightly before assembling.
What to Avoid for the Perfect Melt
- Avoid microwaving on high power for too long.
- Do not skip resting time, as the cheese needs a moment to settle.
- Avoid using very thick bread slices, which may not heat evenly.
Nutrition Facts Overview
Servings: 1 sandwich
Calories per serving: 420
Note: These values are approximate.
Preparation Time Details
Prep Time: 5 minutes
Cook Time: 1 minute
Total Time: 6 minutes
Make-Ahead and Storage Tips
You can assemble the sandwich ahead and wrap it tightly in plastic wrap, then refrigerate for up to one day. Reheat gently in the microwave. This sandwich is best enjoyed fresh, but leftovers can be reheated for about 30 seconds.
How to Serve This Comfort Classic
Pair it with tomato soup for a nostalgic meal. Add a simple green salad on the side for balance. Even a handful of fresh fruit makes it feel more complete.
Creative Leftover Transformations
Cut leftover sandwich into cubes and add to a bowl of soup. Slice into strips and serve as dippers. Chop and add to scrambled eggs for a cheesy twist.
Extra Tips for Even Better Flavor
Sprinkle a tiny pinch of salt on the buttered bread before microwaving. Add a thin slice of tomato inside for freshness.
Make It a Showstopper
Slice it diagonally and stack the halves slightly offset to show off the melted center. Serve on a clean white plate for a simple, classic presentation.
Variations to Try
- Add a thin layer of mustard for tangy depth.
- Use pepper jack cheese for a mild kick.
- Add thinly sliced spinach for extra color.
- Sprinkle dried oregano for a subtle herb flavor.
- Try mixing two types of cheese for richer melt.
FAQ’s
Q1: Will the bread be crispy?
No, the microwave method creates soft bread rather than a crisp crust.
Q2: Can I use shredded cheese?
Yes, it melts well and spreads evenly.
Q3: Why did my cheese turn rubbery?
It may have been microwaved too long on high power.
Q4: Can I skip the butter?
Yes, but the flavor will be slightly less rich.
Q5: Can kids make this?
Yes, with supervision when using the microwave.
Q6: What is the best cheese for melting?
Cheddar, mozzarella, or American melt smoothly.
Q7: Can I double the recipe?
Yes, but heat each sandwich separately for even melting.
Q8: Can I use whole wheat bread?
Absolutely, it works just as well.
Q9: How do I make it less soggy?
Microwave on medium and avoid overcooking.
Q10: Is this as good as stovetop grilled cheese?
It is different, softer and less crisp, but still wonderfully comforting.
Conclusion
Microwavable Grilled Cheese proves that comfort food does not have to be complicated. With just a few simple ingredients and minutes of your time, you can create a warm, melty sandwich that satisfies every cheesy craving. Let me tell you, sometimes simple really is best.
PrintMicrowavable Grilled Cheese

A quick and comforting microwavable grilled cheese sandwich made with soft bread, melted cheddar, and a touch of butter for an easy, gooey snack ready in minutes.
Ingredients
- 2 slices white or sandwich bread
- 2 slices cheddar cheese
- 1 tablespoon unsalted butter, softened
Instructions
- Spread the softened butter evenly on one side of each slice of bread.
- Place one slice of bread butter side down on a microwave-safe plate.
- Lay the cheddar cheese slices evenly over the bread.
- Top with the second slice of bread, butter side facing up.
- Microwave on medium power for 45 to 60 seconds, checking at 30 seconds, until the cheese is fully melted.
- Let the sandwich rest for 30 seconds before slicing and serving.
Notes
- Microwave on medium power to prevent the cheese from becoming rubbery.
- For slightly firmer bread, toast it lightly before assembling.
- Serve immediately for the best texture and flavor.