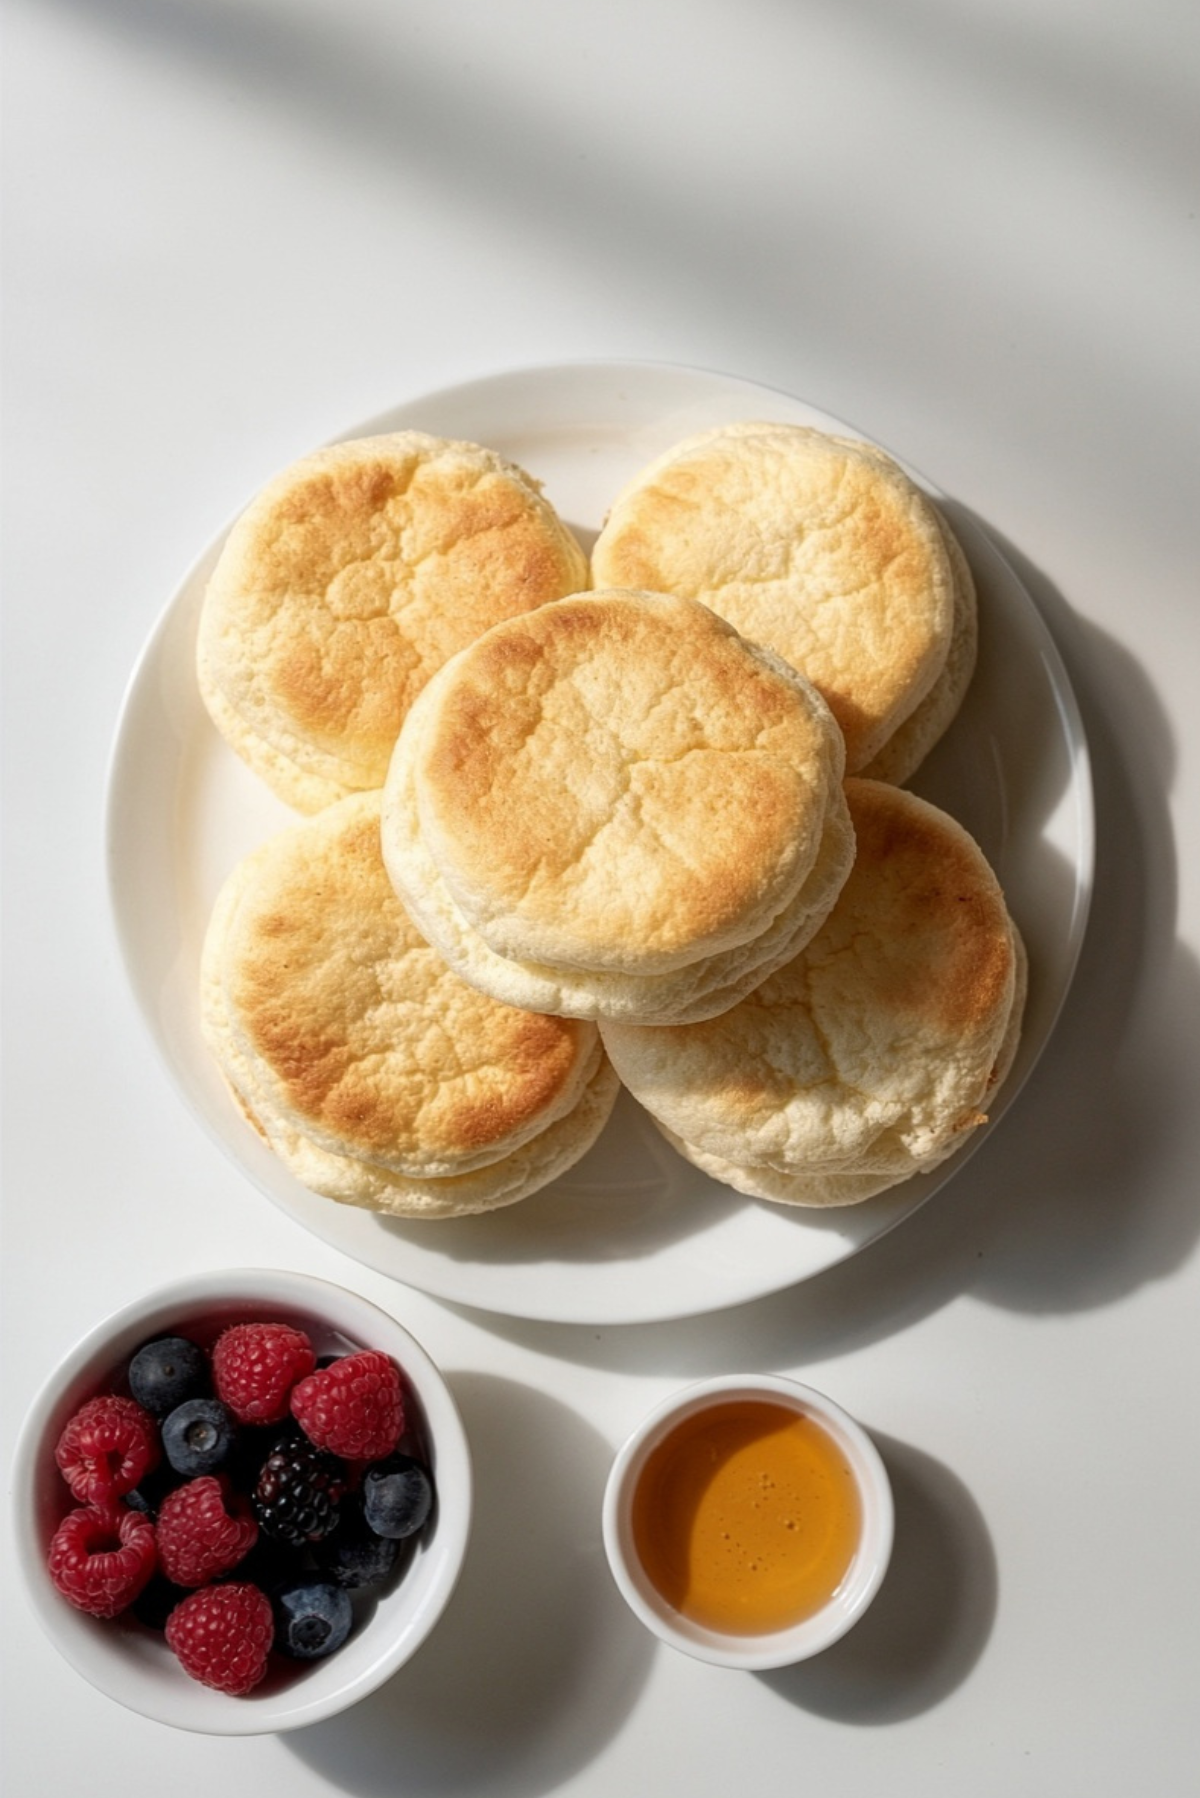
Sweet Cloud Bread with Vanilla
There is something almost magical about pulling a tray of cloud bread from the oven and watching those pale, puffy rounds slowly settle on the counter. They look like little pillows, lightly golden on the outside and soft as air on the inside. The hint of vanilla drifts through the kitchen, warm and comforting. Trust me, you’re going to love this. The first time I tore one open, the texture was so light it almost felt unreal.
And now let’s dive into what makes this sweet version so special.
A Light and Airy Treat That Feels Like a Dream
Sweet Cloud Bread with Vanilla is not your typical bread. It is soft, delicate, and slightly sweet, with a texture somewhere between a sponge cake and a fluffy meringue. It melts gently in your mouth, leaving behind that subtle vanilla warmth that makes you reach for another piece.
It is perfect for breakfast, a light snack, or even a simple dessert topped with berries. This one’s a total game-changer when you want something light but still satisfying.
The Story Behind Cloud Bread
Cloud bread became popular as a low-carb alternative to traditional bread, but over time it has evolved into something much more versatile. Originally made with just a few simple ingredients like eggs and cream cheese, it quickly gained attention for its airy structure and soft texture.
Adding vanilla and a touch of sweetness transforms it into something that feels more like a delicate pastry. It still keeps that signature fluffiness, but now it carries a gentle dessert-like flavor that makes it incredibly adaptable.
Why This Recipe Is So Reliable
Before we move into the process, let me share why this recipe works beautifully every time.
Versatile: Enjoy it plain, with fruit, or as a base for sweet toppings.
Budget-Friendly: Made with just a handful of simple ingredients.
Quick and Easy: Minimal prep and a short baking time.
Customizable: Add cinnamon, citrus zest, or a drizzle of honey.
Crowd-Pleasing: Its soft texture and subtle sweetness appeal to all ages.
Make-Ahead Friendly: Bake in advance and store for quick breakfasts.
Great for Leftovers: Toast lightly the next day for a slightly crisp edge.
Now that you know why it works, let’s make sure you get that perfect cloud-like texture.
Expert Tips for Maximum Fluff
A few details make all the difference here.
- Separate the eggs carefully so no yolk gets into the whites.
- Whip the egg whites until stiff peaks form, this is key for structure.
- Fold gently to keep as much air in the mixture as possible.
- Bake until lightly golden but not overdone, so they stay soft.
These steps create that signature airy lift.
Essential Tools for Success
Before you begin, gather these simple tools.
Mixing Bowls: One for egg whites and one for the yolk mixture.
Hand Mixer or Stand Mixer: Helps whip the egg whites to stiff peaks.
Spatula: For gently folding the mixture.
Baking Sheet: Lined with parchment paper for easy release.
Now let’s talk about the ingredients that create that delicate sweetness.
Ingredients You Will Need For This Recipe
Each ingredient plays a role in texture and flavor.
- Eggs: 3 large, separated, provide structure and lift.
- Cream Cheese: 3 tablespoons, softened, adds richness and slight tang.
- Granulated Sugar: 2 tablespoons, adds gentle sweetness.
- Vanilla Extract: 1 teaspoon, gives warm, aromatic flavor.
- Cream of Tartar: 1/4 teaspoon, stabilizes the whipped egg whites.
- Salt: 1/8 teaspoon, enhances overall flavor.
Simple ingredients, yet when combined properly, they create something surprisingly special.
Easy Ingredient Swaps
Flexibility makes cooking more enjoyable.
Cream Cheese: Mascarpone can be used for a slightly richer flavor.
Granulated Sugar: A sugar substitute can work if needed.
Vanilla Extract: Almond extract for a different aromatic twist.
Now let’s highlight what truly makes this bread feel like a cloud.

The Ingredients That Create the Lift
Egg Whites: When whipped to stiff peaks, they trap air that expands in the oven, creating height and softness.
Cream of Tartar: Helps stabilize those peaks so the structure holds during baking.
Together, they create that airy interior that feels almost weightless.
Let’s Bake These Sweet Clouds
This is where everything comes together beautifully.
- Preheat Your Equipment: Preheat your oven to 300°F and line a baking sheet with parchment paper.
- Combine Ingredients: In one bowl, beat the egg whites with cream of tartar until stiff peaks form. In another bowl, mix egg yolks, cream cheese, sugar, vanilla extract, and salt until smooth.
- Prepare Your Cooking Vessel: Ensure your baking sheet is lined and ready for shaping.
- Assemble the Dish: Gently fold the egg white mixture into the yolk mixture in batches, being careful not to deflate the batter. Spoon the mixture into 6 evenly sized rounds on the baking sheet.
- Cook to Perfection: Bake for 25 to 30 minutes, until the tops are lightly golden and set.
- Finishing Touches: Remove from the oven and let cool slightly on the baking sheet.
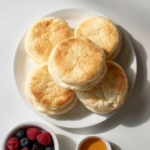
- Serve and Enjoy: Serve warm or at room temperature, optionally topped with fresh berries or a light drizzle of honey.
Texture and Flavor Development
As they bake, the whipped egg whites expand and create those signature airy pockets. The tops turn gently golden while the inside remains soft and sponge-like. The vanilla adds warmth without overpowering, and the slight tang from the cream cheese balances the sweetness beautifully.
Every bite feels light, delicate, and comforting all at once.
Helpful Cooking Tips and Tricks
Keep these pointers in mind.
- Use room temperature eggs for better whipping volume.
- Fold gently and patiently to preserve air.
- Let them cool slightly before removing to prevent sticking.
What to Avoid for Best Results
A few small mistakes can affect the texture.
- Overmixing will deflate the batter.
- Underwhipping the egg whites will reduce structure.
- Baking at too high a temperature may cause browning before the inside sets.
Nutrition Facts Overview
Servings: 6 pieces
Calories per serving: 90
Note: These are approximate values.
Preparation Time Breakdown
Prep Time: 15 minutes
Cook Time: 30 minutes
Total Time: 45 minutes
Make-Ahead and Storage Tips
Store cooled cloud bread in an airtight container in the refrigerator for up to 3 days. For longer storage, freeze between layers of parchment paper for up to 1 month. Reheat gently in the oven at 275°F for a few minutes to restore softness.
How to Serve It
Top with fresh berries, a spoonful of yogurt, or a drizzle of honey. You can also sandwich two pieces together with nut butter for a light treat.
Creative Leftover Transformations
Toast lightly and spread with fruit preserves. Cut into cubes and layer with yogurt for a quick parfait. Use as a base for mini dessert stacks with whipped cream and fruit.
Additional Tips for Flavor and Ease
For extra aroma, add a pinch of cinnamon to the yolk mixture. Always measure ingredients carefully, small changes can affect the delicate structure.
Make It a Showstopper
Dust lightly with powdered sugar and arrange on a platter with colorful berries. Their pale golden tops and soft texture make them naturally eye-catching.
Variations to Try
- Add lemon zest for a bright citrus twist.
- Stir in a tablespoon of cocoa powder for a chocolate version.
- Sprinkle a few mini chocolate chips on top before baking.
- Add a drop of almond extract for a subtle nutty aroma.
FAQ’s
Q1: Can I make this dairy free?
Yes, use a dairy free cream cheese alternative.
Q2: Why did my cloud bread flatten?
The egg whites may not have been whipped to stiff peaks.
Q3: Can I reduce the sugar?
Yes, but it may slightly affect flavor.
Q4: Is this low carb?
It is lower in carbohydrates compared to traditional bread.
Q5: Can I double the recipe?
Yes, simply double all ingredients and bake in batches.
Q6: How do I know it is done?
The tops should be lightly golden and set.
Q7: Can kids help make this?
Yes, especially with mixing and spooning the batter.
Q8: Does it taste eggy?
The vanilla and cream cheese balance the egg flavor well.
Q9: Can I add fruit inside the batter?
It is best to add fruit on top after baking to maintain structure.
Q10: Is it good for breakfast?
Absolutely, it pairs beautifully with fresh fruit and yogurt.
Conclusion
Sweet Cloud Bread with Vanilla is light, airy, and surprisingly satisfying. The soft texture, warm vanilla aroma, and delicate sweetness make it feel special without being heavy. Let me tell you, it is worth every bite. Bake a batch and enjoy that cloud-like softness with every single piece.
PrintSweet Cloud Bread with Vanilla
Light, airy cloud bread with a gentle hint of vanilla, baked until softly golden on the outside and fluffy on the inside. A delicate, slightly sweet treat perfect for breakfast or a light snack.
Ingredients
- 3 large eggs, separated
- 3 tablespoons cream cheese, softened
- 2 tablespoons granulated sugar
- 1 teaspoon vanilla extract
- 1/4 teaspoon cream of tartar
- 1/8 teaspoon salt
Instructions
- Preheat oven to 300°F and line a baking sheet with parchment paper.
- In a clean bowl, beat the egg whites with cream of tartar until stiff peaks form.
- In a separate bowl, mix egg yolks, softened cream cheese, granulated sugar, vanilla extract, and salt until smooth.
- Gently fold the whipped egg whites into the yolk mixture in batches, being careful not to deflate the mixture.
- Spoon the mixture into 6 evenly sized rounds on the prepared baking sheet.
- Bake for 25 to 30 minutes until the tops are lightly golden and set.
- Remove from the oven and allow to cool slightly before serving.
Notes
- Ensure no yolk gets into the egg whites for proper whipping.
- Fold gently to preserve the airy texture.
- Store in an airtight container in the refrigerator for up to 3 days.
- Reheat gently in the oven at 275°F for a few minutes to refresh softness.