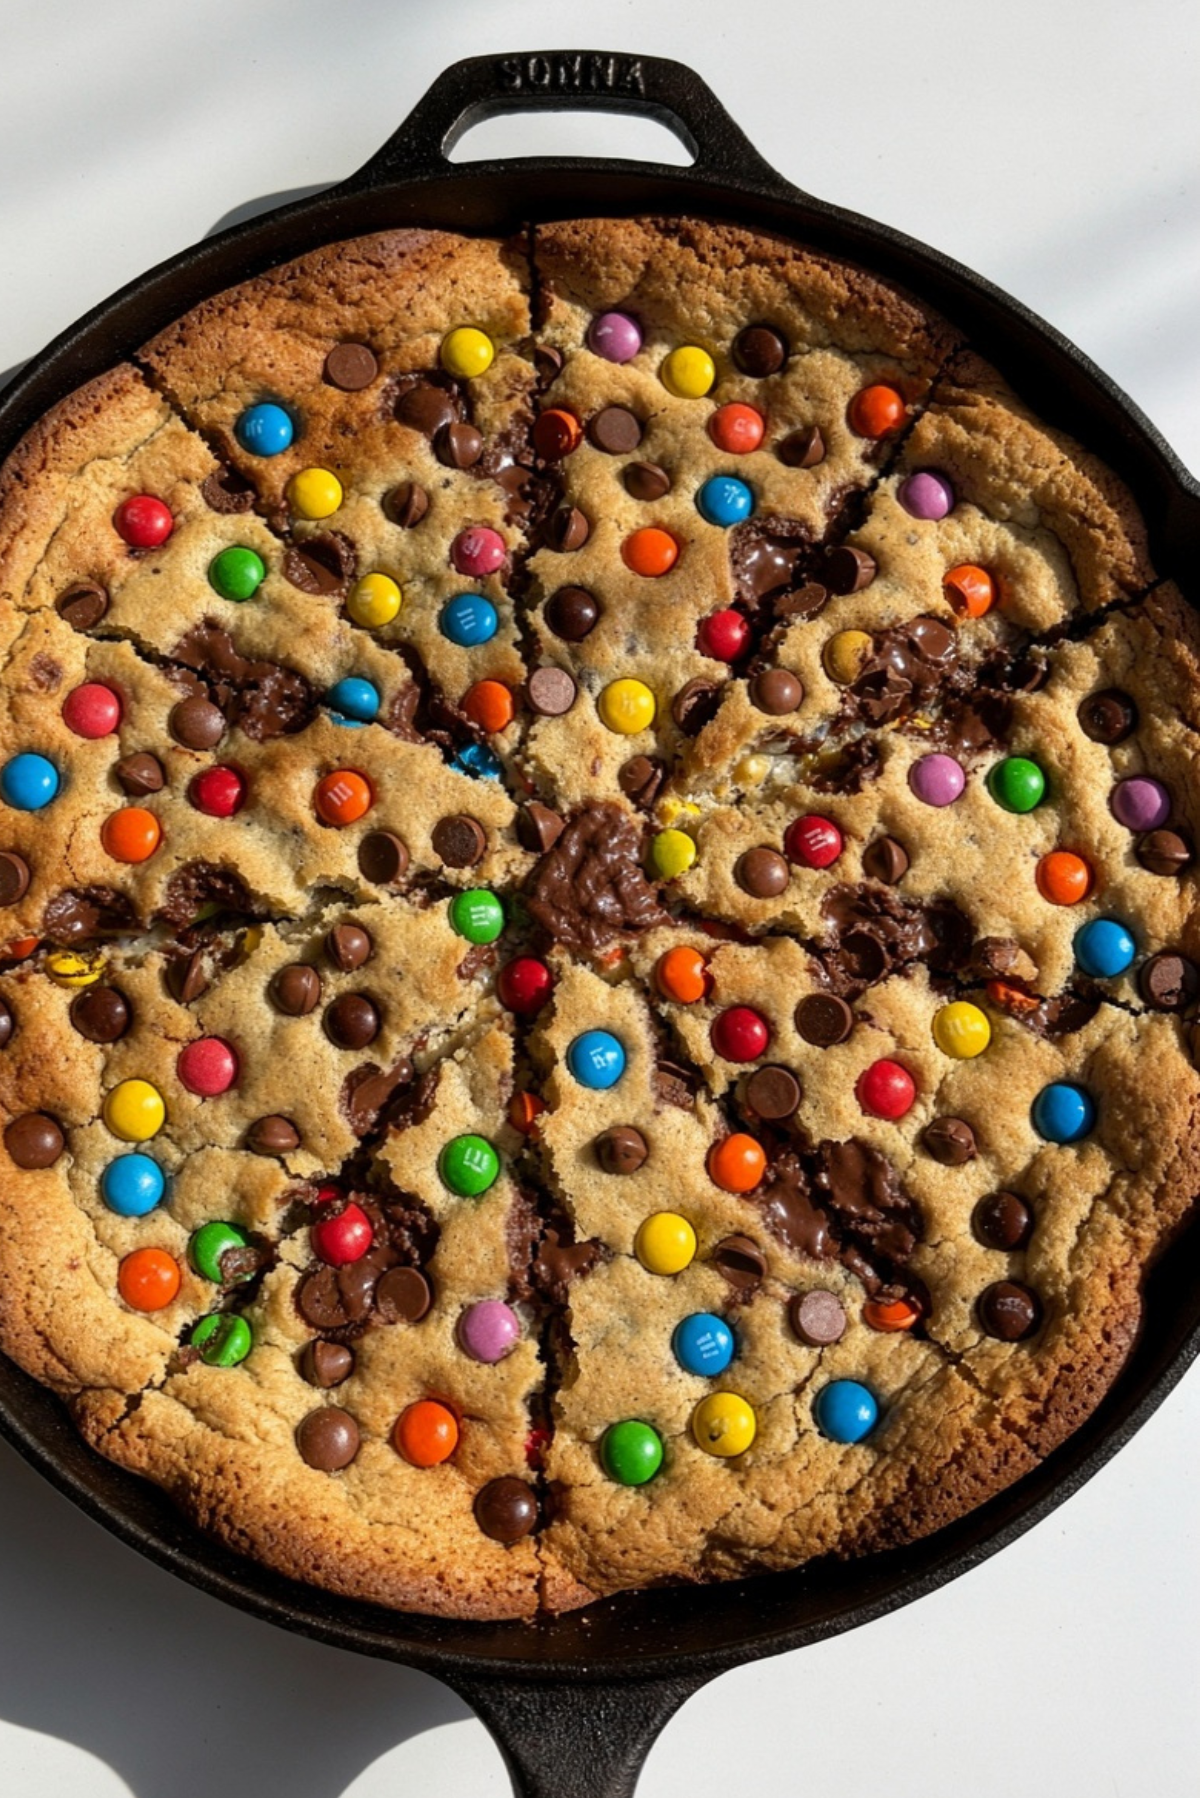
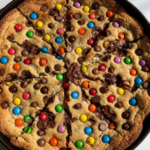
Giant Skillet Pizza Cookie
There is something about a giant cookie baked in a skillet that feels instantly nostalgic. It reminds me of birthday parties, warm kitchens, and that moment when everyone gathers around waiting for the first slice. The edges are golden and slightly crisp, the center stays soft and gooey, and the chocolate melts just enough to make every bite irresistible. Trust me, you’re going to love this.
The Dessert That Feels Like a Celebration
This giant skillet treat is playful, dramatic, and completely shareable. It has the chewy comfort of a classic chocolate chip cookie but baked thick in a cast iron pan so it stays soft in the center and beautifully crisp around the edges.
Serve it warm and let the chocolate gently melt with each slice. It is the kind of dessert that makes people smile before they even take a bite.
A Fun Spin on the Classic Cookie Tradition
Skillet cookies became popular in American restaurants where they were served straight from the oven. The hot pan keeps the cookie warm longer, creating that dreamy contrast between crisp exterior and soft middle.
Adding colorful candy coated chocolates gives it that pizza style look, making it especially fun for birthdays, sleepovers, and casual celebrations.
Why This Recipe Always Delivers
Before we preheat the oven, let me tell you why this one deserves a spot in your dessert rotation.
Versatile: Perfect for birthdays, movie nights, or casual gatherings.
Budget-Friendly: Uses pantry staples you likely already have.
Quick and Easy: Simple mixing method, no chilling required.
Customizable: Swap candies, add nuts, or mix different chocolate types.
Crowd-Pleasing: A giant cookie always steals the spotlight.
Make-Ahead Friendly: Prepare the dough ahead and bake when ready.
Great for Leftovers: Warm slices the next day taste just as good.
Pro Tips for the Perfect Texture
- Do not overmix the dough once flour is added.
- Use room temperature butter for even mixing.
- Slightly underbake for a gooey center.
- Let it rest 5 minutes before slicing to set slightly.
Tools You Will Need
Cast Iron Skillet: 10 inch size works perfectly for thickness.
Mixing Bowls: For combining wet and dry ingredients.
Hand Mixer or Spoon: For creaming butter and sugar.
Spatula: To spread dough evenly.
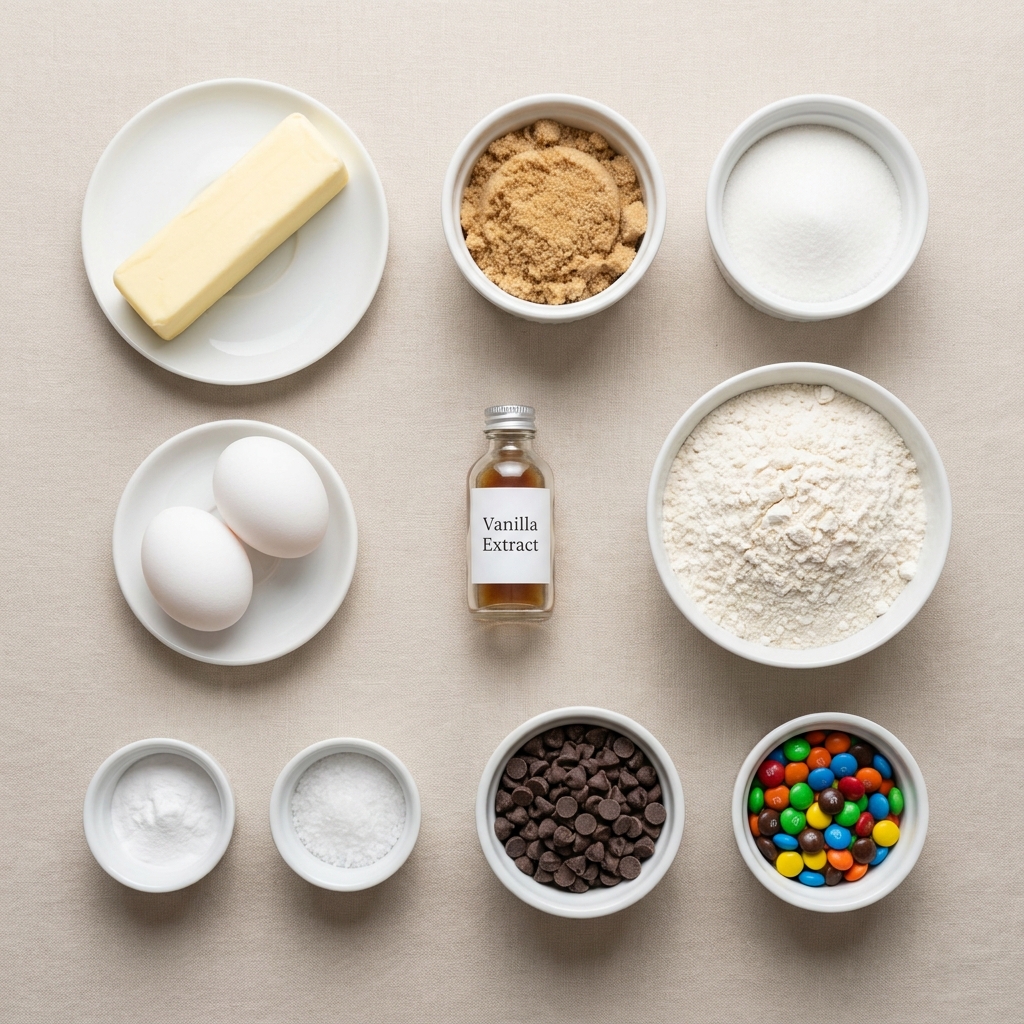
Ingredients You Will Need For This Giant Treat
Each ingredient plays a role in building that chewy, chocolate filled texture.
- Unsalted Butter: 1 cup, softened, creates richness and tenderness.
- Brown Sugar: 3/4 cup, adds moisture and chewiness.
- Granulated Sugar: 1/2 cup, balances sweetness and structure.
- Eggs: 2 large, bind everything together.
- Vanilla Extract: 2 teaspoons, enhances flavor.
- All Purpose Flour: 2 1/4 cups, provides structure.
- Baking Soda: 1 teaspoon, helps the cookie rise slightly.
- Salt: 1/2 teaspoon, balances sweetness.
- Chocolate Chips: 1 cup, for gooey pockets.
- Candy Coated Chocolates: 1 cup, for colorful topping.
Easy Ingredient Swaps
Chocolate Chips: Use dark chocolate chunks.
Candy Coated Chocolates: Use chopped chocolate bars.
All Purpose Flour: Gluten free blend if needed.
Spotlight on the Chocolate
Chocolate Chips: Melt into rich pockets throughout the cookie.
Candy Coated Chocolates: Add crunch and vibrant color on top.
Let’s Bake This Giant Cookie
And now let’s dive into creating this showstopper.
- Preheat Your Equipment: Preheat oven to 350°F and lightly grease a 10 inch cast iron skillet.
- Combine Ingredients: Cream butter, brown sugar, and granulated sugar until light and fluffy. Add eggs and vanilla, mixing until smooth.
- Prepare Your Cooking Vessel: In a separate bowl, whisk flour, baking soda, and salt.
- Assemble the Dish: Gradually mix dry ingredients into wet ingredients. Fold in chocolate chips. Spread dough evenly into skillet and press candy coated chocolates on top.
- Cook to Perfection: Bake for 20 to 25 minutes until edges are golden but center remains slightly soft.
- Finishing Touches: Let rest for 5 minutes to set slightly.
- Serve and Enjoy: Slice like a pizza and serve warm.
Texture and Flavor Magic
The edges are crisp and buttery. The center stays soft and chewy. Chocolate melts into every bite while the candy topping adds a subtle crunch. Let me tell you, it is worth every bite.
Helpful Baking Tips
- Measure flour correctly to avoid dryness.
- Do not overbake.
- Use quality chocolate for best flavor.
What to Avoid
- Overmixing the dough.
- Using cold butter.
- Baking too long which dries the center.
Nutrition Snapshot
Servings: 10
Calories per serving: 420
Note: These are approximate values.
Time Breakdown
Prep Time: 15 minutes
Cook Time: 25 minutes
Total Time: 40 minutes
Make-Ahead and Storage Tips
Store covered at room temperature for up to 3 days. Reheat slices briefly in the oven for a warm texture. Dough can be refrigerated up to 24 hours before baking.
How to Serve for Maximum Wow
Serve directly in the skillet for rustic charm. Add a scoop of vanilla ice cream for extra indulgence.
Creative Leftover Ideas
Crumble into milkshakes. Use pieces as an ice cream topping.
Extra Tips for Flavor
Add a pinch of sea salt on top before baking for contrast. Mix in chopped nuts for texture.
Make It a Showstopper
Press extra candy pieces on top right before baking for a colorful finish. Serve warm for dramatic effect.
Variations to Try
- Peanut butter chocolate version.
- Double dark chocolate with cocoa powder.
- White chocolate and macadamia.
- Sprinkle with crushed pretzels for crunch.
FAQ’s
Q1: Can I use a different pan?
Yes, a round cake pan works too.
Q2: How do I know when it is done?
Edges should be golden and center slightly soft.
Q3: Can I freeze it?
Yes, freeze slices individually.
Q4: Can I make it smaller?
Halve the recipe and use a smaller skillet.
Q5: Is it chewy or crispy?
Both, crisp edges and chewy center.
Q6: Can I add nuts?
Yes, about 1/2 cup chopped.
Q7: Does it need refrigeration?
No, room temperature is fine.
Q8: Can I reduce sugar?
Slightly, but texture may change.
Q9: What chocolate works best?
Semi sweet gives balanced flavor.
Q10: Can kids help make it?
Absolutely, it is simple and fun.
Conclusion
Giant Skillet Pizza Cookie is warm, nostalgic, and irresistibly shareable. It brings together crisp edges, gooey chocolate, and colorful candy in one dramatic dessert. Bake it once and you will find yourself making it for every celebration.
PrintGiant Skillet Pizza Cookie
A thick and chewy giant skillet pizza cookie baked in a cast iron pan, loaded with chocolate chips and colorful candy coated chocolates, featuring crisp golden edges and a soft, gooey center perfect for sharing.
Ingredients
- 1 cup unsalted butter, softened
- 3/4 cup brown sugar
- 1/2 cup granulated sugar
- 2 large eggs
- 2 teaspoons vanilla extract
- 2 1/4 cups all purpose flour
- 1 teaspoon baking soda
- 1/2 teaspoon salt
- 1 cup chocolate chips
- 1 cup candy coated chocolates
Instructions
- Preheat oven to 350°F and lightly grease a 10 inch cast iron skillet.
- Cream together softened butter, brown sugar, and granulated sugar until light and fluffy.
- Add eggs and vanilla extract, mixing until smooth and fully incorporated.
- In a separate bowl, whisk together flour, baking soda, and salt.
- Gradually mix dry ingredients into the wet mixture until just combined.
- Fold in chocolate chips.
- Spread the dough evenly into the prepared skillet.
- Press candy coated chocolates evenly across the top.
- Bake for 20 to 25 minutes until the edges are golden and the center is slightly soft.
- Allow to rest for 5 minutes before slicing and serving warm.
Notes
- Slightly underbake for a gooey center texture.
- Do not overmix the dough once flour is added.
- Let the cookie rest briefly before slicing for cleaner pieces.
- Serve warm for the best chocolate melt and texture contrast.