One-Ingredient Chicken Chips
Sometimes the simplest ideas are the most surprising. One-Ingredient Chicken Chips are exactly that kind of recipe. No complicated seasoning blends, no long ingredient list, just pure chicken transformed into crispy, crunchy chips that are packed with protein. The first time I made these, I could not believe how something so simple could taste this good. Trust me, you’re going to love this.
The Crispy High-Protein Snack You Did Not See Coming
If you are looking for a snack that feels indulgent but is actually wholesome, this is it. These chicken chips bake down into thin, golden rounds with crisp edges and a satisfying crunch. They are savory, lightly salty from the natural flavor of the chicken, and incredibly satisfying.
This one’s a total game-changer for anyone wanting a low carb, high protein snack that does not rely on complicated prep.
From Simple Ingredient to Snack Innovation
Chicken has always been a staple protein in kitchens around the world. What makes this recipe special is the technique. By thinly slicing and baking it slowly, the moisture evaporates and leaves behind a crispy texture that feels almost like a traditional chip.
It is a modern twist on classic protein preparation, turning everyday chicken into something snack worthy and fun.
Why This Recipe Is So Reliable
Before we dive into the method, here is why this recipe works so well.
Versatile: Enjoy them plain or pair with dips and sauces.
Budget-Friendly: Made from simple chicken, no specialty ingredients required.
Quick and Easy: Minimal prep and hands off baking.
Customizable: Even though it is one ingredient, you can add spices later if desired.
Crowd-Pleasing: Crunchy snacks always draw a crowd.
Make-Ahead Friendly: Store them for grab and go snacking.
Great for Leftovers: Perfect way to use extra chicken.
Expert Tips for Maximum Crispiness
Getting that perfect crunch is all about technique.
- Slice the chicken as thinly as possible for even baking.
- Pat the slices dry with paper towels before baking.
- Use parchment paper to prevent sticking.
- Bake at a low temperature to slowly remove moisture without burning.
Tools You Will Need
Keeping it simple makes this even better.
Sharp Knife: Essential for slicing the chicken very thin.
Cutting Board: Provides a stable surface for prep.
Baking Sheet: Large enough to arrange slices in a single layer.
Parchment Paper: Prevents sticking and promotes even crisping.
Ingredient That Makes It All Happen
Yes, it is really just one.
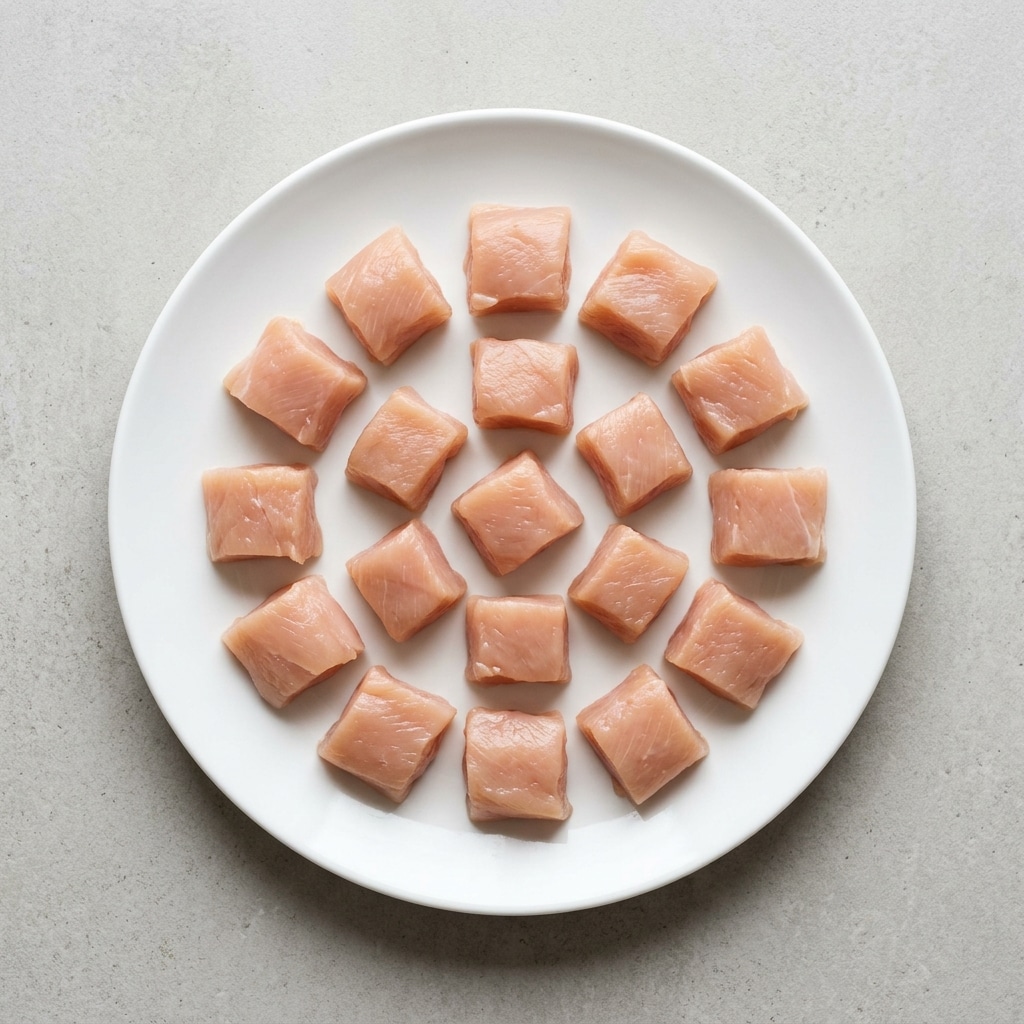
- Boneless Skinless Chicken: 2 large chicken pieces, thinly sliced into even rounds or strips, this becomes the crispy chip base.
Flexible Additions If You Want Them
While the base recipe uses one ingredient, you can experiment.
Chicken: Add a light sprinkle of salt after baking if desired.
Chicken: Dust with paprika or garlic powder for extra flavor once crisp.
Spotlight on the Star
Boneless Skinless Chicken: Lean, protein rich, and neutral in flavor, it transforms beautifully when baked slowly until crisp.
Let’s Make These Crispy Chips
Now let’s dive into the process step by step.
- Preheat Your Equipment: Preheat your oven to 375°F and line a baking sheet with parchment paper.
- Combine Ingredients: Since this is a one ingredient recipe, focus on preparing the chicken by slicing it as thinly as possible.
- Prepare Your Cooking Vessel: Arrange the chicken slices in a single layer on the lined baking sheet, ensuring they do not overlap.
- Assemble the Dish: Lightly press the slices flat so they cook evenly.
- Cook to Perfection: Bake for 20 to 25 minutes, flipping halfway through, until the slices are golden brown and crisp around the edges.
- Finishing Touches: Let the chips cool on the baking sheet for 5 to 10 minutes to crisp further.
- Serve and Enjoy: Serve immediately as a crunchy snack or store for later.
Texture and Flavor Breakdown
As the chicken bakes, it releases moisture and tightens into a thin, crisp chip. The edges become lightly golden and crunchy, while the center firms up for that satisfying snap. The flavor is savory and clean, making it perfect for pairing with dips.
Helpful Tips and Tricks
Keep these in mind for best results.
- Slice against the grain for better texture.
- Use uniform thickness for even crisping.
- Allow full cooling time for maximum crunch.
What to Avoid
A few common mistakes are easy to prevent.
- Slicing too thick, which prevents proper crisping.
- Overcrowding the baking sheet.
- Removing from the oven too early before edges are golden.
Nutrition Facts
Servings: 4
Calories per serving: 120
Note: These are approximate values.
Preparation Time
Prep Time: 10 minutes
Cook Time: 25 minutes
Total Time: 35 minutes
Make-Ahead and Storage Tips
Store cooled chips in an airtight container at room temperature for up to 2 days. If they soften, reheat briefly in the oven to restore crispness. Freezing is not recommended as it affects texture.
How to Serve
Serve with your favorite dipping sauce, alongside a fresh salad, or as a crunchy topping for soups.
Creative Leftover Transformations
Crush the chips and use as a protein packed salad topping. Add to wraps for extra crunch.
Additional Tips
Experiment with baking time slightly depending on your oven. Keep a close eye toward the end to prevent over browning.
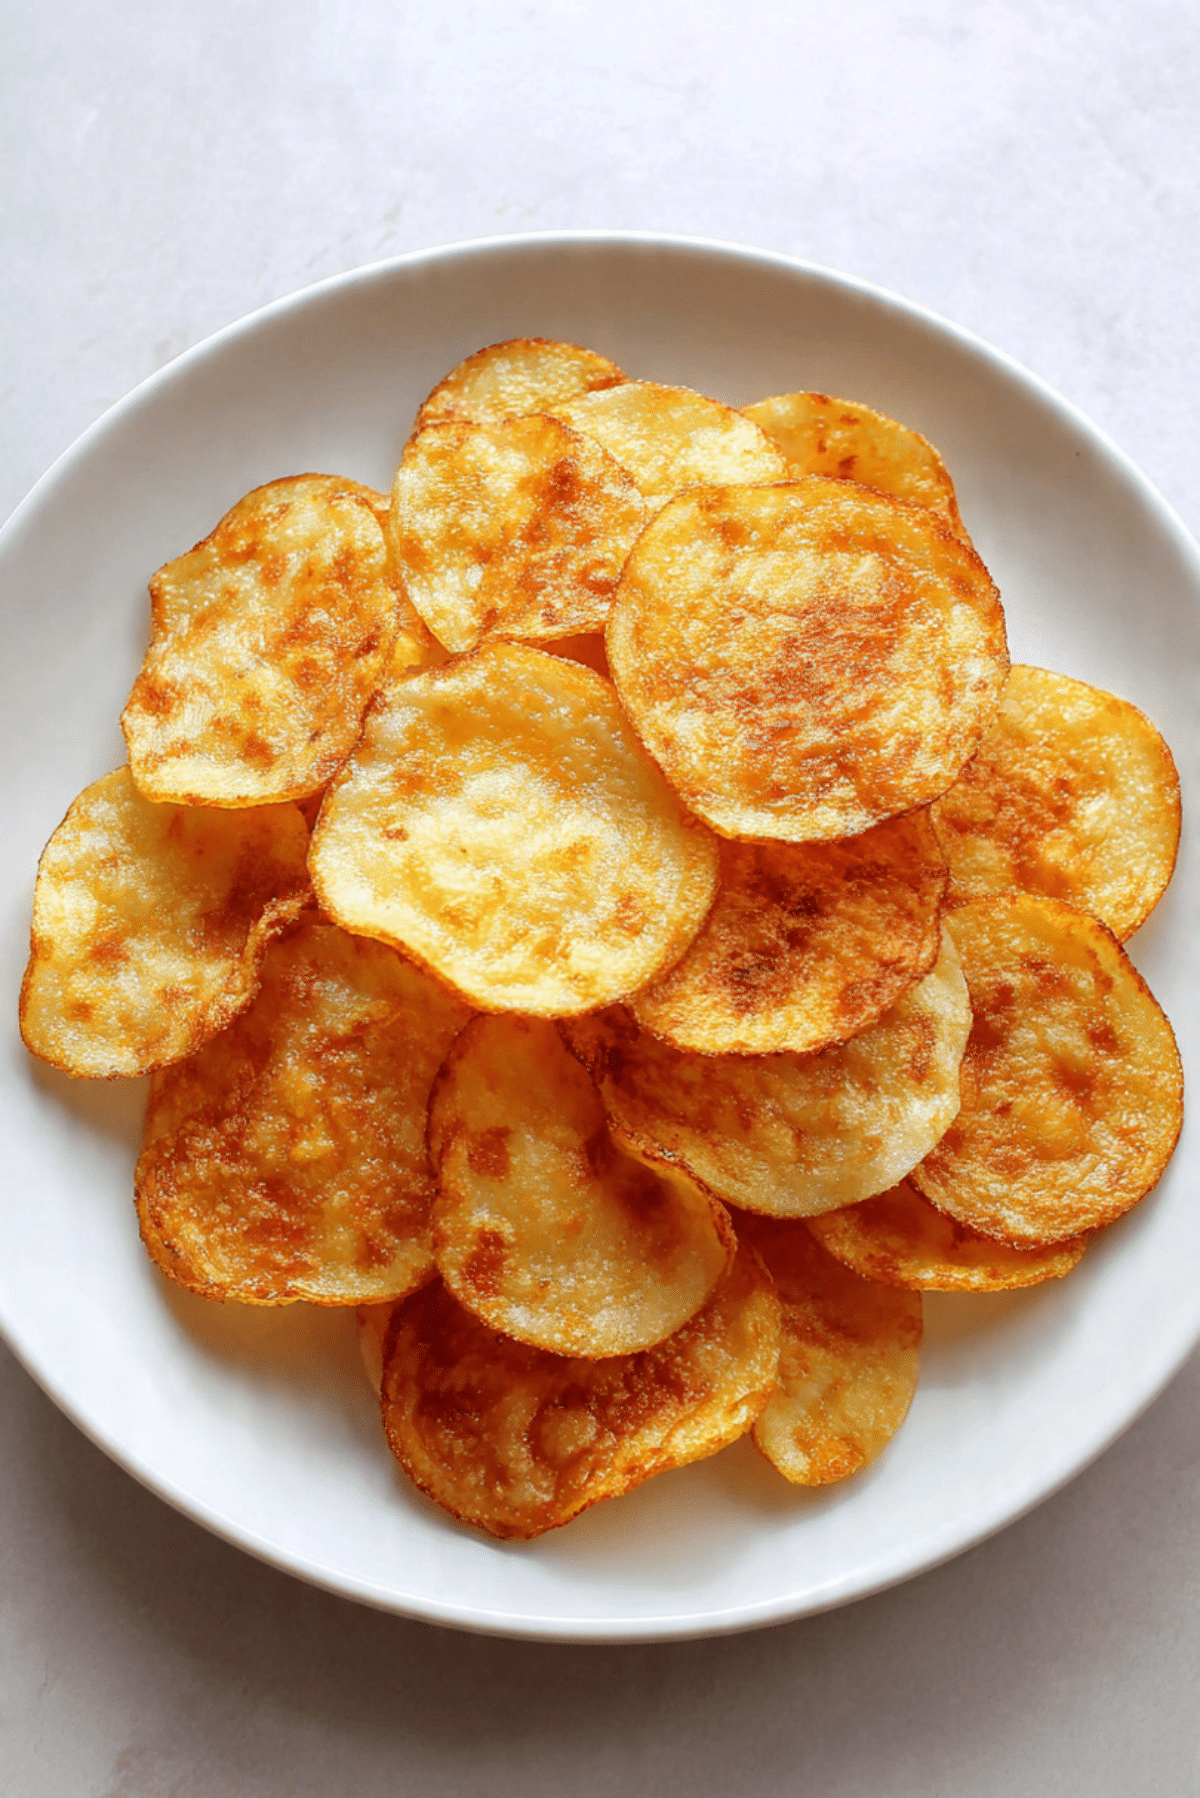
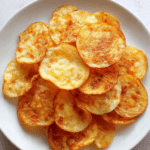
Make It a Showstopper
Stack the chips in a neat pile on a white plate. Serve with a small bowl of dip in the center for a clean, modern presentation.
Variations to Try
Sprinkle with smoked paprika after baking.
Add a pinch of black pepper for subtle heat.
Dip in plain Greek yogurt mixed with herbs.
Serve with guacamole for a creamy contrast.
FAQ’s
Q1: Can I use chicken thighs?
Yes, but trim excess fat for better crisping.
Q2: Do I need to add oil?
No, the natural moisture and proteins are enough.
Q3: How thin should I slice the chicken?
As thin as possible for best results.
Q4: Can I use a dehydrator?
Yes, it will take longer but can produce very crisp results.
Q5: Are these low carb?
Yes, they contain no carbohydrates.
Q6: How do I store them?
In an airtight container at room temperature.
Q7: Can I season before baking?
You can, but the base recipe uses only chicken.
Q8: Why are mine not crispy?
They may be too thick or under baked.
Q9: Can I air fry them?
Yes, adjust time and temperature accordingly.
Q10: Are they kid friendly?
Yes, especially when served with a favorite dip.
Conclusion
One-Ingredient Chicken Chips prove that you do not need a long ingredient list to create something delicious. Crispy, protein packed, and surprisingly satisfying, they are the perfect snack when you want something simple and smart. Let me tell you, it’s worth every bite.
PrintOne-Ingredient Chicken Chips
Crispy one-ingredient chicken chips made from thinly sliced boneless skinless chicken baked until golden and crunchy. A simple, high-protein, low carb snack with no added ingredients.
Ingredients
- 2 large boneless skinless chicken pieces, thinly sliced into even rounds or strips
Instructions
- Preheat oven to 375°F and line a baking sheet with parchment paper.
- Using a sharp knife, slice the chicken as thinly and evenly as possible.
- Pat the slices dry with paper towels to remove excess moisture.
- Arrange the chicken slices in a single layer on the prepared baking sheet, making sure they do not overlap.
- Bake for 20 to 25 minutes, flipping halfway through, until the slices are golden brown and crisp around the edges.
- Remove from the oven and allow the chips to cool on the baking sheet for 5 to 10 minutes to crisp further.
- Serve immediately or store once completely cooled.
Notes
- Slice the chicken as thinly as possible for maximum crispiness.
- Do not overcrowd the baking sheet to ensure even baking.
- If chips soften after storage, reheat briefly in the oven to restore crunch.
- Watch closely during the final minutes to prevent over browning.