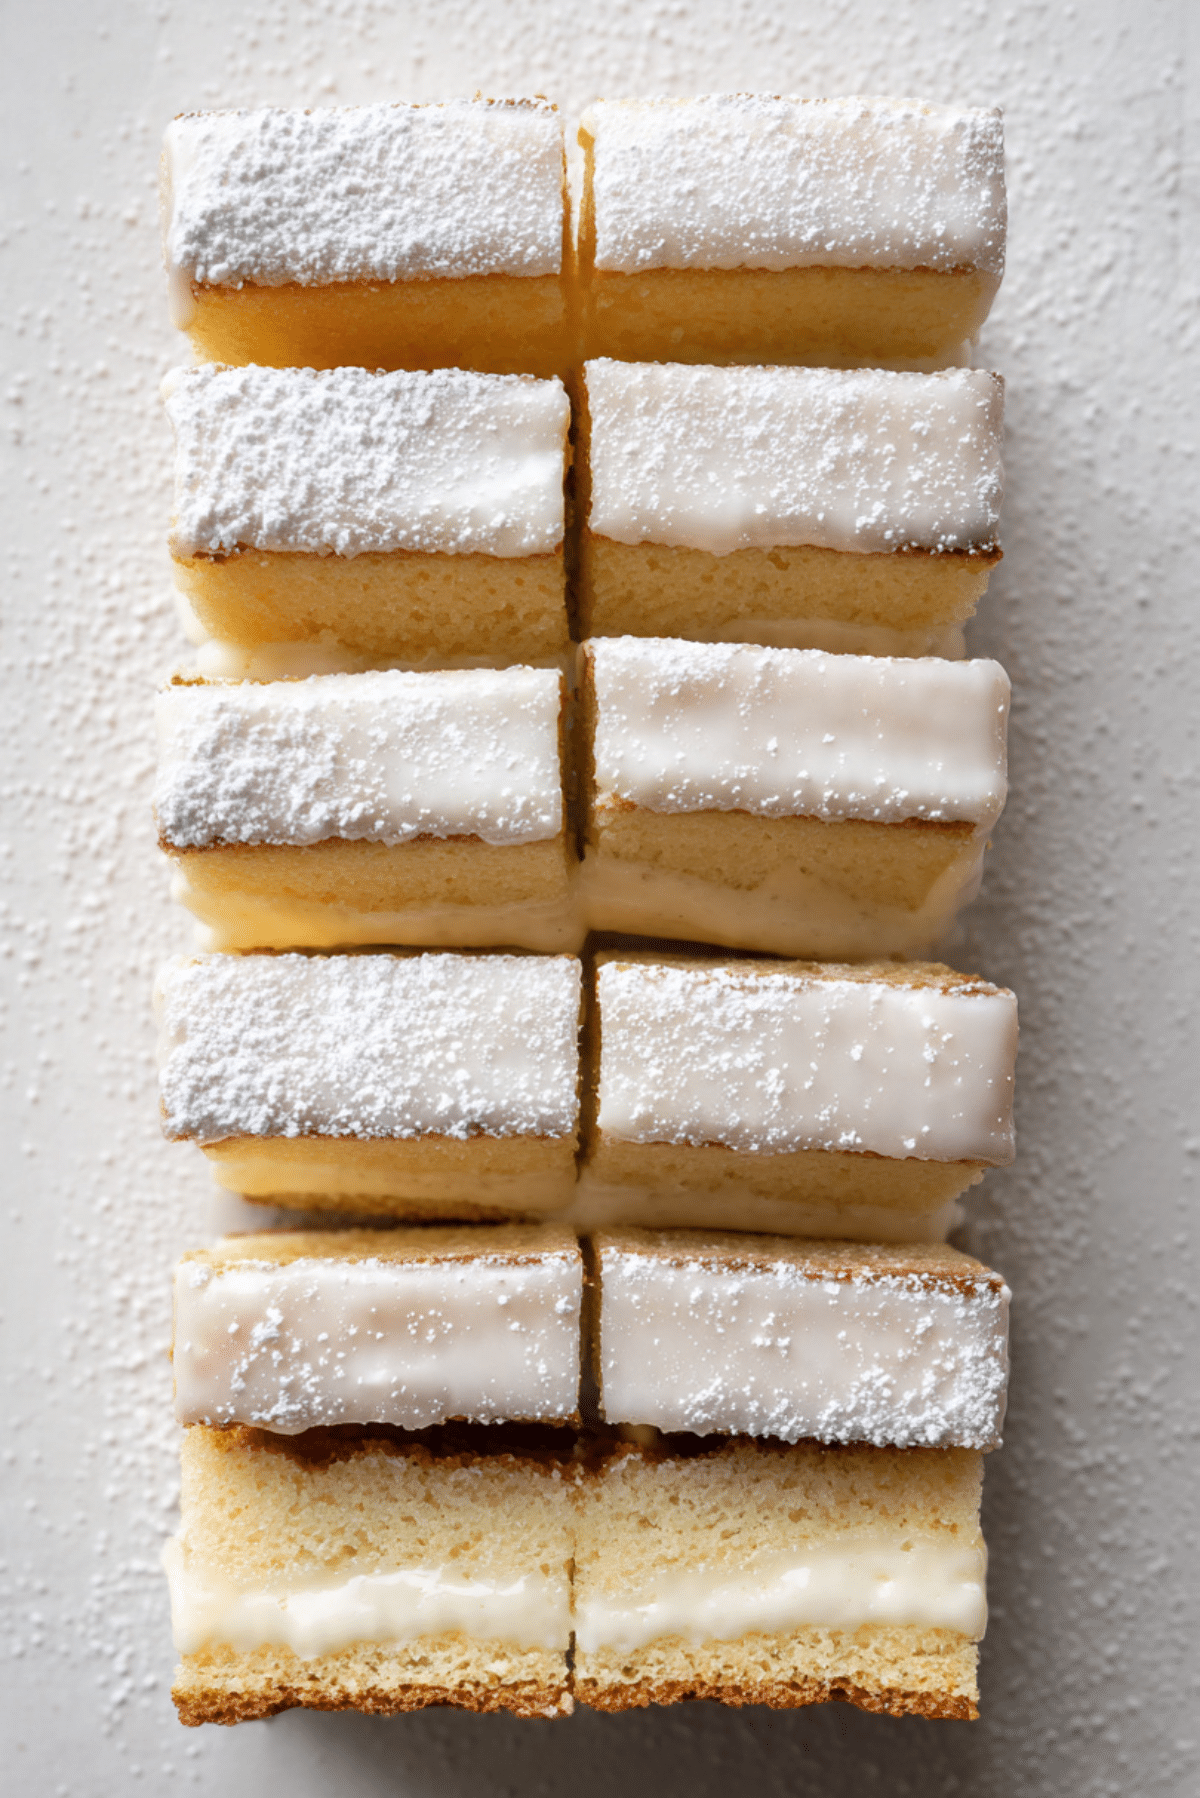
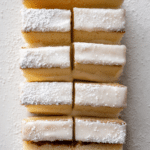
Vanilla Milk Squares
There is something almost magical about slicing into a chilled pan of Vanilla Milk Squares and seeing those soft, golden layers hugging that creamy center. The first bite is light, milky, and gently sweet, with a smooth vanilla aroma that lingers in the air before you even taste it. Trust me, you’re going to love this. It is the kind of dessert that feels nostalgic and comforting, yet impressive enough to place proudly in the center of any table.
A Creamy Dream That Feels Like a Hug in Every Bite
Some desserts shout for attention with bold flavors, but this one whispers softly and still wins everyone over. The sponge is tender and airy, the milk filling is silky and cool, and that smooth white topping adds just the right touch of sweetness. Each layer works in harmony, creating a balanced bite that is rich without feeling heavy. This one’s a total game changer if you love desserts that melt gently on your tongue.
A Sweet Treat with European Roots
Milk based layered desserts have long been popular in Central and Eastern Europe, where simple pantry staples are transformed into something elegant. Many households have their own variation, often passed down from grandparents who knew how to turn flour, eggs, and milk into something unforgettable. Over time, Vanilla Milk Squares became a celebration dessert, served at family gatherings and holidays. Let me tell you, it is worth every bite.
Why This Recipe Never Fails
Before we step into the kitchen, let me share why this dessert deserves a permanent place in your baking rotation.
Versatile: It fits birthdays, holidays, or a quiet Sunday afternoon. Dress it up with fresh berries or keep it simple and classic.
Budget-Friendly: Made with everyday pantry ingredients, it delivers a luxurious result without expensive extras.
Quick and Easy: The steps are straightforward and beginner friendly, even if layered desserts seem intimidating at first.
Customizable: You can add citrus zest, a hint of cocoa, or even a fruit layer to make it your own.
Crowd-Pleasing: The light vanilla flavor appeals to both kids and adults.
Make-Ahead Friendly: It actually tastes better after chilling, which makes planning ahead effortless.
Great for Leftovers: The texture stays soft and creamy for days when stored properly.
Pro Tips for Perfect Layers Every Time
A little insider knowledge makes all the difference.
- Make sure the milk filling is completely cool before assembling to prevent soggy sponge.
- Whisk constantly while cooking the cream to avoid lumps.
- Use room temperature eggs for a fluffier sponge.
- Chill thoroughly before slicing for clean, sharp edges.
Kitchen Tools That Make the Process Smooth
Before we gather ingredients, let’s make sure the right tools are within reach.
Mixing Bowls: For separating wet and dry ingredients smoothly.
Whisk: Essential for lump free milk cream.
Electric Mixer: Helps achieve a fluffy sponge batter.
9×13 inch Baking Pan: Ensures even layers and perfect thickness.
Spatula: For spreading the cream evenly.
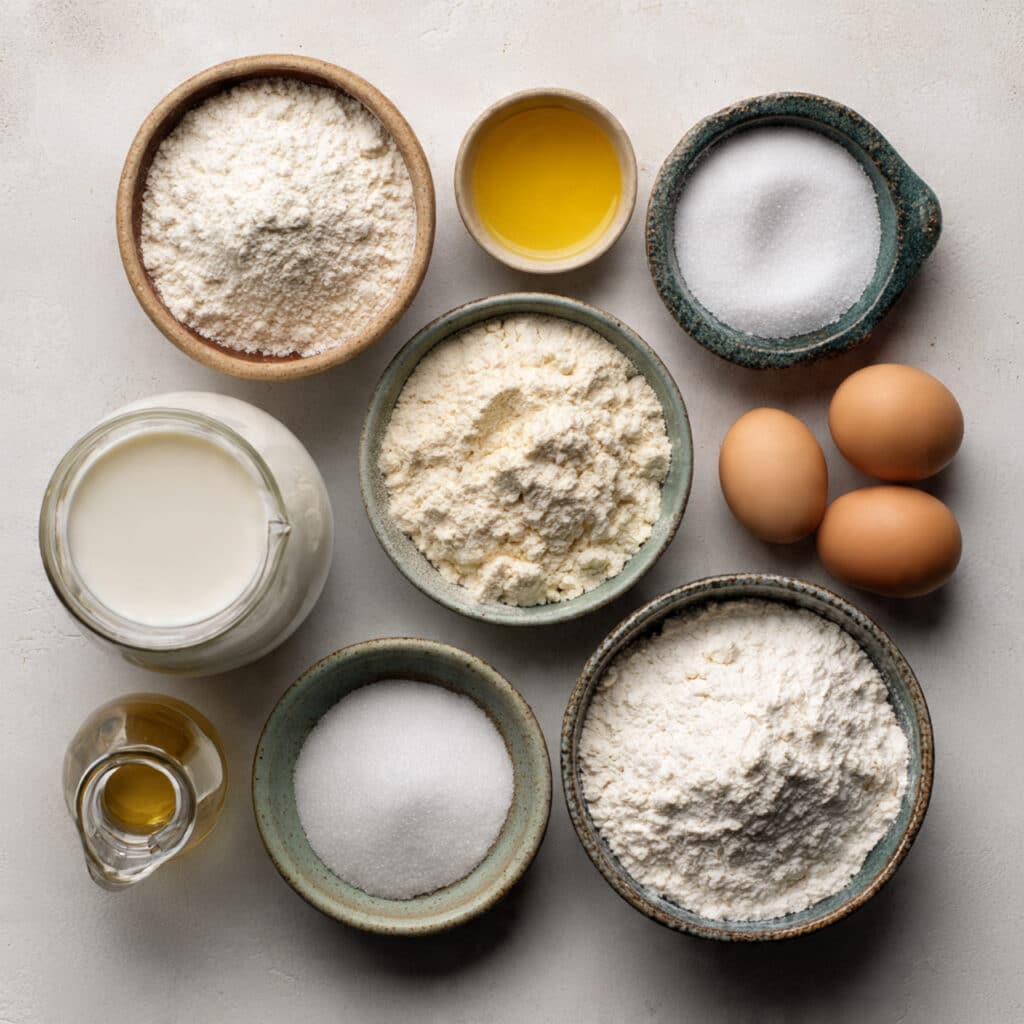
Ingredients That Build Those Beautiful Layers
The magic starts here, and every ingredient has a role to play.
- All Purpose Flour: 2 cups, forms the structure of the sponge.
- Granulated Sugar: 1 cup, sweetens both sponge and filling.
- Large Eggs: 4, bring richness and help the sponge rise.
- Whole Milk: 4 cups, creates the creamy filling.
- Unsalted Butter: 1 cup, softened, adds richness to the filling.
- Cornstarch: 1 cup, thickens the milk cream perfectly.
- Vanilla Extract: 2 teaspoons, delivers that warm aromatic flavor.
- Baking Powder: 1 tablespoon, ensures a light sponge.
- Powdered Sugar: 1 cup, for the smooth topping.
Smart Swaps If You Need Them
If you are missing something, here are simple alternatives.
Whole Milk: Use 2 percent milk for a slightly lighter filling.
All Purpose Flour: Swap with a gluten free baking blend.
Unsalted Butter: Use plant based butter if needed.
Vanilla Extract: Vanilla bean paste for deeper flavor.
The Star Ingredients That Make It Shine
Some ingredients truly define this dessert.
Whole Milk: It gives the filling its silky texture and creamy flavor.
Vanilla Extract: This is where the signature aroma comes from, so choose a good quality one.
Let’s Bake and Layer the Magic
Now let dive into the part where your kitchen starts smelling amazing.
- Preheat Your Equipment: Preheat your oven to 350 degrees F and lightly grease a 9×13 inch baking pan.
- Combine Ingredients: Beat eggs and sugar until pale and fluffy, then mix in flour and baking powder until smooth.
- Prepare Your Cooking Vessel: Pour the batter evenly into the greased pan and smooth the surface.
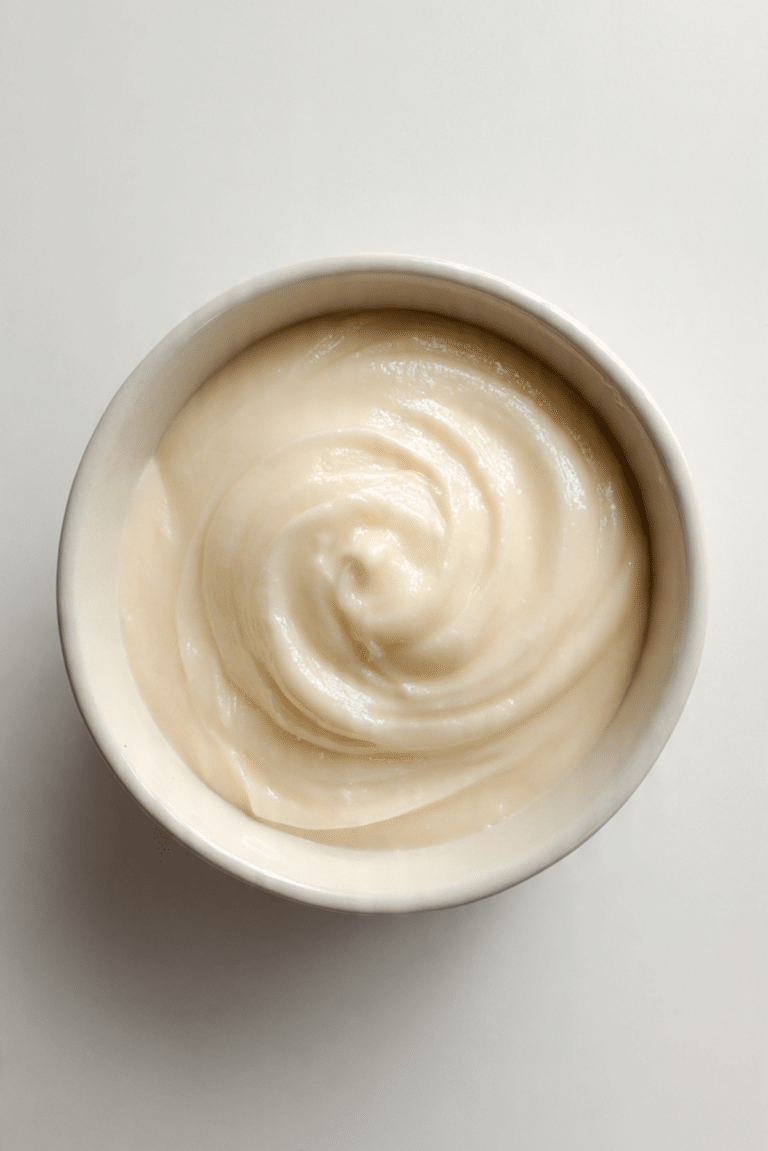
- Assemble the Dish: Bake for 25 minutes until golden, then cool completely. Meanwhile cook milk, cornstarch, and sugar over medium heat while whisking until thick. Stir in butter and vanilla, then cool fully before spreading over the sponge.
- Cook to Perfection: Allow the assembled dessert to chill in the refrigerator for at least 2 hours so the layers set beautifully.
- Finishing Touches: Spread powdered sugar glaze evenly over the top.
- Serve and Enjoy: Slice into neat squares and serve chilled.
The Texture and Flavor Story
What makes this dessert unforgettable is the contrast. The sponge is light and airy, almost cake like, while the milk layer is smooth and custard thick. The sweetness is gentle, balanced by the natural creaminess of milk and butter. When chilled, everything firms up just enough to hold shape yet still melts softly when you bite into it.
Helpful Tips for the Best Results
A few small details can elevate the final result.
- Chill overnight for the cleanest slices.
- Use a sharp knife and wipe it clean between cuts.
- Do not rush cooling, patience creates perfect layers.
Common Mistakes and How to Avoid Them
Even simple desserts have their tricky moments.
- Overcooking the milk cream can make it too stiff, cook just until thick.
- Skipping chill time leads to messy slices, allow full setting.
- Using cold butter in the filling can cause lumps, soften it first.
Nutrition Overview Per Serving
Servings: 12
Calories per serving: 320
Note: These are approximate values.
Time Breakdown at a Glance
Prep Time: 20 minutes
Cook Time: 25 minutes
Total Time: 45 minutes
Plan Ahead and Store with Confidence
This dessert is perfect for preparing a day in advance. Store it covered in the refrigerator for up to 4 days. You can freeze individual squares wrapped tightly for up to one month. Thaw overnight in the fridge before serving.
Serving Ideas That Make It Extra Special
Serve chilled with fresh berries, a dusting of cocoa, or alongside a cup of warm coffee. For celebrations, add thin white chocolate shavings on top for a delicate finish.
Give Leftovers a Delicious Second Life
Leftover squares can be layered into dessert cups with fruit compote. You can also crumble them and mix with whipped cream for a quick parfait style treat.
Extra Tips for Even Better Results
Use high quality vanilla for the richest aroma. Allow full cooling before assembling to keep layers distinct. Always slice with a steady hand for picture perfect squares.
Turn It Into a Showstopper
For a bakery style finish, trim the edges before serving. Add a light dusting of powdered sugar just before presenting so it looks fresh and elegant.
Fun Variations to Explore
- Add lemon zest to the sponge for a citrus twist.
- Mix cocoa powder into half the sponge batter for a marble effect.
- Layer thin sliced strawberries between sponge and cream.
- Replace vanilla with almond extract for a nutty aroma.
FAQ’s
Q1: Can I make this ahead of time?
Yes, it actually tastes better after resting overnight in the fridge.
Q2: Can I freeze it?
Yes, wrap slices tightly and freeze for up to one month.
Q3: Why is my filling lumpy?
It may not have been whisked constantly while cooking.
Q4: Can I reduce the sugar?
You can reduce slightly, but it may affect texture.
Q5: What type of milk works best?
Whole milk gives the creamiest result.
Q6: How do I get clean slices?
Chill thoroughly and use a sharp knife.
Q7: Can I use plant based milk?
Yes, though texture may be slightly softer.
Q8: How long does it last in the fridge?
Up to 4 days when covered properly.
Q9: Can I double the recipe?
Yes, use a larger pan and adjust baking time slightly.
Q10: Is it overly sweet?
No, it has a gentle balanced sweetness.
Conclusion
Vanilla Milk Squares are proof that simple ingredients can create something truly memorable. Soft sponge, creamy milk filling, and that delicate vanilla sweetness come together in a way that feels both comforting and elegant. Give it a try in your own kitchen, and once you taste that first chilled bite, you will understand why this dessert keeps coming back to family tables again and again.
PrintVanilla Milk Squares
Soft and airy sponge layered with a silky vanilla milk cream and topped with a smooth sweet glaze, this chilled dessert melts gently with every bite and is perfect for gatherings or make-ahead treats.
Ingredients
- 2 cups all purpose flour
- 1 cup granulated sugar
- 4 large eggs
- 4 cups whole milk
- 1 cup unsalted butter, softened
- 1 cup cornstarch
- 2 teaspoons vanilla extract
- 1 tablespoon baking powder
- 1 cup powdered sugar
Instructions
- Preheat oven to 350 degrees F and lightly grease a 9×13 inch baking pan.
- Beat eggs and granulated sugar until pale and fluffy. Mix in flour and baking powder until smooth and fully combined.
- Pour batter evenly into the prepared pan and smooth the surface.
- Bake for 25 minutes until lightly golden. Allow the sponge to cool completely.
- In a saucepan over medium heat, whisk together whole milk, cornstarch, and remaining sugar until thickened, stirring constantly to prevent lumps.
- Remove from heat, stir in softened butter and vanilla extract until smooth, then allow the cream to cool completely.
- Spread the cooled milk cream evenly over the sponge layer.
- Refrigerate for at least 2 hours to allow the layers to set.
- Spread powdered sugar glaze evenly over the top, slice into squares, and serve chilled.
Notes
- Chill overnight for the cleanest slices.
- Whisk the milk mixture constantly while cooking to avoid lumps.
- Use room temperature eggs for a fluffier sponge texture.