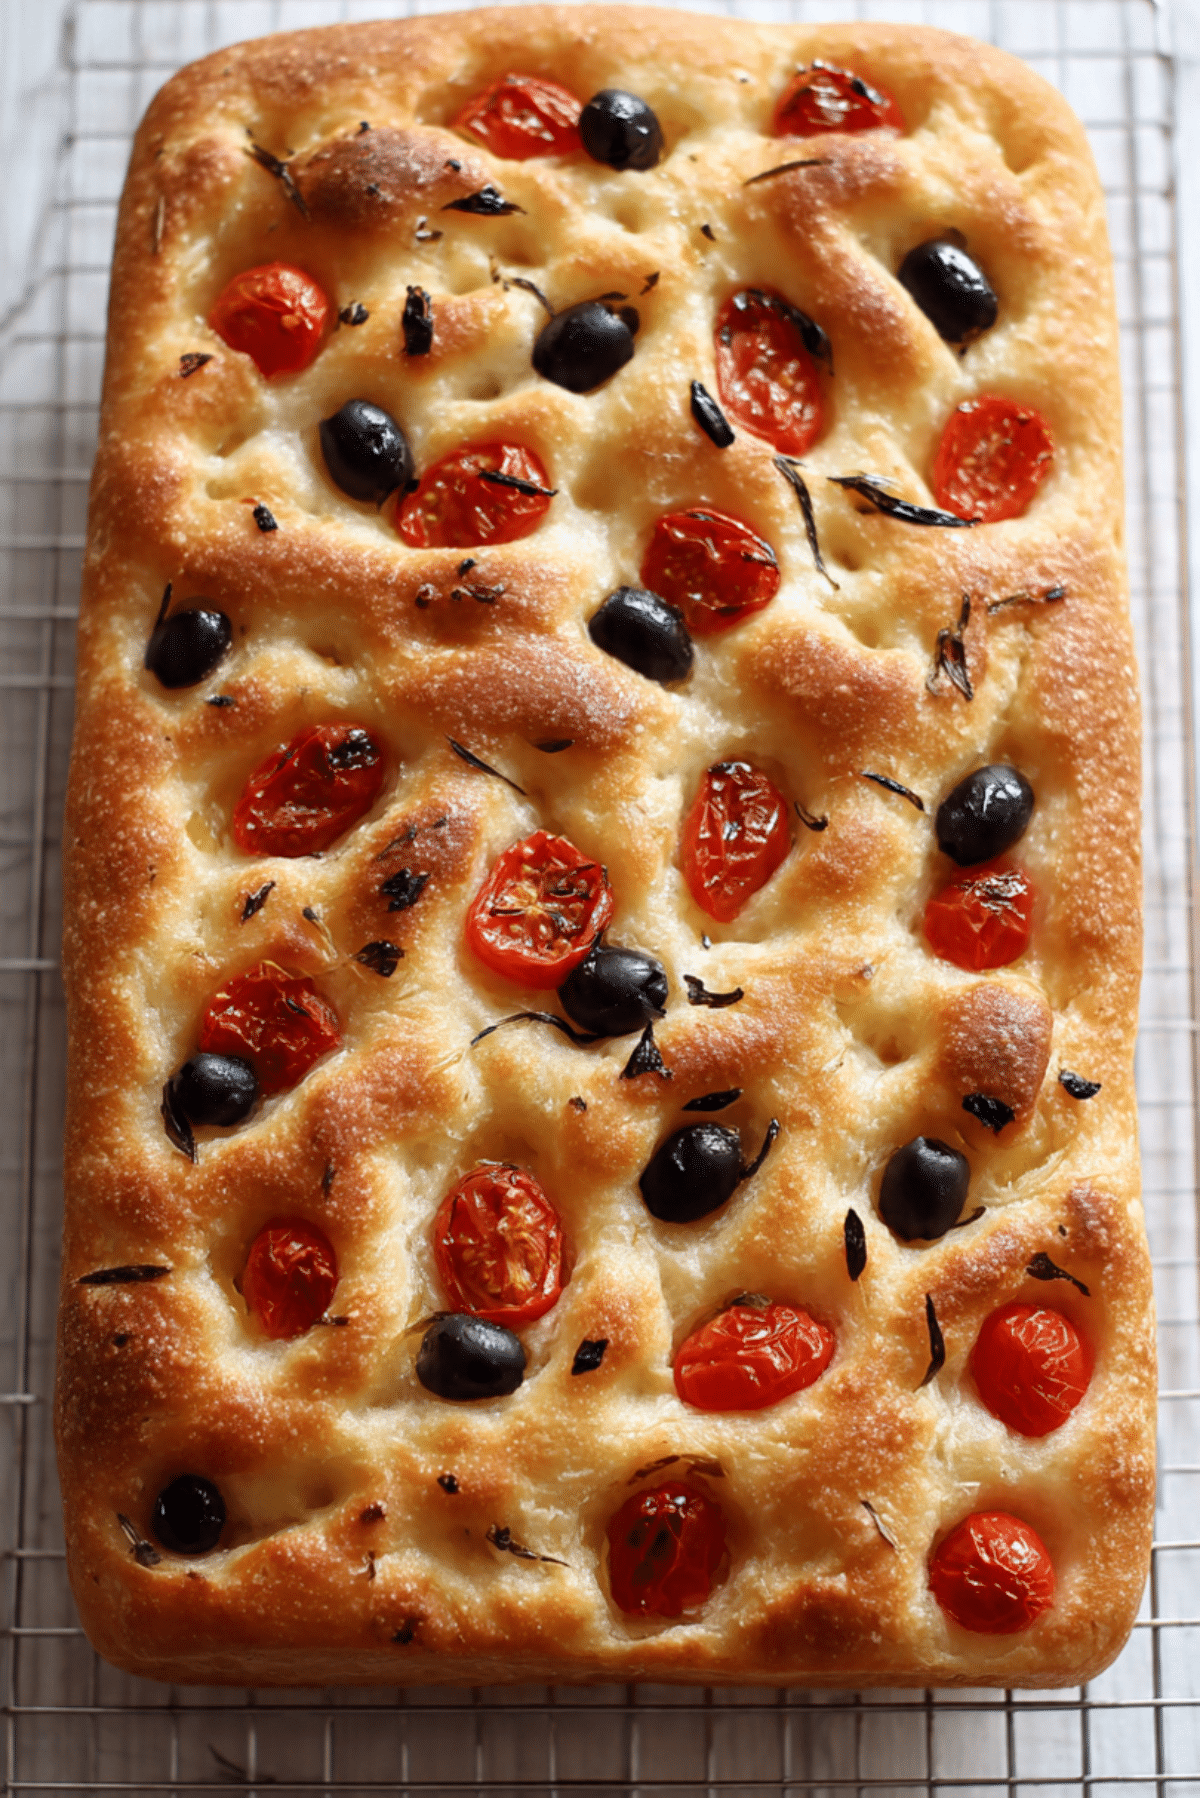
Tomato Olive Focaccia
There is something almost magical about pulling a golden slab of focaccia out of the oven. The scent of warm olive oil, sweet roasted tomatoes, and briny olives fills the kitchen in a way that makes everyone wander in asking when it will be ready. This Tomato Olive Focaccia is soft in the center, lightly crisp on the edges, and dotted with juicy bursts of tomato and savory olives. Trust me, you’re going to love this.
Why This Bread Feels Like a Little Celebration
Freshly baked focaccia has that rare ability to feel both rustic and special at the same time. It looks impressive, yet it is wonderfully simple. The golden crust catches the light, the tomatoes soften into sweet little jewels, and the olives add just the right salty bite. Every square feels like it belongs at a family table, passed around with laughter and maybe a drizzle of extra olive oil on top.
A Taste of Mediterranean Tradition
Focaccia has its roots in Italy, where it has been baked for centuries as a humble yet beloved flatbread. Traditionally enriched with olive oil and sometimes herbs or vegetables, it was often enjoyed as a snack or alongside soups and stews. The combination of tomatoes and olives reflects the sunny Mediterranean pantry, where simple ingredients shine when treated with care. This version keeps that spirit alive, bringing those coastal flavors right into your kitchen.
Why You Can Always Count on This Recipe
Before we dive into the details, let me tell you why this one is a keeper.
Versatile: It works as a side, a sandwich base, or even a light meal with a salad.
Budget-Friendly: Flour, yeast, tomatoes, and olives are simple ingredients that do not break the bank.
Quick and Easy: The hands on time is minimal, and most of the magic happens while the dough rises.
Customizable: You can add herbs, onions, or different olives if you like.
Crowd-Pleasing: The soft crumb and savory topping win over both kids and adults.
Make-Ahead Friendly: You can prepare the dough earlier in the day and bake when ready.
Great for Leftovers: It toasts beautifully the next day for sandwiches or dipping.
Secrets From My Kitchen to Yours
Let me share a few insider tips that make a real difference.
- Use good quality extra virgin olive oil, because its flavor truly comes through.
- Do not rush the rise, a well risen dough means a light and airy crumb.
- Press your fingers firmly into the dough before baking to create those classic dimples.
- Sprinkle a little flaky salt on top just before baking for extra texture.
Tools That Make It Easier
You do not need fancy equipment, just a few basics.
Large Mixing Bowl: For combining and proofing the dough comfortably.
Wooden Spoon or Dough Scraper: To mix and handle the sticky dough.
9×13 inch Baking Pan: Gives the focaccia its classic rectangular shape.
Cooling Rack: Helps prevent a soggy bottom once baked.
Ingredients That Bring It All Together
The beauty of this bread lies in its simplicity. Each ingredient plays a small but important role in building flavor and texture.
- All Purpose Flour: 4 cups, about 500 grams, forms the structure and gives the bread its soft yet chewy crumb.
- Warm Water: 1 3 quarter cups, about 420 milliliters, activates the yeast and hydrates the dough.
- Active Dry Yeast: 2 1 quarter teaspoons, one packet, helps the dough rise and become airy.
- Extra Virgin Olive Oil: 1 quarter cup, 60 milliliters, plus 2 tablespoons for topping, adds richness and moisture.
- Salt: 1 1 half teaspoons for the dough, plus 1 half teaspoon flaky salt for topping, enhances flavor.
- Cherry Tomatoes: 1 cup, halved, provide sweetness and juiciness.
- Black Olives: 3 quarter cup, whole and pitted, bring a savory, briny contrast.
Easy Swaps If You Need Them
Sometimes you work with what you have, and that is perfectly fine.
Cherry Tomatoes: Use sliced Roma tomatoes if needed.
Black Olives: Green olives can be used for a sharper flavor.
All Purpose Flour: Bread flour works for a slightly chewier texture.

Spotlight on the Stars
A couple of ingredients really define this bread.
Extra Virgin Olive Oil: This is not just for moisture, it perfumes the dough and creates that delicate crispness on the edges.
Cherry Tomatoes: As they bake, they soften and concentrate in sweetness, almost like little pockets of sauce baked into the crust.
Let’s Bake This Together
Now let’s dive into the process. It is easier than you might think, and honestly, it is quite relaxing.
- Preheat Your Equipment: Preheat your oven to 425 degrees Fahrenheit, 220 degrees Celsius, once the dough has finished its final rise.
- Combine Ingredients: In a large bowl, mix warm water and yeast. Let it sit for 5 minutes until slightly foamy. Add flour, 1 quarter cup olive oil, and 1 1 half teaspoons salt. Stir until a sticky dough forms.
- Prepare Your Cooking Vessel: Grease a 9×13 inch baking pan with a little olive oil to prevent sticking and to help create a crisp bottom.
- Assemble the Dish: Transfer the dough into the pan and gently stretch it to fit. Cover and let it rise for about 30 minutes. Once puffy, press your fingertips into the surface to create dimples. Arrange halved cherry tomatoes and whole black olives over the top, pressing them slightly into the dough. Drizzle with the remaining 2 tablespoons olive oil and sprinkle with 1 half teaspoon flaky salt.
- Cook to Perfection: Bake for 20 to 25 minutes until golden brown and cooked through. The edges should be lightly crisp and the top beautifully colored.
- Finishing Touches: Remove from the oven and let it cool in the pan for 10 minutes, then transfer to a cooling rack.
- Serve and Enjoy: Slice into squares and serve warm or at room temperature. Let me tell you, it is worth every bite.
The Texture and Flavor Story
The first thing you notice is the contrast. The crust has a gentle crispness from the olive oil, while the inside stays soft and airy. The tomatoes become sweet and slightly jammy, and the olives add little bursts of saltiness. Together, they create a balance that feels comforting yet vibrant.
Helpful Tips for Even Better Results
A few small details can make this even better.
- Let the dough rise in a warm, draft free spot for best results.
- Do not overload with toppings, which can weigh the dough down.
- Use your fingers generously when dimpling, this helps the oil settle into the surface.
Common Mistakes and How to Fix Them
Even simple breads can have small hiccups, so here is what to watch for.
- If the bread turns out dense, the dough may not have risen long enough. Give it more time next round.
- If the bottom is pale, bake a few minutes longer or move the pan to a lower rack.
- If toppings fall off, press them slightly deeper into the dough before baking.
A Quick Look at the Nutrition
Servings: 12
Calories per serving: 210
Note: These are approximate values.
Time Breakdown for Planning
Prep Time: 20 minutes plus 1 hour rise time
Cook Time: 25 minutes
Total Time: 1 hour 45 minutes
Making It Ahead and Storing It
You can prepare the dough earlier in the day and let it rise slowly in the refrigerator. Once baked, store leftovers in an airtight container at room temperature for up to 2 days. For longer storage, freeze slices wrapped tightly. Reheat in the oven at 350 degrees Fahrenheit for about 8 minutes to bring back that fresh baked feel.
Serving Ideas That Shine
Serve this bread alongside a bowl of soup, a crisp green salad, or a platter of roasted vegetables. It also makes an incredible base for sandwiches stuffed with grilled vegetables and cheese. A small dish of olive oil for dipping is never a bad idea.
Transforming Leftovers Into Something New
Leftover squares can be sliced horizontally and filled for panini style sandwiches. You can cube it and toast for crunchy salad croutons. Or simply warm it and top with a fried egg for a cozy breakfast.
Extra Tips for Success
Brush a little more olive oil on top right after baking for extra shine. Sprinkle fresh chopped herbs if you want a pop of color. Always let it cool slightly before slicing to keep the crumb tender.
Make It Look Bakery Worthy
For a beautiful presentation, slice into even squares and arrange on a wooden board. Add a small bowl of olive oil and a few fresh tomatoes on the side. The vibrant red and deep black against the golden bread look absolutely stunning.
Fun Variations to Explore
- Add thinly sliced red onions for extra sweetness.
- Sprinkle dried oregano or rosemary into the dough for herby aroma.
- Top with thin slices of bell pepper for more color.
- Use a mix of green and black olives for deeper flavor.
FAQ’s
Q1: Can I use instant yeast instead of active dry yeast?
Yes, you can. Use the same amount and mix it directly with the flour.
Q2: Why is my dough so sticky?
Focaccia dough is naturally high in hydration, which gives it that airy texture.
Q3: Can I make this gluten free?
You would need a specific gluten free flour blend designed for yeast breads.
Q4: How do I know it is fully baked?
The top should be golden and the bottom lightly browned.
Q5: Can I add cheese on top?
Yes, a light sprinkle of shredded mozzarella can be added before baking.
Q6: Do I need to knead the dough?
Minimal mixing is enough, just until combined.
Q7: Can I let it rise overnight?
Yes, refrigerate the dough for a slow rise.
Q8: How do I reheat it without drying it out?
Wrap loosely in foil and warm in the oven.
Q9: Can I use fresh tomatoes instead of cherry tomatoes?
Yes, just slice them thinly and remove excess moisture.
Q10: Is this good for sandwiches?
Absolutely, it makes a fantastic sandwich base.
Conclusion
Baking Tomato Olive Focaccia at home feels like bringing a piece of the Mediterranean into your kitchen. The aroma, the golden crust, the soft crumb, it all comes together in the most comforting way. This one’s a total game changer for family dinners or casual gatherings. Give it a try, enjoy the process, and savor every warm, savory bite.
PrintTomato Olive Focaccia
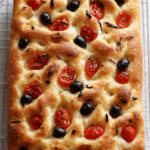
Soft and airy focaccia topped with sweet cherry tomatoes and briny black olives, baked until golden with a crisp edge and tender center.
Ingredients
- 4 cups all purpose flour, about 500 grams
- 1 3/4 cups warm water, about 420 milliliters
- 2 1/4 teaspoons active dry yeast, one packet
- 1/4 cup extra virgin olive oil, 60 milliliters, plus 2 tablespoons for topping
- 1 1/2 teaspoons salt for the dough
- 1/2 teaspoon flaky salt for topping
- 1 cup cherry tomatoes, halved
- 3/4 cup black olives, whole and pitted
Instructions
- Preheat oven to 425 degrees Fahrenheit, 220 degrees Celsius, after the dough completes its final rise.
- In a large bowl, combine warm water and yeast. Let sit for 5 minutes until slightly foamy. Add flour, 1/4 cup olive oil, and 1 1/2 teaspoons salt. Stir until a sticky dough forms.
- Grease a 9×13 inch baking pan with olive oil.
- Transfer dough into the pan and gently stretch to fit. Cover and let rise for 30 minutes. Press fingertips into the surface to create dimples. Arrange halved cherry tomatoes and whole black olives on top, pressing slightly into the dough. Drizzle with remaining 2 tablespoons olive oil and sprinkle with 1/2 teaspoon flaky salt.
- Bake for 20 to 25 minutes until golden brown and cooked through.
- Let cool in the pan for 10 minutes, then transfer to a cooling rack.
- Slice into squares and serve warm or at room temperature.
Notes
- Let the dough rise in a warm draft free area for best texture.
- Do not overload with toppings to keep the crumb light.
- Reheat in a 350 degrees Fahrenheit oven for 8 minutes to refresh leftovers.