Sourdough Quick Focaccia
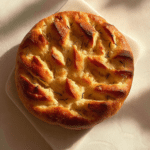
There is something deeply satisfying about the smell of fresh bread filling your home, and this Sourdough Quick Focaccia is the ultimate way to enjoy that bakery-fresh experience without the multi-day wait. Imagine a golden, olive-oil-crisped crust that yields to a cloud-like, airy interior with just a hint of that signature sourdough tang. Each dimple in the dough holds a little pool of rich olive oil and a sprinkle of aromatic rosemary, making every single bite a masterclass in texture. Whether you’re a seasoned bread baker or a total beginner, this recipe is designed to be approachable, reliable, and—most importantly—delicious. Let me tell you, once you pull this shimmering, golden loaf out of your oven, you’ll never want to go back to store-bought bread again.
The Rustic Roots of Italian Focaccia
Focaccia has been a staple of Italian cuisine for centuries, originating from the rugged coastlines of Liguria. Traditionally known as “fugassa” in the Genoese dialect, it was a simple hearth bread cooked over hot coals. By introducing a sourdough starter into this ancient technique, we bridge the gap between old-world fermentation and modern convenience. The starter doesn’t just act as a leavening agent; it adds a complex depth of flavor and a better nutritional profile by breaking down the grains during its rise. This “quick” version uses a touch of commercial yeast alongside the starter to speed up the process, giving you that incredible sourdough character in a fraction of the time.
Why This Sourdough Focaccia is a Kitchen Essential
This isn’t just another bread recipe; it’s a versatile tool in your culinary arsenal that fits perfectly into a busy lifestyle.
Time-Saving: By combining sourdough starter with a pinch of yeast, you get the flavor you love without the 24-hour fermentation period.
No-Knead Magic: This dough is incredibly high-hydration and shaggy, meaning the gluten develops through simple folds rather than intense kneading.
Pantry-Friendly: You likely already have the basic ingredients—flour, water, salt, and oil—ready to go in your kitchen.
Perfect for Entertaining: It’s a stunning side dish that looks professional but requires minimal active effort, leaving you time to focus on your guests.
Endlessly Customizable: From classic rosemary and salt to sun-dried tomatoes and feta, the toppings are limited only by your imagination.
Foolproof Texture: Because it’s baked in a pan, you don’t have to worry about shaping or “oven spring” like you would with a traditional sourdough loaf.
Crowd-Pleasing: Who can resist warm, salty bread? It’s a guaranteed hit at every dinner table or potluck.
Pro Secrets for the Perfect Focaccia
Getting that iconic “dimpled” look and airy crumb is all about technique. Here are the rules for success:
- Be Generous with Oil: Olive oil is not just for flavor; it’s what fries the bottom of the dough in the pan, creating that incredible golden crunch.
- Wet Your Hands: Sourdough focaccia dough is very sticky. To handle it without making a mess, keep a small bowl of water nearby to dip your fingers in before folding or dimpling.
- Don’t Rush the Proof: Even with the “quick” method, the dough needs to look puffy and full of bubbles before it hits the oven. If it doesn’t wobble like jelly, it needs more time.
- Dimple Deeply: When you make those characteristic holes, press your fingers all the way down until you feel the bottom of the pan to ensure the oil settles into the dough.
Essential Tools for Your Kitchen
Before you start mixing, make sure you have these basic tools on hand for a smooth baking experience.
- 9×13 Inch Baking Pan: A metal pan is best for achieving a crispy, golden bottom crust through even heat conduction.
- Large Mixing Bowl: You’ll need plenty of room for the dough to double in size during the first rise.
- Dough Whisk or Sturdy Spatula: Since this is a no-knead recipe, a whisk or spatula helps incorporate the wet and dry ingredients easily.
- Kitchen Scale: Measuring by weight (grams) is the secret to consistent bread baking every single time.
Ingredients You Will Need For This Recipe
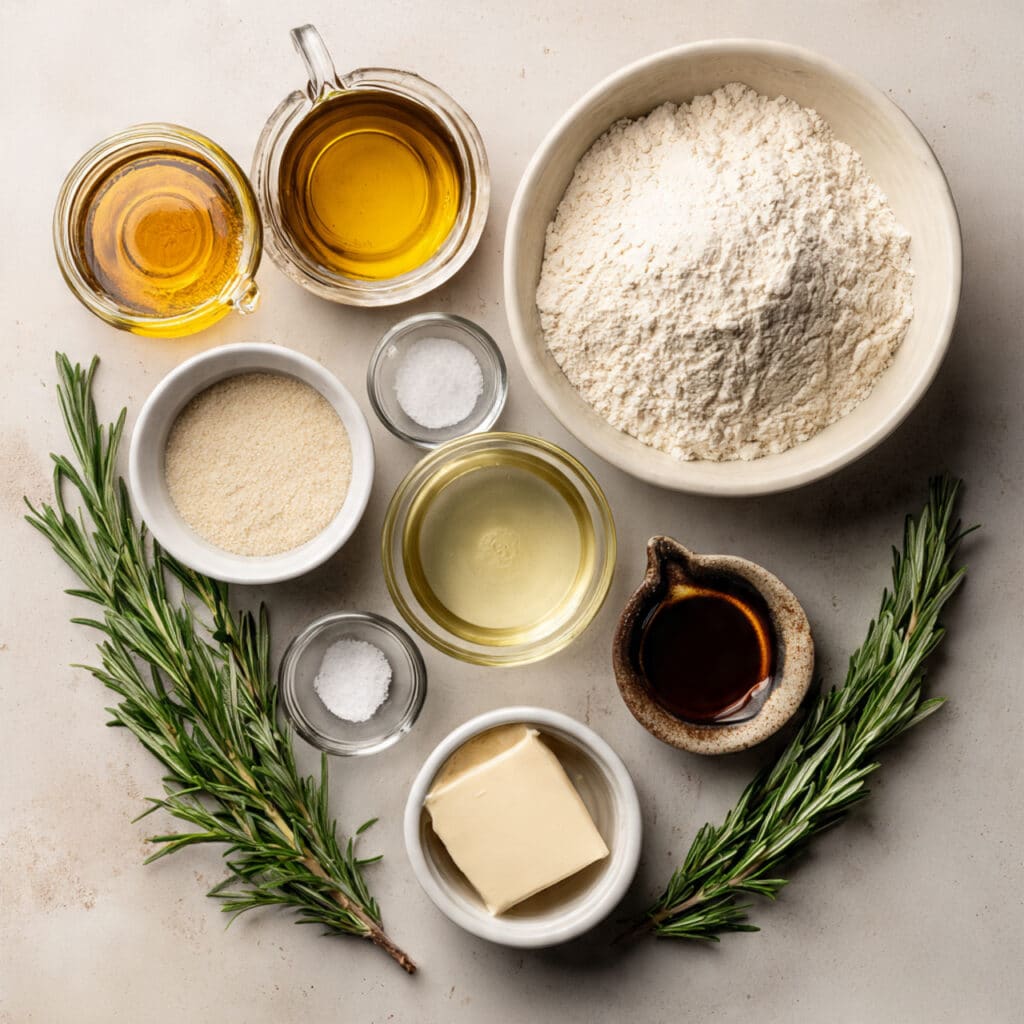
The beauty of this bread lies in the quality of these simple, wholesome ingredients.
- Active Sourdough Starter: 1/2 cup (113g). This provides the flavor base and a boost of natural fermentation.
- Warm Water: 1 1/2 cups (360g). Lukewarm water (about 100°F) helps activate the yeast and starter quickly.
- Bread Flour: 4 cups (480g). Bread flour has a higher protein content than all-purpose, giving the focaccia its chewy, strong structure.
- Extra Virgin Olive Oil: 6 tablespoons (divided). Use high-quality oil for both the dough and the “frying” effect in the pan.
- Instant Yeast: 2 1/4 teaspoons. The “quick” secret that ensures a reliable rise in just a few hours.
- Honey or Sugar: 1 tablespoon. This feeds the yeast and helps the crust achieve a beautiful golden brown color.
- Fine Sea Salt: 2 teaspoons. Essential for strengthening the dough and enhancing the savory flavors.
- Flaky Sea Salt & Rosemary: For topping. These provide the classic finishing touch and a burst of herbal aroma.
Simple Ingredient Substitutions
If you’re out of something, don’t worry—focaccia is one of the most forgiving breads to bake.
Bread Flour: All-purpose flour (the bread will be slightly softer and less chewy).
Instant Yeast: Active dry yeast (just bloom it in the warm water with the honey for 5 minutes first).
Honey: Granulated sugar or maple syrup.
Rosemary: Thyme, oregano, or even a sprinkle of garlic powder.
Sourdough Starter: If you don’t have one, you can double the yeast, though you’ll miss that specific sourdough tang.
Key Ingredient Spotlight
Active Sourdough Starter: This is the heart of the recipe. Even in a “quick” version, the starter introduces enzymes that make the bread easier to digest and creates those beautiful, irregular air bubbles.
Extra Virgin Olive Oil: Don’t skimp here! The oil acts as a barrier between the dough and the pan, effectively oven-frying the bottom to create a savory, crispy “skirt” around the edges.
Let’s Get Cooking
Ready to bake? Follow these steps for a perfect sourdough focaccia that will impress everyone at the table.
- Mix the Base: In your large mixing bowl, whisk together the warm water, honey, and instant yeast. Let it sit for a minute until the yeast begins to dissolve.
- Incorporate Starter and Oil: Stir in the sourdough starter and 2 tablespoons of olive oil until the mixture is mostly smooth and milky.
- Form the Dough: Add the bread flour and fine sea salt. Use a dough whisk or spatula to stir until no dry flour remains. The dough will be very wet and shaggy.
- The First Rise: Cover the bowl with a damp cloth or plastic wrap. Let it rest in a warm spot for about 60-90 minutes, or until it has roughly doubled in size.
- Prepare the Pan: Pour 2-3 tablespoons of olive oil into your 9×13 pan, ensuring the bottom and sides are well-coated.
- Transfer and Stretch: Gently tip the dough into the pan. Use oiled fingers to stretch it toward the corners. If it shrinks back, let it rest for 10 minutes and try again.
- The Second Rise: Cover the pan and let the dough rise for another 45-60 minutes until it is puffy, jiggly, and filled with visible air bubbles.
- Dimple and Bake: Preheat your oven to 425°F. Drizzle the remaining oil over the dough. Press your fingers deep into the dough to create dimples, sprinkle with rosemary and flaky salt, and bake for 20-25 minutes until golden brown.
Developing Deep Flavor and Texture
While this is a quick recipe, the magic happens during the “dimpling” stage. By pressing your fingers into the dough, you create valleys where the olive oil and salt collect. During baking, the high heat causes the water in the dough to turn to steam, inflating those bubbles, while the oil sizzles against the pan to create a crust that is simultaneously light and decadently rich.
Expert Cooking Tips and Tricks
- The Wiggle Test: Before baking, give the pan a gentle shake. The dough should jiggle like a bowl of Jello; if it’s stiff, let it rise for another 15 minutes.
- Ice Cube Trick: For an extra crispy crust, toss 2-3 ice cubes onto the bottom of the oven (not the pan!) right as you put the focaccia in to create a burst of steam.
- Cold Ferment Option: If you have time, you can put the dough in the fridge overnight after Step 4 for an even more intense sourdough flavor.
What to Avoid for the Best Results
- Avoid Over-Mixing: This is a no-knead bread. If you overwork the dough, you’ll knock out the air bubbles and end up with a dense loaf.
- Avoid Dry Fingers: Always oil or wet your hands before touching the dough to prevent it from sticking and tearing.
- Avoid Under-Baking: Don’t be afraid of a dark golden color; that’s where the flavor and the “crunch” live.
Nutrition Facts
Servings: 12
Calories per serving: 210
Note: These are approximate values.
Preparation Time
Prep Time: 15 minutes
Cook Time: 25 minutes
Total Time: 40 minutes (excluding rising time)
Make-Ahead and Storage Tips
Focaccia is best enjoyed the day it is made, but it stores surprisingly well. Keep leftovers in an airtight container at room temperature for up to 2 days. To revive that signature crunch, simply pop a slice in the toaster oven or a 350°F oven for 5 minutes. You can also freeze the baked focaccia for up to 3 months—just wrap it tightly in foil and plastic wrap.
How to Serve Your Focaccia
This bread is a star on its own, but it also makes the perfect base for sandwiches. Slice it horizontally and fill it with prosciutto, fresh mozzarella, and arugula for an incredible Italian lunch. It’s also the ultimate dipping bread; serve it alongside a bowl of high-quality balsamic vinegar and olive oil, or use it to scoop up the remaining sauce from a hearty pasta dish.
Creative Leftover Transformations
If you have a few slices left over, turn them into gourmet croutons for a Caesar salad or a panzanella (bread salad). You can also use slightly stale focaccia to make the best savory French toast you’ve ever had—just dip it in an egg and milk mixture seasoned with herbs and fry it in butter.
Additional Tips for Freshness
If you find your focaccia has softened too much the next day, try “refreshing” it by spraying the top lightly with water before reheating it in the oven. This creates a small amount of steam that helps soften the interior while the oven heat crisps the outside again.
Make It a Showstopper
Turn your bread into a piece of art by creating a “focaccia garden.” Arrange thin slices of bell peppers to look like flowers, use chives for stems, and olives for stones. It’s a beautiful way to serve this bread for holidays or special brunches, and it tastes just as good as it looks.
Variations to Try
- Garlic & Parmesan: Add minced garlic to the oil drizzle and top with grated parmesan cheese 5 minutes before the bread finishes baking.
- Olive & Onion: Press pitted kalamata olives and thinly sliced red onions into the dough before the final rise.
- Sweet Sourdough: Skip the salt and rosemary; top with sliced grapes, a drizzle of honey, and a pinch of cinnamon sugar for a breakfast version.
- Everything Bagel: Top with “everything bagel” seasoning for a savory, seedy crunch that pairs perfectly with cream cheese.
FAQ’s
Q1: My dough is too sticky to handle, what should I do?
A1: This is normal! Focaccia dough is supposed to be very wet. Keep your hands well-oiled or wet with water, and don’t try to knead it like regular bread.
Q2: Can I use sourdough discard instead of active starter?
A2: Yes, since this recipe uses instant yeast for the primary rise, you can use unfed discard for the flavor.
Q3: Why didn’t I get big bubbles on top?
A3: This usually means the dough didn’t rise long enough in the pan or the yeast was expired. Make sure the dough is very puffy before dimpling.
Q4: Can I bake this in a glass pan?
A4: You can, but keep in mind that glass takes longer to heat up and might not produce a crust as crispy as a metal pan.
Q5: Is this recipe vegan?
A5: Almost! Simply swap the honey for granulated sugar or maple syrup to make it 100% vegan.
Q6: Can I make the dough ahead of time?
A6: Yes! You can let the dough do its first rise in the refrigerator for up to 24 hours to develop more flavor.
Q7: What kind of olive oil is best?
A7: Use an Extra Virgin Olive Oil (EVOO) for the best flavor, as the oil is a major ingredient in the taste of the final bread.
Q8: How do I know when it’s done baking?
A8: The top should be golden brown, and if you gently lift a corner, the bottom should be crisp and browned as well.
Q9: My focaccia stuck to the pan, how can I prevent this?
A9: Make sure you are generous with the oil in the pan, or use a non-stick pan or a piece of parchment paper on the bottom.
Q10: Can I add cheese to the dough?
A10: It’s better to add cheese as a topping so it can melt and brown beautifully on the surface.
Conclusion
The Sourdough Quick Focaccia is a celebration of simple ingredients and smart techniques. It brings the sophisticated, tangy flavor of sourdough into your kitchen without the stress of a complicated schedule. From its shatteringly crisp edges to its pillowy soft center, it is a bread that demands to be shared. Whether you’re dipping it into soup, using it for a sandwich, or just eating it warm right off the cooling rack, I promise this will become a new favorite in your baking rotation. Happy baking!
PrintSourdough Quick Focaccia
A quick-method sourdough focaccia that combines the tangy flavor of a starter with the reliability of instant yeast for a golden, airy, and oil-crisped Italian bread.
Ingredients
- Active Sourdough Starter: 1/2 cup (113g)
- Warm Water: 1 1/2 cups (360g)
- Bread Flour: 4 cups (480g)
- Extra Virgin Olive Oil: 6 tablespoons, divided
- Instant Yeast: 2 1/4 teaspoons
- Honey: 1 tablespoon
- Fine Sea Salt: 2 teaspoons
- Flaky Sea Salt & Rosemary: for topping
Instructions
- Mix the Base: Whisk warm water, honey, and instant yeast in a large bowl.
- Incorporate Starter and Oil: Stir in the sourdough starter and 2 tablespoons of olive oil.
- Form the Dough: Add bread flour and fine salt; stir until a shaggy, wet dough forms.
- First Rise: Cover and let rest in a warm spot for 60-90 minutes until doubled.
- Prepare the Pan: Coat a 9×13 pan with 2-3 tablespoons of olive oil.
- Transfer and Stretch: Place dough in pan and stretch to corners (rest 10 mins if it resists).
- Second Rise: Cover and let rise for 45-60 minutes until puffy and jiggly.
- Dimple and Bake: Preheat oven to 425°F. Drizzle remaining oil, dimple deeply with fingers, add toppings, and bake for 20-25 minutes.
Notes
- Note: Keep hands oiled or wet when handling the dough to prevent sticking.
- Note: Ensure the dough is bubbly and wobbly before baking for the best airy texture.
- Note: A metal pan provides the best conduction for a truly crispy bottom crust.