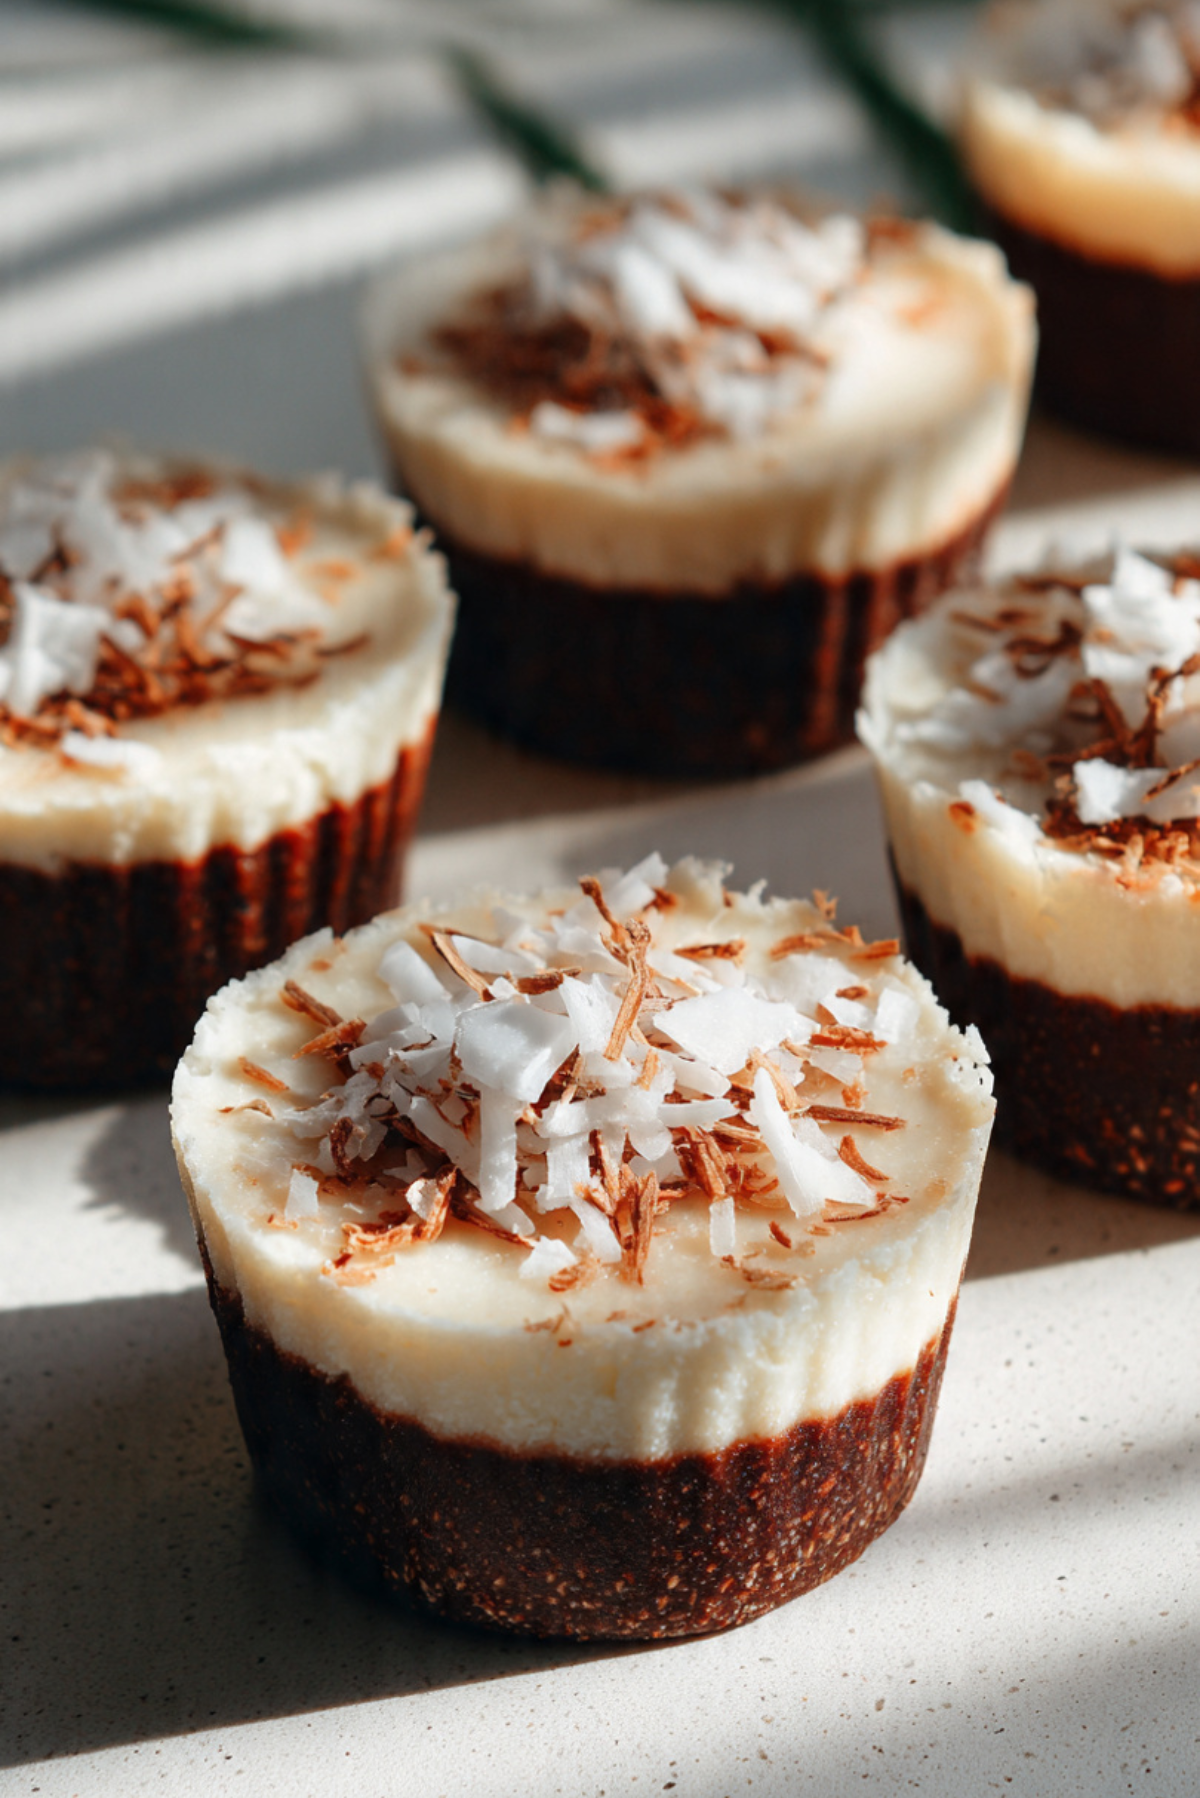
Rice Coconut Cups
There is something incredibly comforting about the combination of coconut and chocolate. The first time I made these Rice Coconut Cups, I remember how the kitchen smelled sweet and creamy, with just a hint of toasted richness from the base. They look simple, almost humble, but trust me, you are going to love this. Each bite is soft, slightly chewy, and perfectly balanced between rich and refreshing. Let me tell you, it is worth every bite.
A Little Sweet Escape in Every Bite
Sometimes you want a dessert that feels indulgent but not heavy. That is exactly where these little cups shine. The creamy coconut layer melts gently on your tongue, while the chocolate rice base gives that satisfying contrast. It feels like a tiny tropical vacation packed into a single serving. And the best part is how easy they are to make, which makes them even more lovable.
A Tropical Inspiration with Simple Roots
Coconut based sweets have been part of many cultures for generations. From Southeast Asian coconut treats to island inspired desserts, coconut has always brought that natural sweetness and soft texture to the table. Pairing it with rice and chocolate feels modern yet comforting. It is a small twist on classic coconut confections, blending tradition with everyday pantry ingredients.
Why This Dessert Always Delivers
Before we dive into the details, let me share why this one is a total game changer in the dessert world.
Versatile: You can serve these at parties, pack them in lunch boxes, or enjoy them with an afternoon coffee. They fit almost any occasion.
Budget-Friendly: The ingredients are simple and easy to find, which makes this a treat you can prepare without stretching your grocery list.
Quick and Easy: There is no complicated technique here. Just mix, layer, chill, and enjoy.
Customizable: You can adjust sweetness, switch chocolate types, or even add nuts for crunch.
Crowd-Pleasing: Coconut and chocolate together rarely disappoint. Most people go back for seconds.
Make-Ahead Friendly: These cups actually taste even better after chilling for a few hours.
Great for Leftovers: They store beautifully, so you can enjoy them over a few days without losing texture.
Chef Secrets for the Perfect Texture
Now let us talk about how to make them absolutely perfect.
- Use finely shredded coconut for a smoother, creamier top layer.
- Press the base firmly into the molds so it holds together when sliced.
- Chill long enough, at least two hours, so the layers set properly.
- Use good quality chocolate because the flavor really comes through.
Essential Tools for Smooth Preparation
Before gathering ingredients, let us quickly go over what you will need.
Mixing Bowls: For combining both the chocolate base and the coconut layer.
Silicone Muffin Molds or Paper Liners: These make removing the cups much easier.
Spatula: Helps press the base evenly and smooth the coconut layer.
Saucepan: Needed to gently melt and combine the base ingredients.
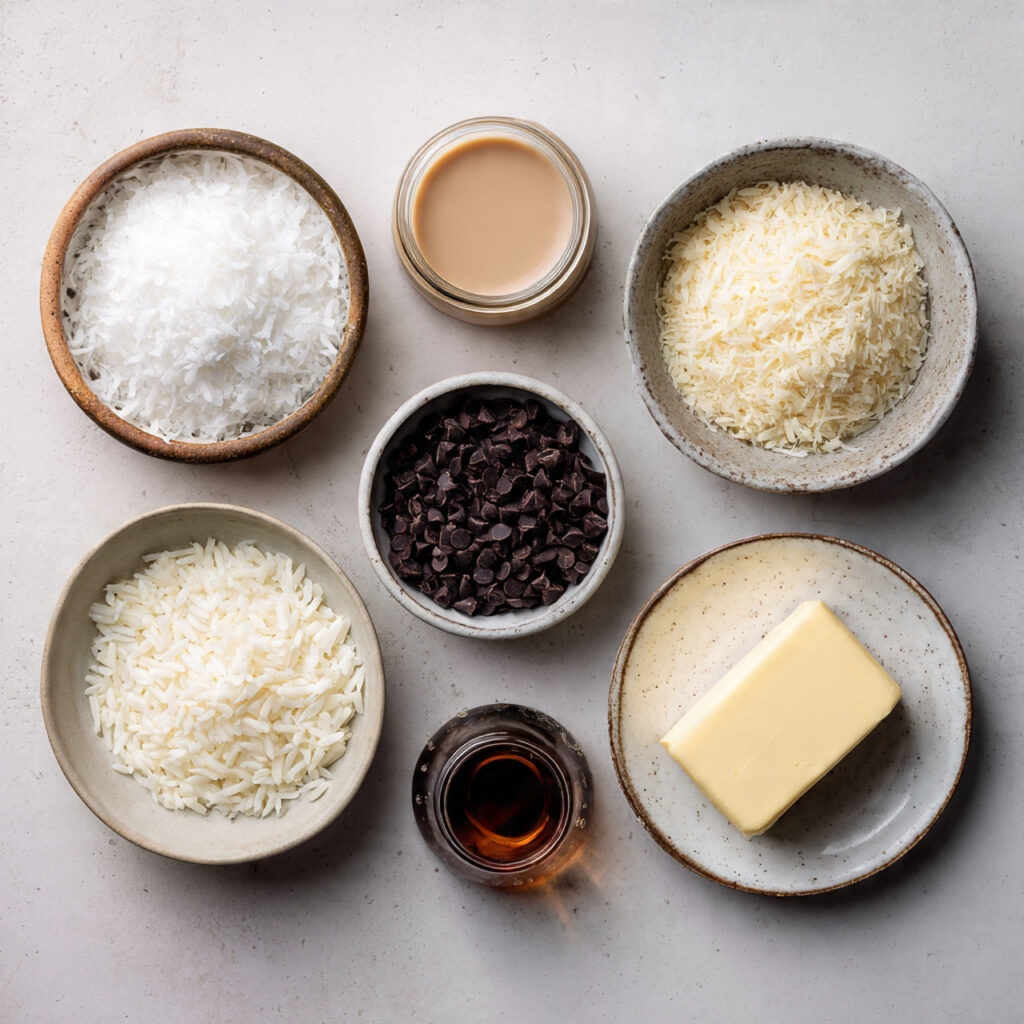
Ingredients That Make the Magic Happen
The beauty of this dessert is how a few simple ingredients come together in harmony. Creamy, rich, and slightly chewy, each one plays its role beautifully.
- Sweetened Shredded Coconut: 2 cups, provides the signature flavor and chewy texture.
- Sweetened Condensed Milk: 1 cup, binds the coconut and adds creamy sweetness.
- Vanilla Extract: 1 teaspoon, enhances the overall aroma and warmth.
- Dark Chocolate Chips: 1 cup, melted for the rich bottom layer.
- Cooked Rice: 1 cup, cooled and slightly sticky, gives structure to the base.
- Unsalted Butter: 2 tablespoons, melted, adds richness and helps the base firm up.
Easy Swaps If You Need Them
Sometimes you work with what you have, and that is perfectly fine.
Dark Chocolate Chips: Use milk chocolate for a sweeter base.
Sweetened Condensed Milk: Coconut condensed milk works well for a dairy free option.
Cooked Rice: Try puffed rice for a lighter crunch.
Unsalted Butter: Coconut oil can replace it for extra coconut flavor.
Spotlight on Key Ingredients
Sweetened Shredded Coconut: This is the heart of the dessert. It gives body, texture, and that unmistakable tropical flavor.
Dark Chocolate Chips: They balance the sweetness of the coconut with a slight bitterness that makes each bite more interesting.
Let Us Bring It All Together
Now comes the fun part, turning simple ingredients into something irresistible.
- Preheat Your Equipment: There is no oven needed, but prepare your muffin molds by lining them or lightly greasing them.
- Combine Ingredients: In a bowl, mix the shredded coconut, sweetened condensed milk, and vanilla extract until fully combined and sticky.
- Prepare Your Cooking Vessel: In a saucepan over low heat, melt the butter and stir in the chocolate chips until smooth. Remove from heat and fold in the cooked rice until evenly coated.
- Assemble the Dish: Spoon the chocolate rice mixture into the bottom of each mold and press firmly. Then add the coconut mixture on top and smooth the surface.
- Cook to Perfection: Place the molds in the refrigerator and chill for at least 2 hours until fully set.
- Finishing Touches: Sprinkle a few extra coconut flakes on top before serving if desired.
- Serve and Enjoy: Gently remove from molds and serve chilled for the best texture.
A Balance of Creamy and Chewy
What makes these cups so satisfying is the contrast. The bottom layer is slightly dense with a soft chew from the rice, while the top is creamy and tender. As it chills, the flavors blend beautifully. The chocolate becomes firm yet smooth, and the coconut layer stays soft but structured. Every bite offers that little surprise of texture.
Helpful Tips for Even Better Results
If you want to make sure everything turns out just right, keep these in mind.
- Press the base evenly so it does not crumble when sliced.
- Let them chill fully before removing from molds.
- Use a small spoon dipped in water to smooth the coconut layer neatly.
Common Mistakes and How to Avoid Them
Even simple recipes can have small hiccups, so here is what to watch for.
- Do not skip chilling time, or the layers may not hold together.
- Avoid overcooking the chocolate, keep heat low to prevent burning.
- Do not use overly dry rice, it should be slightly sticky for best structure.
Nutrition Overview at a Glance
Servings: 12 cups
Calories per serving: 210
Note: These are approximate values.
Time Breakdown for Easy Planning
Prep Time: 20 minutes
Cook Time: 5 minutes
Total Time: 25 minutes plus 2 hours chilling
Make Ahead and Storage Tips
These cups are perfect for preparing in advance. You can store them in an airtight container in the refrigerator for up to 5 days. If you want to freeze them, place them in a single layer and freeze for up to 2 months. Thaw in the refrigerator before serving. The texture stays surprisingly good.
Serving Ideas That Elevate the Experience
Serve them slightly chilled with a hot cup of coffee or tea. You can also add a drizzle of melted chocolate on top for extra richness. For gatherings, arrange them on a simple white platter with a light dusting of coconut flakes.
Turning Leftovers into Something New
If you somehow have leftovers, crumble one over vanilla yogurt for a quick dessert parfait. You can also chop them into small pieces and fold into vanilla ice cream for a homemade twist.
Extra Tips for Flavor and Ease
For deeper flavor, lightly toast the shredded coconut before mixing. You can also add a pinch of salt to the chocolate base to enhance sweetness. Keep molds flexible so removal is easier and cleaner.
Make It Look Bakery Worthy
To impress guests, smooth the top layer carefully and garnish with a neat strip of coconut. Serve them on matching plates with soft lighting for a polished presentation.
Fun Variations to Explore
Try adding chopped almonds to the base for crunch.
Stir a little cocoa powder into the coconut layer for a marbled look.
Use white chocolate in the base for a sweeter version.
Add a thin layer of raspberry jam between the base and coconut for a fruity twist.
FAQ’s
Q1: Can I use leftover rice?
Yes, just make sure it is plain and slightly sticky.
Q2: Can I make them dairy free?
Yes, use coconut condensed milk and coconut oil.
Q3: How long do they need to chill?
At least 2 hours for proper setting.
Q4: Can I freeze them?
Yes, up to 2 months in an airtight container.
Q5: Are they very sweet?
They are moderately sweet, but dark chocolate balances it nicely.
Q6: Can I use unsweetened coconut?
Yes, but you may want to adjust sweetness slightly.
Q7: Do I need silicone molds?
They help, but paper liners also work well.
Q8: Can I add nuts?
Absolutely, chopped almonds or walnuts are great.
Q9: Should they be served cold?
Yes, they taste best chilled.
Q10: Can I double the recipe?
Yes, simply double all ingredients evenly.
Conclusion
These Rice Coconut Cups are simple, comforting, and full of flavor. They come together with minimal effort but deliver maximum satisfaction. Once you try them, they might just become your go to sweet treat. Trust me, this one is a keeper.
PrintRice Coconut Cups
Creamy coconut layered over a rich chocolate rice base, chilled to perfection and topped with delicate coconut flakes. These no-bake treats are soft, slightly chewy, and perfectly balanced between sweet and indulgent.
Ingredients
- 2 cups sweetened shredded coconut
- 1 cup sweetened condensed milk
- 1 teaspoon vanilla extract
- 1 cup dark chocolate chips
- 1 cup cooked rice, cooled
- 2 tablespoons unsalted butter, melted
Instructions
- Prepare silicone muffin molds or line a muffin tin with paper liners.
- In a mixing bowl, combine the sweetened shredded coconut, sweetened condensed milk, and vanilla extract. Stir until fully mixed and sticky.
- In a saucepan over low heat, melt the butter and add the dark chocolate chips. Stir until completely smooth.
- Remove from heat and fold in the cooked rice until evenly coated with the melted chocolate.
- Spoon the chocolate rice mixture evenly into the bottom of each mold and press firmly to create a compact base.
- Divide the coconut mixture over the chocolate base and smooth the tops evenly.
- Refrigerate for at least 2 hours until fully set.
- Once chilled, gently remove from molds and garnish with extra coconut flakes if desired before serving.
Notes
- Press the chocolate base firmly to prevent crumbling.
- Chill completely before removing from molds for clean edges.
- You can substitute coconut oil for butter for a deeper coconut flavor.
- Store in an airtight container in the refrigerator for up to 5 days.