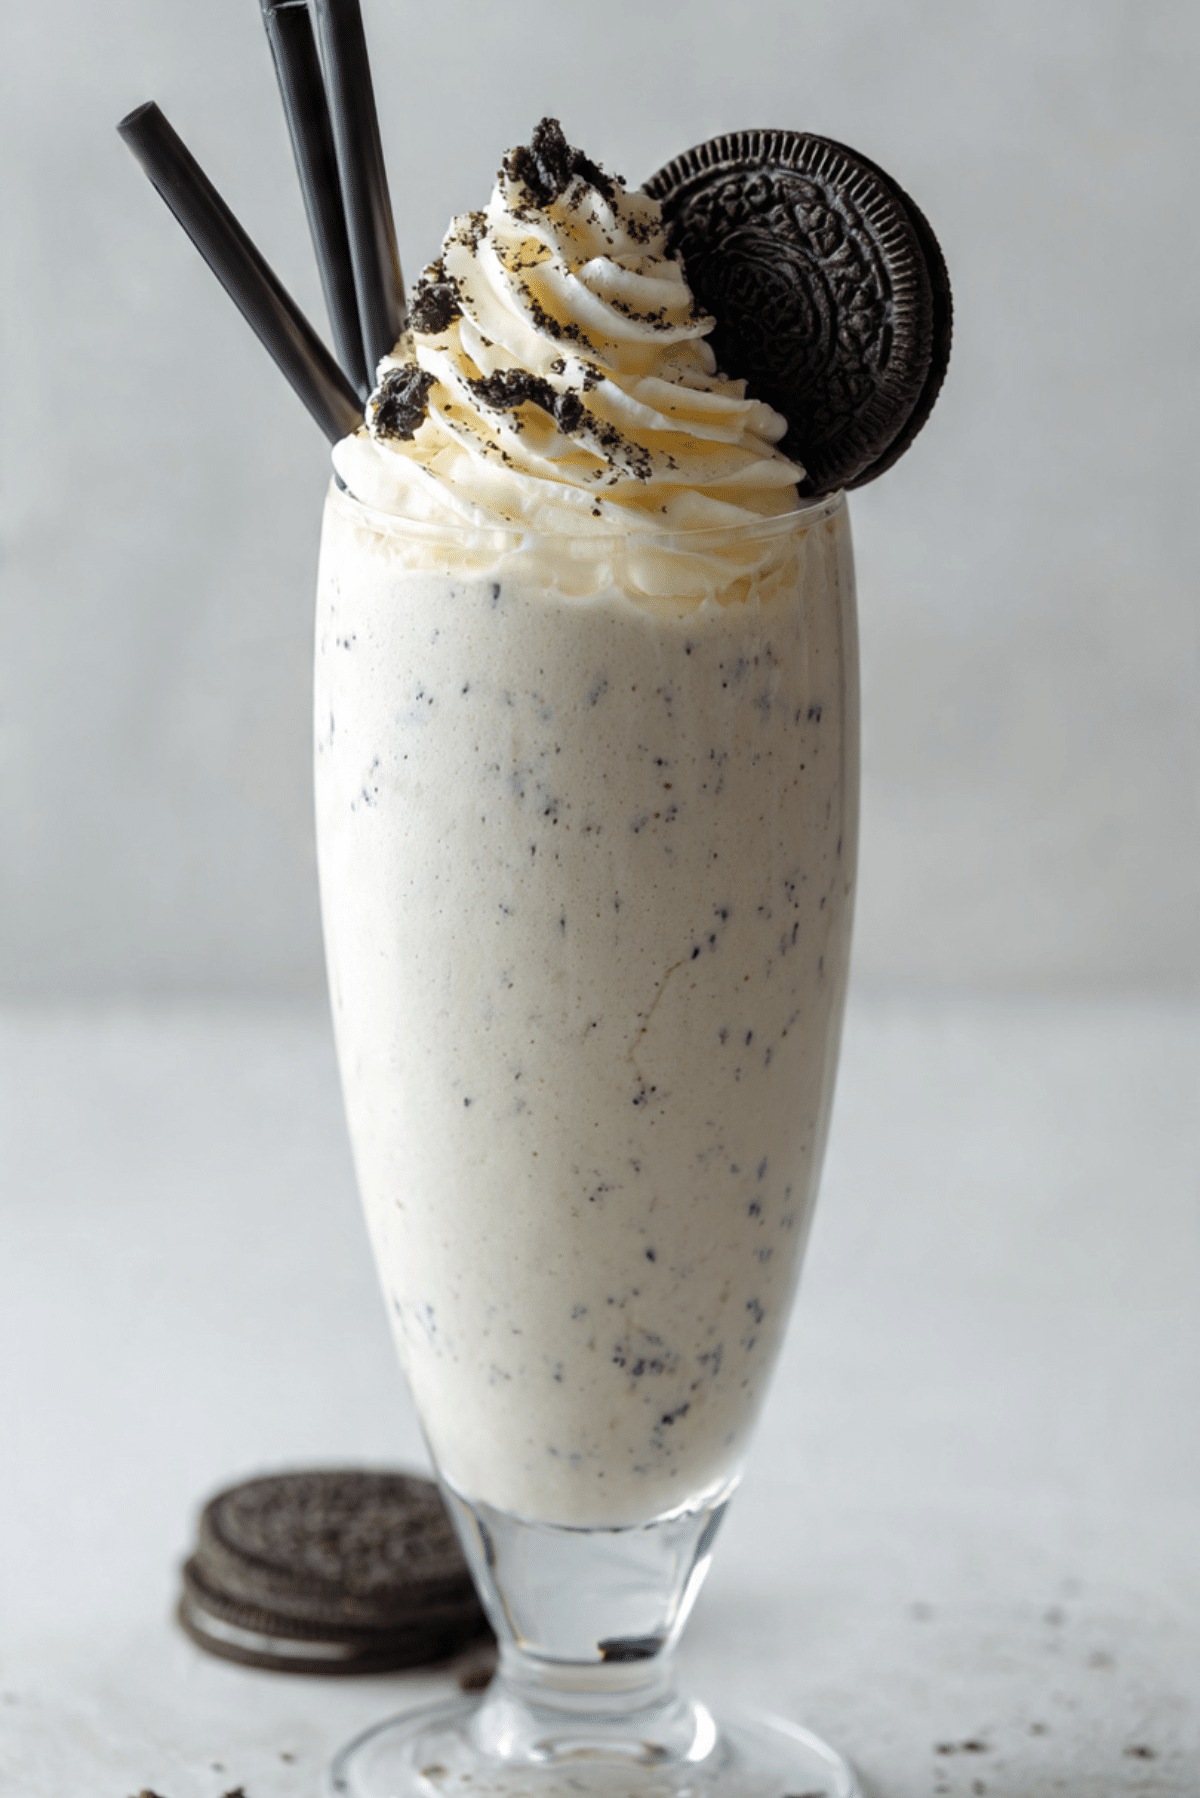
Oreo Milkshake
There is something instantly comforting about an Oreo milkshake. The moment the blender starts whirring, you already know what is coming next, that thick, creamy sip filled with chocolate cookie crunch and sweet vanilla goodness. This is the kind of treat that feels playful and indulgent, perfect for hot afternoons, movie nights, or anytime you just want something fun and nostalgic. Trust me, you’re going to love this one.
Behind the Recipe
This Oreo milkshake takes me straight back to afternoons when dessert felt like a reward instead of a routine. It is inspired by those classic diner shakes that came tall, frosty, and unapologetically rich. I wanted a version you could easily make at home, with simple ingredients and that same joyful feeling in every sip.
Recipe Origin or Trivia
Oreo cookies were first introduced in 1912, and it did not take long before people started blending them into desserts. Milkshakes became popular in American diners during the early 1900s, and combining the two was honestly inevitable. Today, the Oreo milkshake is a global favorite, loved for its balance of creamy vanilla and deep chocolate flavor.
Why You’ll Love Oreo Milkshake
This milkshake checks all the right boxes, and now let me tell you exactly why it deserves a spot in your recipe rotation.
Versatile: You can enjoy it as a dessert, a sweet snack, or even a fun party drink with toppings.
Budget-Friendly: It uses basic ingredients that are easy to find and affordable.
Quick and Easy: From start to finish, it comes together in just a few minutes.
Customizable: Adjust the thickness, sweetness, or cookie amount to suit your taste.
Crowd-Pleasing: Kids and adults both go crazy for this classic flavor combo.
Make-Ahead Friendly: You can prep parts ahead and blend when ready to serve.
Great for Leftovers: Extra milkshake can be frozen and re-blended later.
Chef’s Pro Tips for Perfect Results
A great Oreo milkshake is all about balance. Keep these tips in mind to get that diner style result at home.
- Use very cold milk so the shake stays thick and frosty.
- Do not overblend if you want visible cookie bits.
- Taste before serving and add sweetness only if needed.
- Chill your glasses for an extra refreshing experience.
Kitchen Tools You’ll Need
Before you start blending, it helps to have everything ready on the counter.
Blender: A good blender ensures a smooth, creamy texture.
Measuring Cups: Helpful for keeping the milk to ice cream ratio just right.
Tall Glasses: Perfect for serving and showing off those cookie swirls.
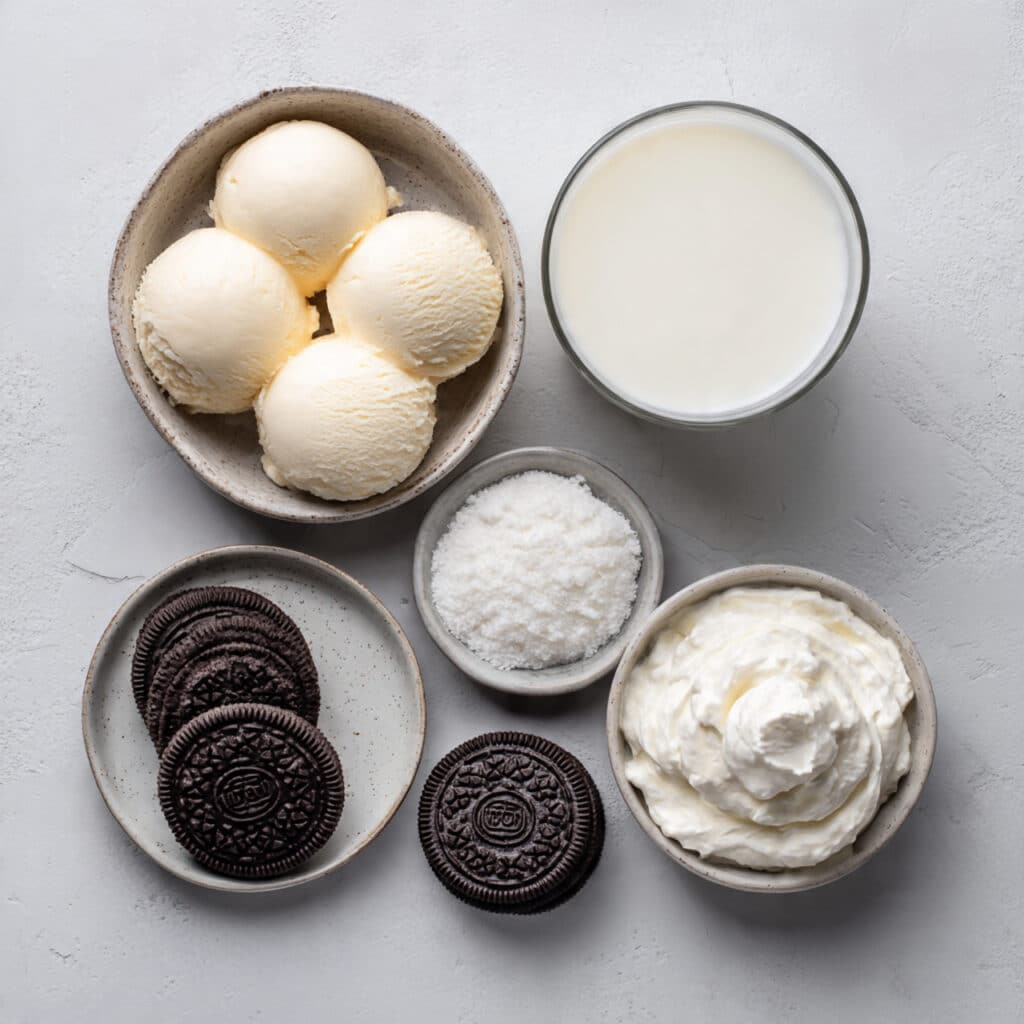
Ingredients in Oreo Milkshake
This recipe works because every ingredient plays its part, and together they create something truly satisfying.
- Vanilla Ice Cream: 2 cups, this forms the creamy base and adds classic sweetness.
- Milk: 1 cup, whole milk works best for richness and smooth texture.
- Oreo Cookies: 8 cookies, they bring chocolate flavor and that iconic crunch.
- Whipped Cream: for topping, adds lightness and visual appeal.
Ingredient Substitutions
Sometimes you need to improvise, and that is totally fine.
Vanilla Ice Cream: Chocolate or cookies and cream ice cream.
Milk: Almond milk or oat milk for a dairy free option.
Oreo Cookies: Any chocolate sandwich cookie.
Ingredient Spotlight
Oreo Cookies: These cookies bring more than just sweetness. They add texture, deep cocoa flavor, and that nostalgic taste everyone recognizes instantly.
Instructions for Making Oreo Milkshake
Now let’s dive into the fun part and bring this milkshake to life.
- Preheat Your Equipment: Chill the blender jar and serving glasses for a few minutes.
- Combine Ingredients: Add vanilla ice cream, milk, and Oreo cookies to the blender.
- Prepare Your Cooking Vessel: Secure the blender lid and make sure everything is locked in place.
- Assemble the Dish: Pulse briefly to break up the cookies, then blend until creamy.
- Cook to Perfection: Blend just until smooth but still slightly chunky if desired.
- Finishing Touches: Pour into glasses and top with whipped cream.
- Serve and Enjoy: Add an extra Oreo on top and enjoy immediately.
Texture & Flavor Secrets
The magic of this milkshake is in the contrast. You get a silky smooth vanilla base paired with little bursts of crunchy chocolate cookie. As the ice cream melts slightly, the flavors deepen and blend together, creating a rich and satisfying sip every time.
Cooking Tips & Tricks
A few small tweaks can take this milkshake to the next level.
- Use fewer cookies for a smoother shake.
- Add extra ice cream for a thicker consistency.
- Blend in short bursts to control texture.
What to Avoid
Even simple recipes have a few pitfalls.
- Overblending can make the shake too thin.
- Warm ingredients will melt the ice cream too fast.
- Skipping the chill step can dull the final texture.
Nutrition Facts
Servings: 2
Calories per serving: 420
Note: These are approximate values.
Preparation Time
Prep Time: 5 minutes
Cook Time: 0 minutes
Total Time: 5 minutes
Make-Ahead and Storage Tips
If you want to get ahead, you can pre-crush the cookies and freeze the ice cream scoops. Leftover milkshake can be frozen in an airtight container and re-blended later with a splash of milk to bring it back to life.
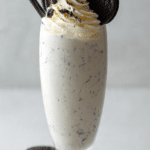
How to Serve Oreo Milkshake
Serve it tall and cold with extra whipped cream, a cookie garnish, or even a drizzle of chocolate syrup. It pairs beautifully with brownies, cookies, or a simple afternoon break.
Creative Leftover Transformations
Turn leftover milkshake into popsicles, or blend it with extra ice cream for a thicker frozen dessert. You can even pour it over vanilla ice cream as a sauce.
Additional Tips
For extra indulgence, add a splash of vanilla extract or blend in a spoonful of cookie crumbs at the end. Let me tell you, it’s worth every bite.
Make It a Showstopper
Presentation matters. Use clear glasses, visible cookie chunks, and generous toppings to make it look as good as it tastes.
Variations to Try
- Add chocolate ice cream for a deeper cocoa flavor.
- Blend in a banana for a fruity twist.
- Use mint ice cream for a refreshing version.
- Add extra cookies for maximum crunch.
FAQ’s
Q1: Can I make this without a blender?
Yes, crush the cookies finely and stir vigorously, though the texture will be less smooth.
Q2: How do I make it thicker?
Use more ice cream and less milk.
Q3: Can I make it dairy free?
Yes, use plant based ice cream and milk.
Q4: Can I reduce the sweetness?
Use fewer cookies or unsweetened milk alternatives.
Q5: How long does it last?
It is best enjoyed fresh, but can be frozen for up to one week.
Q6: Can I add toppings?
Absolutely, whipped cream and cookie pieces work great.
Q7: Is this kid friendly?
Yes, it is perfect for all ages.
Q8: Can I double the recipe?
Yes, just blend in batches if needed.
Q9: What if it is too thin?
Add more ice cream and blend again.
Q10: Can I use crushed cookies instead?
Yes, crushed cookies work just fine.
Conclusion
This Oreo milkshake is pure comfort in a glass. It is creamy, nostalgic, and incredibly easy to make, which makes it a total game-changer for quick desserts. Give it a try, and I promise it will become a favorite in your kitchen.
PrintOreo Milkshake
A creamy and nostalgic Oreo milkshake made with vanilla ice cream, cold milk, and classic chocolate sandwich cookies, blended into a thick and indulgent treat that is perfect for dessert or a sweet snack.
Ingredients
- 2 cups vanilla ice cream
- 1 cup cold whole milk
- 8 Oreo cookies
- Whipped cream for topping
Instructions
- Chill the blender jar and serving glasses for a few minutes.
- Add the vanilla ice cream, cold milk, and Oreo cookies to the blender.
- Pulse briefly to break up the cookies.
- Blend until creamy and smooth, keeping small cookie bits if desired.
- Pour into chilled glasses.
- Top with whipped cream and serve immediately.
Notes
- Use less milk for a thicker milkshake.
- Add extra cookies for more crunch.
- Best enjoyed immediately while cold and creamy.