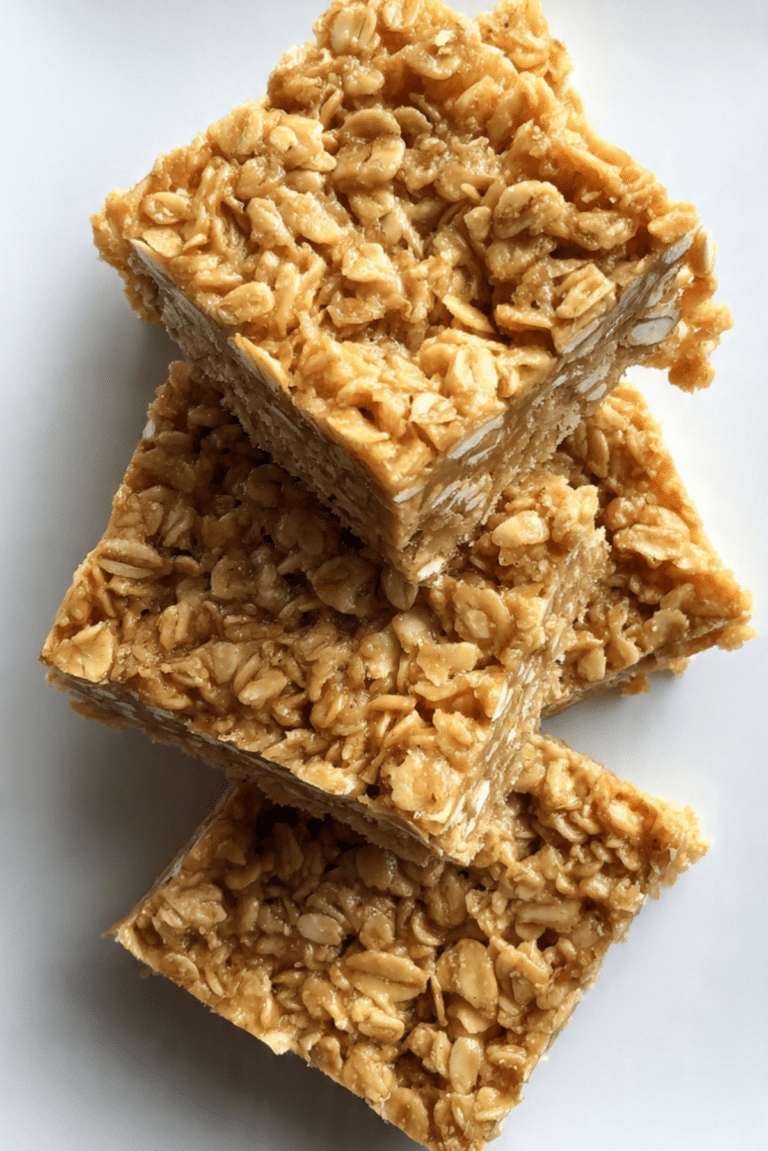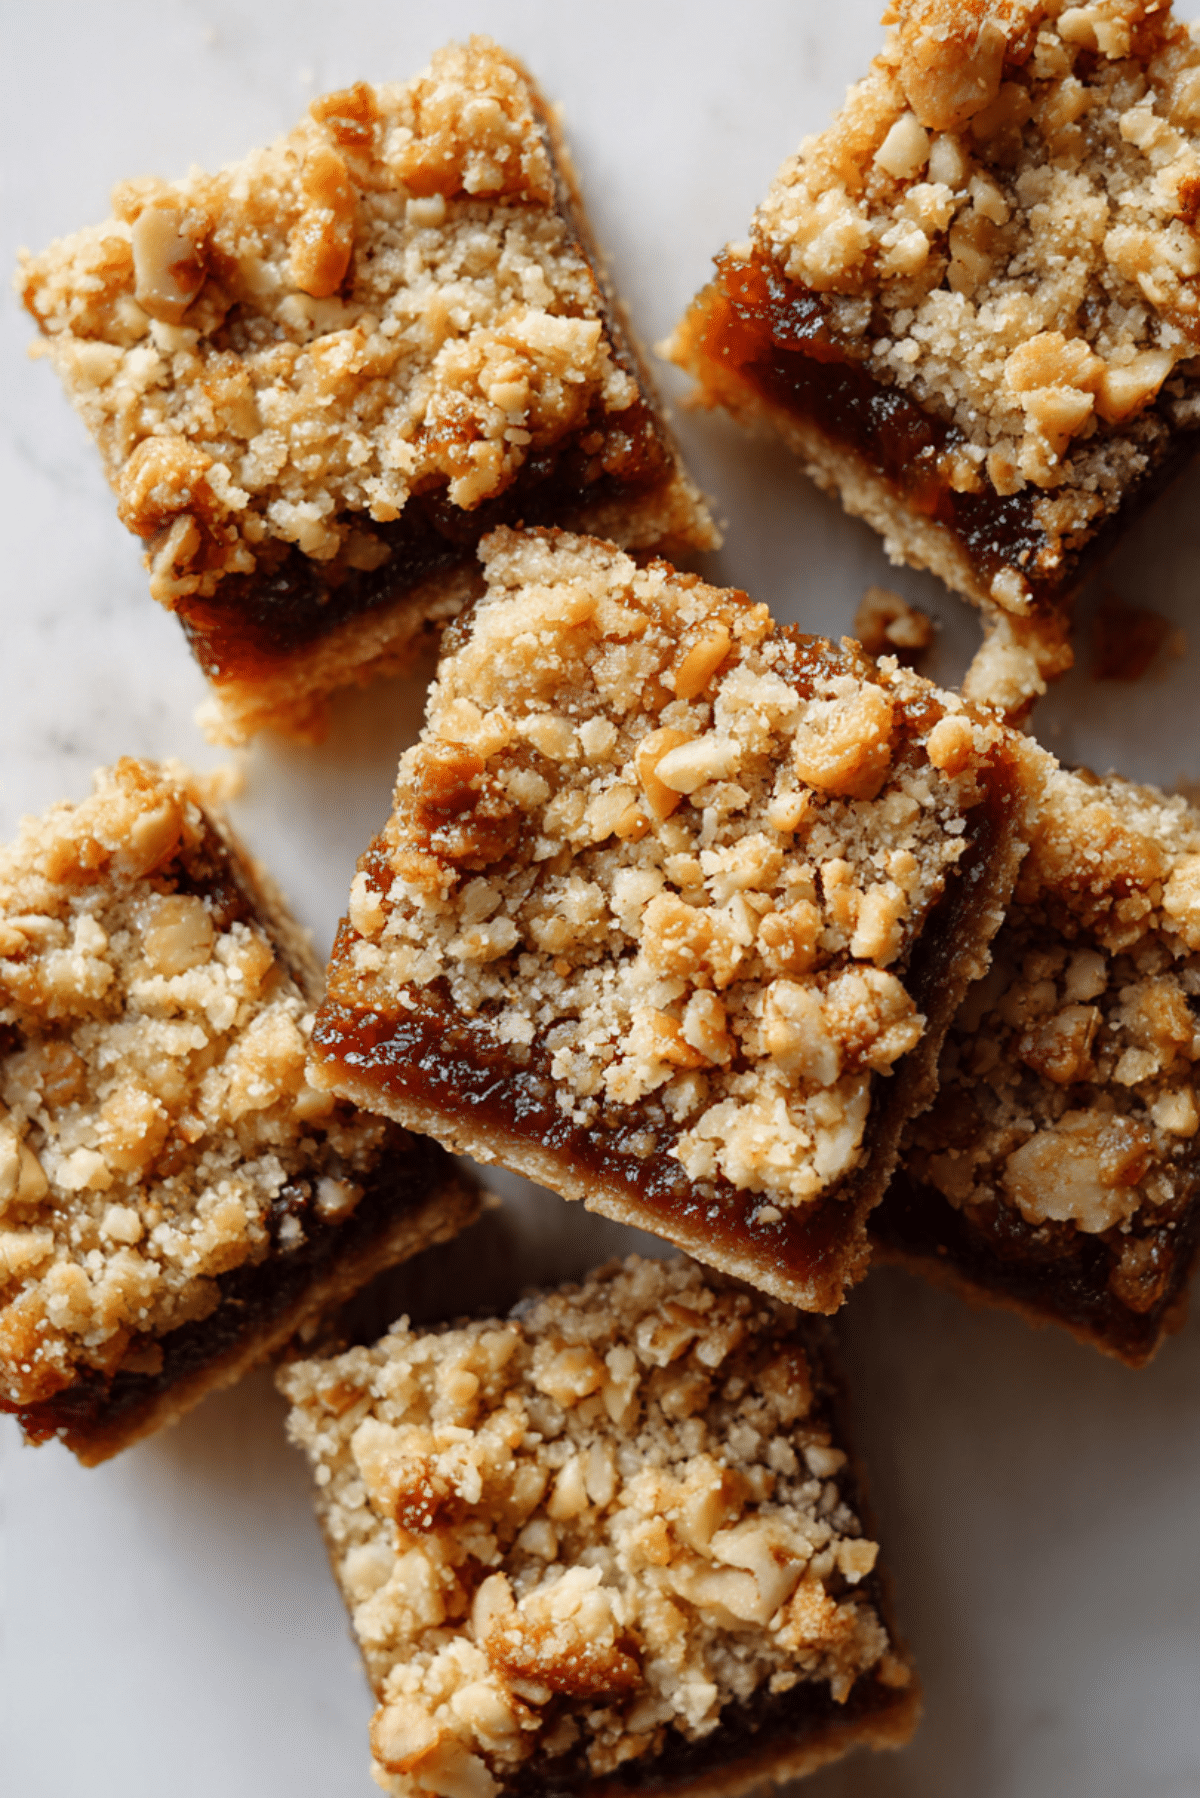
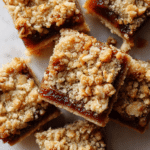
Orange Date Squares
There is something quietly comforting about slicing into a pan of Orange Date Squares. The scent of warm citrus and caramel like dates fills the kitchen, and suddenly everything feels a little softer, a little sweeter. The first bite gives you that tender oat crust, then the rich, almost buttery date filling kissed with fresh orange zest. Trust me, you’re going to love this. This one’s a total game changer for afternoon coffee breaks or cozy weekend baking.
A Sweet Treat That Feels Like a Warm Hug
Some desserts shout for attention, but these squares gently win you over. The combination of hearty oats, naturally sweet dates, and bright orange creates a balance that feels both wholesome and indulgent. The crust is sturdy yet tender, the filling smooth and slightly sticky, and the topping adds just enough crumble to keep every bite interesting.
And now let’s dive a little deeper into where this comforting classic comes from.
A Little Backstory From Old Fashioned Baking Traditions
Date squares have long been part of home baking traditions, especially in North America and parts of Europe where pantry baking was essential. Dates were treasured for their natural sweetness and long shelf life, making them perfect for simple desserts that did not rely heavily on refined sugar.
Adding orange is a beautiful twist that likely came later, as citrus became more accessible. The brightness of orange zest and juice cuts through the dense sweetness of dates, creating a more layered flavor profile. Let me tell you, it’s worth every bite.
Why This Recipe Deserves a Spot in Your Kitchen
Before we roll up our sleeves, let’s talk about why this bake is such a reliable favorite.
Versatile: These squares work as a snack, dessert, or even a sweet addition to a brunch spread. They feel right at home anywhere.
Budget-Friendly: Dates, oats, flour, and butter are pantry staples. You get maximum flavor without expensive ingredients.
Quick and Easy: The steps are simple and straightforward, perfect for both beginners and seasoned bakers.
Customizable: You can adjust the sweetness, add nuts, or experiment with spices like cinnamon.
Crowd-Pleasing: That chewy date center and buttery oat crumble win people over every single time.
Make-Ahead Friendly: They slice beautifully once cooled and store well for days.
Great for Leftovers: If you somehow have any left, they taste even better the next day.
Pro Tips From My Kitchen to Yours
A few insider touches make all the difference here.
- Use fresh orange zest for the brightest flavor.
- Chop dates evenly so the filling cooks down smoothly.
- Press the crust firmly into the pan so it holds together when sliced.
- Let the squares cool completely before cutting for clean edges.
Kitchen Tools That Make It Easy
You do not need anything fancy, just a few essentials.
8×8 inch baking pan: This size gives the perfect thickness for each layer.
Saucepan: For gently cooking the date and orange filling.
Mixing bowl: To combine the oat crust and crumble topping.
Zester or fine grater: For fresh orange zest.
Parchment paper: Helps lift the whole slab out easily for slicing.
Ingredients You Will Need For These Orange Date Squares
The beauty of this dessert lies in how these simple ingredients work together.
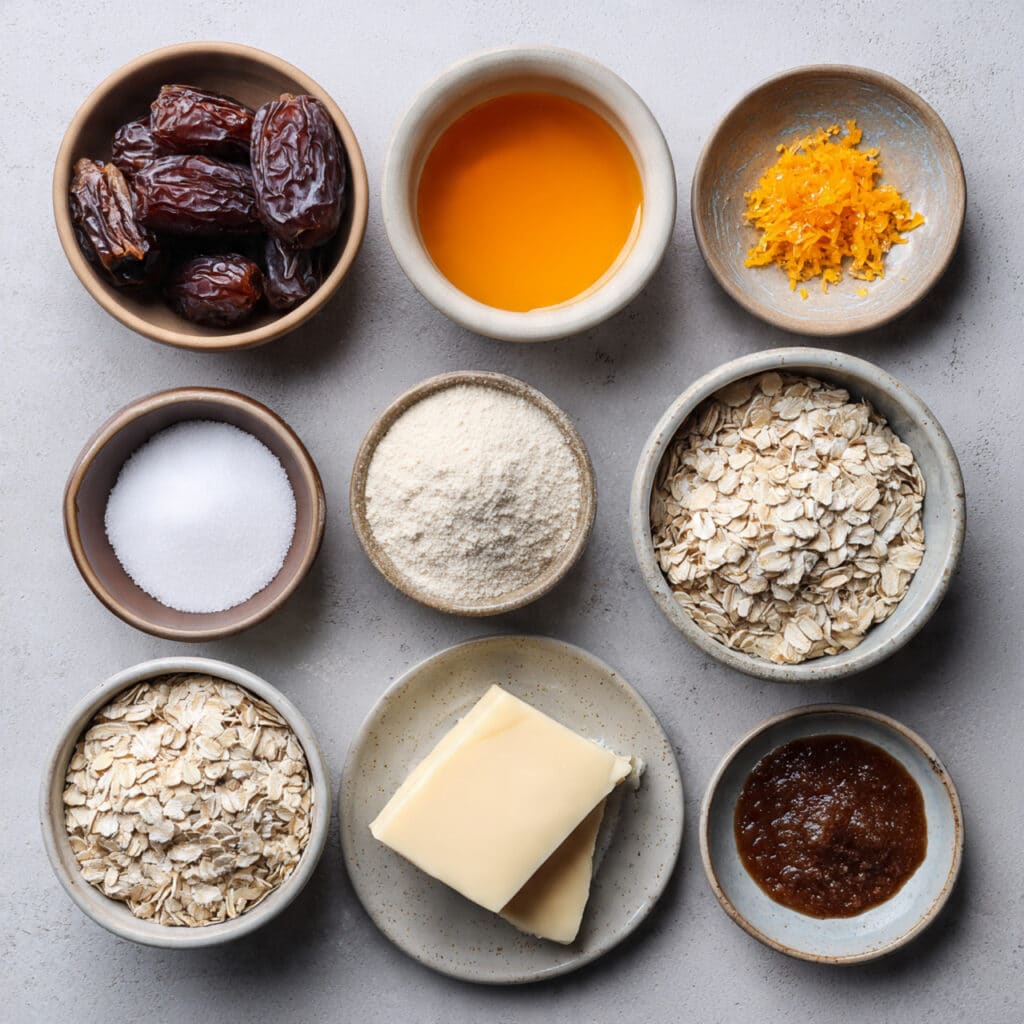
- Pitted Dates: 2 cups, about 300 grams, finely chopped, these create the naturally sweet, rich filling.
- Fresh Orange Juice: 1 cup, adds brightness and softens the dates while cooking.
- Orange Zest: 1 tablespoon, freshly grated, enhances the citrus aroma.
- Granulated Sugar: 2 tablespoons, balances the tartness of the orange.
- All Purpose Flour: 1 cup, 120 grams, forms the structure of the crust.
- Old Fashioned Rolled Oats: 1 cup, 90 grams, gives texture and heartiness.
- Brown Sugar: 1 cup, packed, adds moisture and a caramel note.
- Unsalted Butter: 1 cup, 226 grams, melted, binds the crust and adds richness.
- Baking Soda: 1 teaspoon, ensures a tender crumb.
- Salt: 1 quarter teaspoon, enhances all the flavors.
Flexible Swaps If You Need Them
Baking should feel relaxed, not stressful.
All Purpose Flour: Use whole wheat flour for a nuttier flavor.
Brown Sugar: Coconut sugar works for a slightly deeper taste.
Unsalted Butter: Substitute with melted coconut oil for a dairy free version.
Rolled Oats: Quick oats can be used, though the texture will be softer.
Spotlight On Two Key Ingredients
Pitted Dates: These are the heart of the filling. When cooked gently with orange juice, they turn into a thick, jam like layer that feels both decadent and wholesome.
Orange Zest: Just a tablespoon transforms the flavor. It lifts the sweetness and adds a fragrant citrus note that makes the squares feel lighter.
Let’s Bake Together
Now the fun really begins. Here are the steps you’re going to follow.
- Preheat Your Equipment: Preheat your oven to 350 degrees Fahrenheit, 175 degrees Celsius. Line an 8×8 inch baking pan with parchment paper.
- Combine Ingredients: In a saucepan over medium heat, combine chopped dates, orange juice, orange zest, and granulated sugar. Cook for 8 to 10 minutes, stirring often, until thick and jam like. Remove from heat and let cool slightly.
- Prepare Your Cooking Vessel: In a mixing bowl, stir together flour, rolled oats, brown sugar, baking soda, and salt.
- Assemble the Dish: Pour in melted butter and mix until crumbly. Press half of the mixture firmly into the prepared pan. Spread the date filling evenly over the base. Sprinkle the remaining crumble mixture on top and gently press down.
- Cook to Perfection: Bake for 30 minutes, or until the top is lightly golden and set.
- Finishing Touches: Allow the pan to cool completely at room temperature before lifting out and slicing into squares.
- Serve and Enjoy: Slice into even squares and enjoy with tea or coffee.
Texture and Flavor Magic in Every Bite
What makes these squares so satisfying is the contrast. The bottom crust is firm and buttery, the middle layer is soft, sticky, and deeply sweet, while the top crumble adds a delicate crunch. The orange brightens the dense date flavor, keeping each bite balanced instead of overly sweet.
Helpful Baking Tips for Success
If you want perfect results every time, keep these in mind.
- Let the filling cool slightly before spreading so it does not soak into the crust.
- Press the base layer firmly so it holds together.
- Use parchment paper for easy removal.
- Chill briefly before slicing for sharper edges.
Common Mistakes and How to Avoid Them
Even simple bakes can trip you up, but you’ve got this.
- Overcooking the filling can make it too thick, cook just until jam like.
- Skipping the cooling time can cause crumbly slices.
- Not pressing the crust firmly enough can lead to uneven layers.
Nutrition Snapshot
Servings: 9
Calories per serving: 320
Note: These are approximate values.
Time Breakdown for Easy Planning
Prep Time: 15 minutes
Cook Time: 30 minutes
Total Time: 45 minutes
Make Ahead and Storage Guide
You can prepare the filling a day in advance and store it in the fridge. Once baked, keep the squares in an airtight container at room temperature for up to 3 days or refrigerate for up to 1 week. They freeze beautifully for up to 2 months, just wrap tightly and thaw at room temperature before serving.
Serving Ideas to Elevate the Experience
Serve slightly warmed with a scoop of vanilla ice cream for dessert, or enjoy chilled with a cup of black coffee. A light dusting of powdered sugar can add a pretty finish.
Creative Ways to Use Leftovers
Crumble a square over yogurt for breakfast, layer pieces with whipped cream for a quick parfait, or pack them into lunchboxes for a sweet surprise.
Extra Tips for Flavor and Ease
Add a pinch of cinnamon to the crumble for warmth. Toast the oats lightly before mixing for deeper flavor. Always zest the orange before juicing, it makes life easier.
Make It Visually Stunning
Cut into uniform squares and wipe the knife between slices for clean edges. Arrange on a simple white plate and let the golden layers shine.
Fun Variations to Try
- Add chopped walnuts or pecans to the topping.
- Stir a pinch of ground ginger into the filling.
- Replace half the dates with dried figs.
- Add a thin drizzle of orange glaze on top.
- Mix in shredded coconut for a tropical touch.
FAQ’s
Q1: Can I use fresh dates instead of packaged ones?
Yes, just make sure they are pitted and chopped finely.
Q2: Can I reduce the sugar?
You can slightly reduce the brown sugar, but the texture may change.
Q3: How do I know when they are done?
The top should be lightly golden and set.
Q4: Can I double the recipe?
Yes, use a 9×13 inch pan and adjust baking time slightly.
Q5: Do I need to refrigerate them?
Not necessarily, but refrigeration extends freshness.
Q6: Can I make them gluten free?
Use a gluten free flour blend and certified gluten free oats.
Q7: Why is my filling too runny?
It likely needed more cooking time to thicken.
Q8: Can I add nuts?
Absolutely, chopped nuts add wonderful crunch.
Q9: How should I cut them neatly?
Let them cool completely and use a sharp knife.
Q10: Are they overly sweet?
No, the orange balances the natural sweetness beautifully.
Conclusion
There is something deeply satisfying about baking a pan of Orange Date Squares from scratch. The aroma, the golden crumble, the bright citrus note, it all comes together in the most comforting way. Trust me, once you try these, they will become a regular in your kitchen. So preheat that oven and let’s get baking.
PrintOrange Date Squares
Soft, chewy Orange Date Squares layered with a buttery oat crust, a rich citrus-kissed date filling, and a golden crumb topping. Perfect for coffee breaks, brunch tables, or an anytime sweet treat.
Ingredients
- 2 cups (300 grams) pitted dates, finely chopped
- 1 cup fresh orange juice
- 1 tablespoon fresh orange zest
- 2 tablespoons granulated sugar
- 1 cup (120 grams) all purpose flour
- 1 cup (90 grams) old fashioned rolled oats
- 1 cup packed brown sugar
- 1 cup (226 grams) unsalted butter, melted
- 1 teaspoon baking soda
- 1/4 teaspoon salt
Instructions
- Preheat oven to 350 degrees Fahrenheit (175 degrees Celsius) and line an 8×8 inch baking pan with parchment paper.
- In a saucepan over medium heat, combine chopped dates, orange juice, orange zest, and granulated sugar. Cook for 8 to 10 minutes, stirring often, until thick and jam like. Remove from heat and let cool slightly.
- In a mixing bowl, stir together flour, rolled oats, brown sugar, baking soda, and salt.
- Pour in melted butter and mix until crumbly. Press half of the mixture firmly into the prepared pan.
- Spread the date filling evenly over the base.
- Sprinkle the remaining crumble mixture on top and gently press down.
- Bake for 30 minutes, or until the top is lightly golden and set.
- Allow to cool completely before lifting from the pan and slicing into 9 squares.
Notes
- Let the filling cool slightly before spreading to prevent a soggy crust.
- Press the base layer firmly so the squares hold together when sliced.
- For cleaner cuts, chill briefly before slicing and wipe the knife between cuts.
- Add a pinch of cinnamon to the crumble for extra warmth if desired.