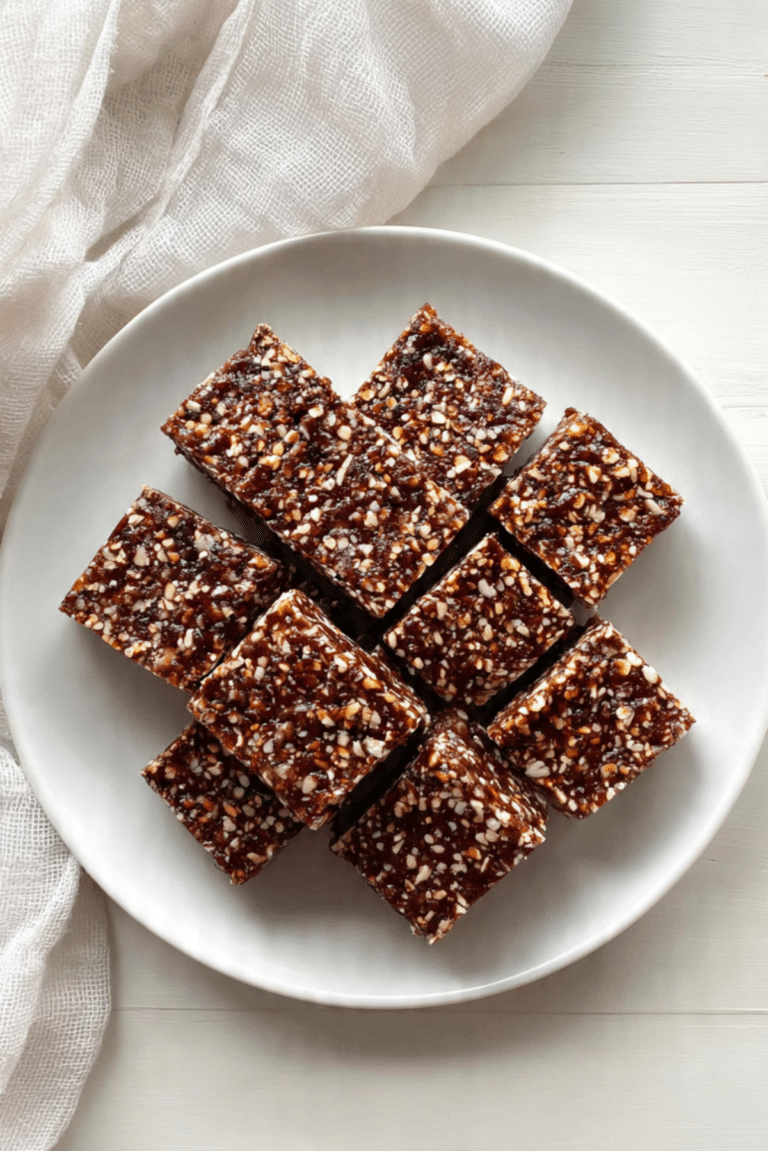
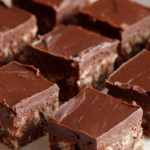
No Bake Chocolate Biscuit Bars Easy
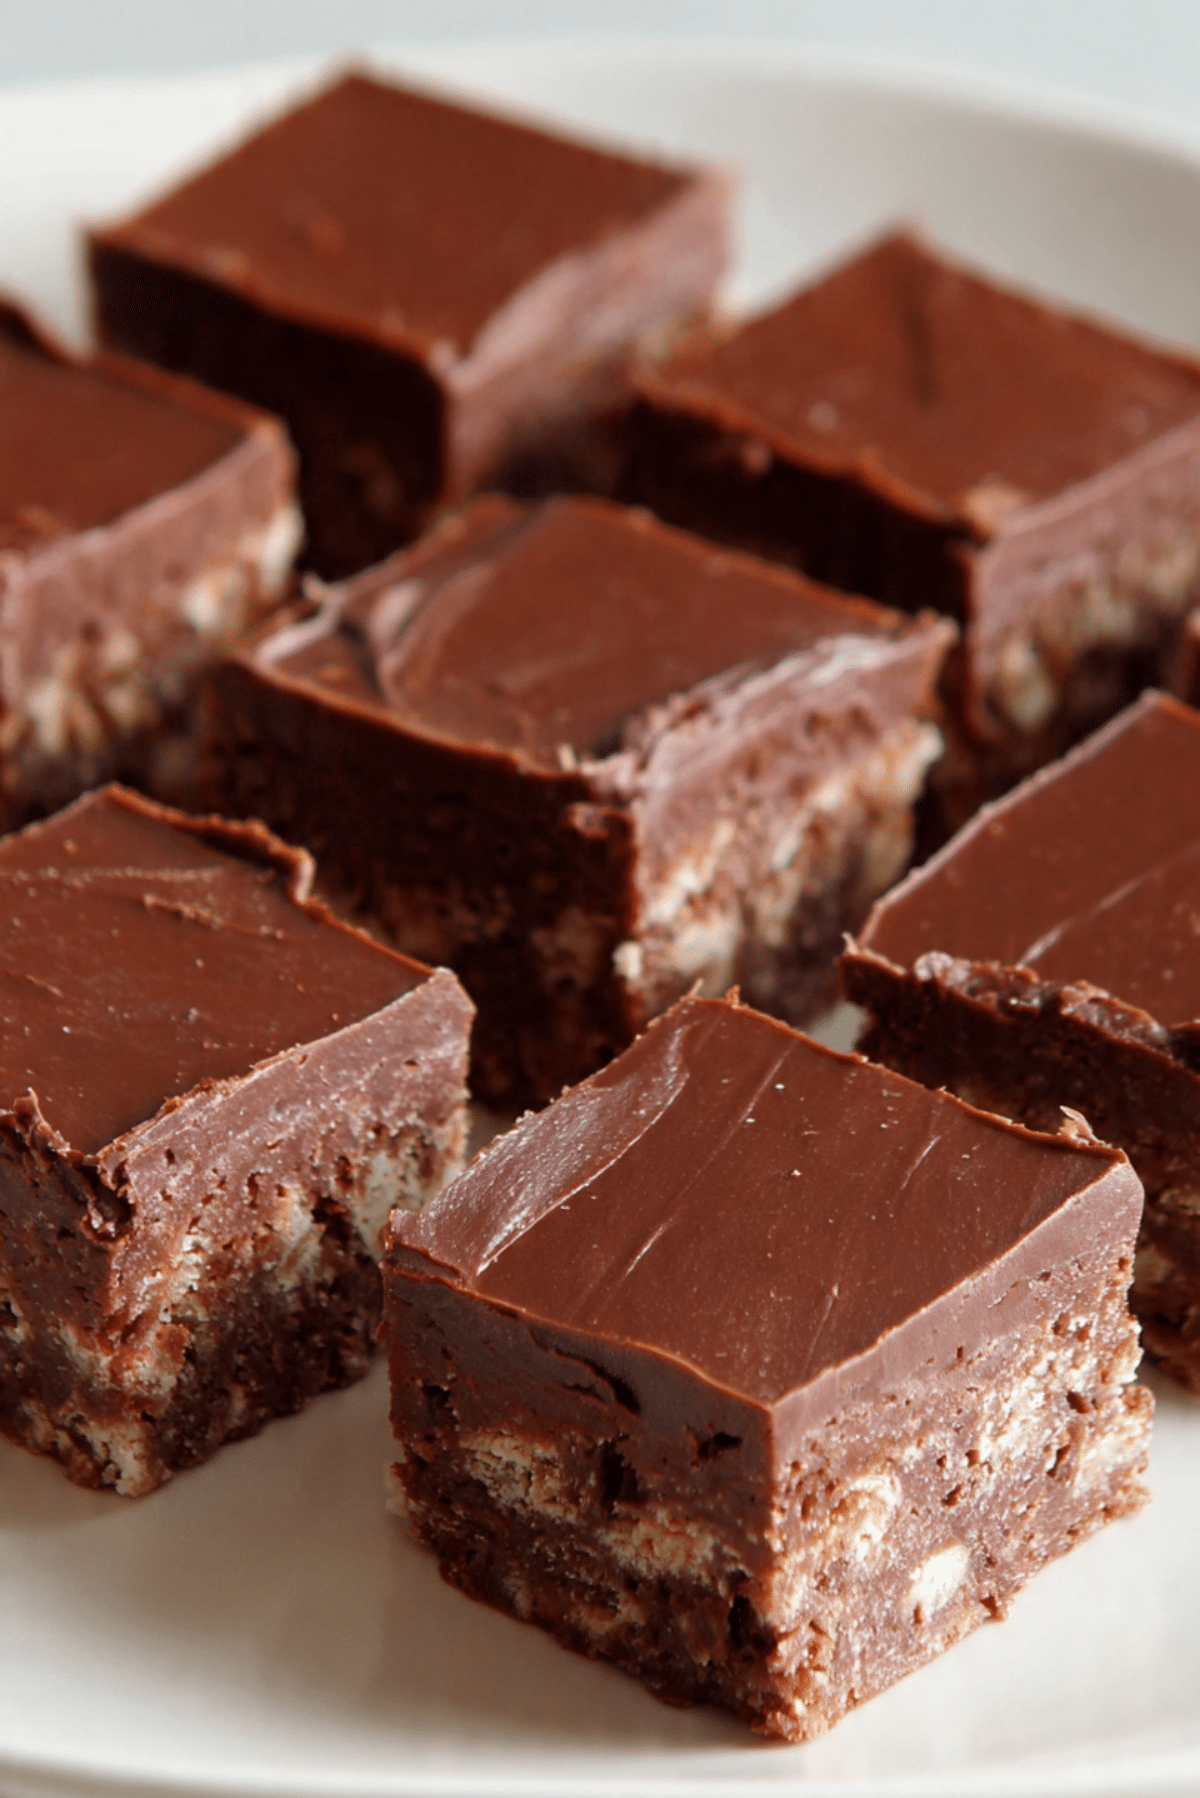
There is something nostalgic about crushing biscuits and mixing them into melted chocolate. It feels simple, almost playful, and yet the result tastes like something you would find in a cozy bakery window. No Bake Chocolate Biscuit Bars Easy is the kind of dessert you make when you want maximum reward with minimal effort. The texture is rich and fudgy, with crunchy biscuit pieces tucked into every bite. And the best part, there is no oven involved. Trust me, you are going to love this.
Why These Chocolate Bars Are Pure Comfort in Every Bite
Some desserts try too hard, but these bars keep it beautifully simple. You get deep chocolate flavor, a satisfying crunch from the biscuits, and a smooth glossy top that makes them look polished and irresistible. They slice neatly, travel well, and disappear quickly. This one is a total game changer for last minute gatherings or late night sweet cravings.
A Sweet Treat With Old School Charm
Chocolate biscuit desserts have been loved for generations across Europe and beyond. They were often made as a quick refrigerator cake, using pantry staples and whatever biscuits were on hand. Over time, different variations popped up, but the heart of it stayed the same, crushed biscuits folded into melted chocolate and set until firm. It is humble, nostalgic, and absolutely timeless.
Why This Recipe Is Always a Good Idea
Let me tell you why these bars deserve a permanent spot in your dessert list.
Versatile: You can serve them at parties, pack them for picnics, or keep them chilled for sweet snacking.
Budget-Friendly: Simple ingredients like biscuits, cocoa, and butter make this easy on your wallet.
Quick and Easy: No baking, no complicated steps, just mix and chill.
Customizable: Add nuts, dried fruit, or different chocolate types to change the flavor.
Crowd-Pleasing: Both kids and adults go back for seconds.
Make-Ahead Friendly: They actually taste better after chilling overnight.
Great for Leftovers: Store in the fridge and enjoy for several days.
Pro Tips for Perfect No Bake Bars
A few small tricks will give you that bakery style finish.
- Use good quality chocolate for deeper flavor.
- Crush the biscuits into uneven pieces for better texture.
- Press the mixture firmly into the pan to avoid crumbly bars.
- Chill long enough so slicing is clean and neat.
Kitchen Tools That Make It Easy
You do not need much, which is part of the charm.
Mixing Bowl: For combining the chocolate mixture and biscuits.
Saucepan: To gently melt the butter and chocolate together.
Spatula: Helps fold everything evenly.
Square Baking Pan: Keeps the bars evenly shaped for slicing.
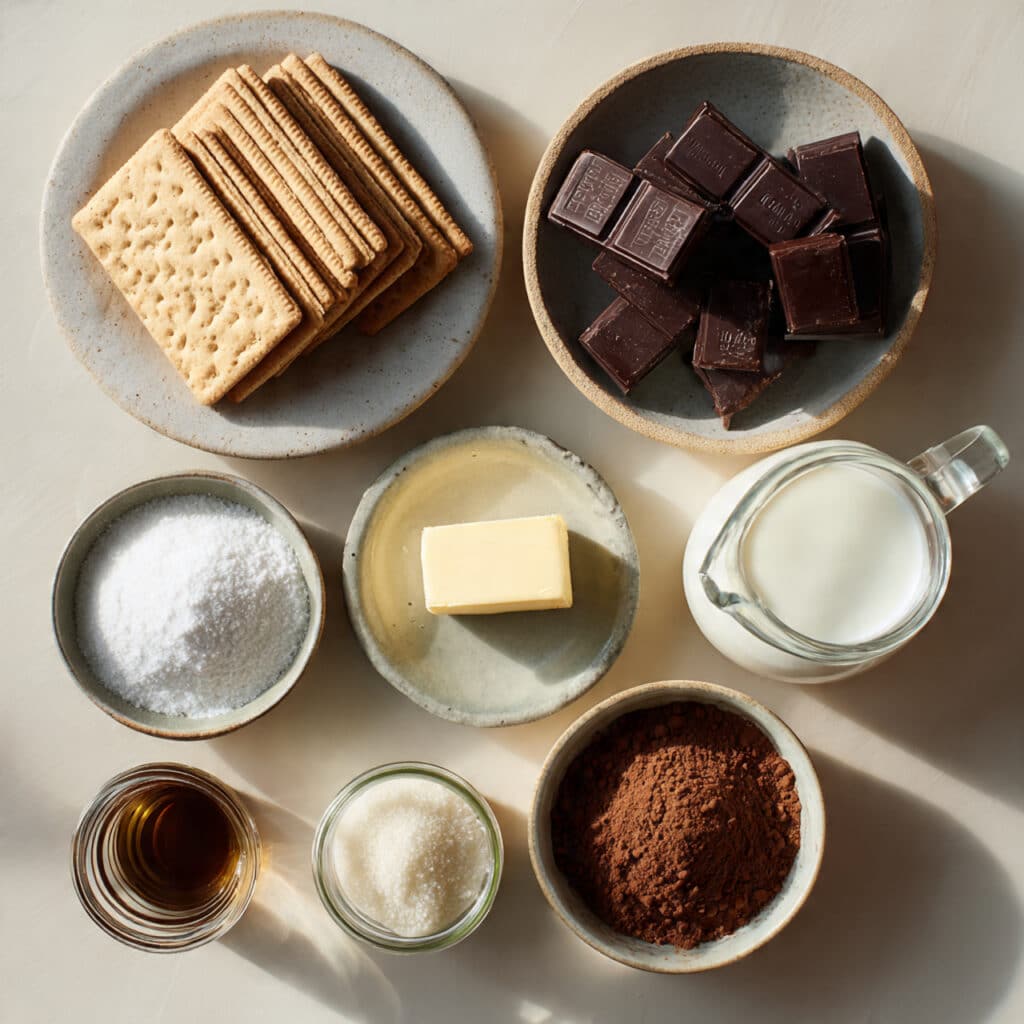
Ingredients You Will Need For This Recipe
Each ingredient plays an important role in building flavor and texture.
- Digestive Biscuits: 2 cups crushed, about 200 grams, they add crunch and structure.
- Semi Sweet Chocolate: 2 cups chopped, about 340 grams, forms the rich base.
- Unsalted Butter: 1 cup, 226 grams, creates smoothness and helps set the bars.
- Granulated Sugar: 1/2 cup, 100 grams, adds sweetness.
- Unsweetened Cocoa Powder: 1/4 cup, 25 grams, deepens the chocolate flavor.
- Vanilla Extract: 1 teaspoon, enhances overall sweetness.
- Milk: 1/4 cup, 60 milliliters, helps create a smooth mixture.
Easy Ingredient Substitutions
You can adjust based on what you have on hand.
Digestive Biscuits: Graham crackers.
Semi Sweet Chocolate: Dark chocolate or milk chocolate.
Milk: Heavy cream.
Granulated Sugar: Brown sugar for a deeper note.
Spotlight on the Chocolate
Semi Sweet Chocolate: This is the backbone of the bars. It melts smoothly and balances sweetness with richness, giving that perfect fudgy bite.
Let Us Bring It All Together
Now let us dive into the process, and you will see just how simple it is.
- Preheat Your Equipment: No oven needed, but line an 8 inch square pan with parchment paper.
- Combine Ingredients: In a saucepan over low heat, melt butter and chopped chocolate together. Stir in sugar, cocoa powder, milk, and vanilla until smooth.
- Prepare Your Cooking Vessel: Ensure the lined pan is ready on a flat surface.
- Assemble the Dish: Fold crushed biscuits into the chocolate mixture until evenly coated.
- Cook to Perfection: Pour the mixture into the prepared pan and press down firmly into an even layer.
- Finishing Touches: Smooth the top with a spatula. Refrigerate for at least 2 hours until firm.
- Serve and Enjoy: Lift from the pan, slice into bars, and enjoy that rich chocolate crunch.
Texture and Flavor That Keeps You Coming Back
As the bars chill, the chocolate firms up into a dense, fudgy base. The biscuit pieces stay slightly crisp, giving you that beautiful contrast. You taste deep cocoa notes balanced with sweetness and a hint of vanilla. Let me tell you, it is worth every bite.
Helpful Tips for Success
A few reminders to make them perfect.
- Chill fully before slicing.
- Use a sharp knife wiped clean between cuts.
- Store in the refrigerator to keep firm.
What to Avoid When Making These Bars
Even simple recipes have small pitfalls.
- Do not overheat the chocolate, melt gently.
- Avoid crushing biscuits too finely.
- Do not skip lining the pan.
Nutrition Facts Overview
Servings: 12
Calories per serving: 320
Note: These are approximate values.
Preparation Time Details
Prep Time: 15 minutes
Cook Time: 5 minutes
Total Time: 20 minutes plus chilling
Make Ahead and Storage Tips
Store in an airtight container in the refrigerator for up to five days. You can freeze them for up to two months. Thaw in the fridge before serving.
How to Serve These Chocolate Bars
Serve chilled with coffee, tea, or a glass of milk. They also make a lovely addition to dessert platters.
Creative Leftover Ideas
Crumble over ice cream. Chop into small cubes and mix into yogurt. Or use as a base for a layered dessert.
Additional Tips for Even Better Results
Sprinkle a pinch of sea salt on top before chilling for contrast. You can also drizzle melted white chocolate over the top for decoration.
Make It a Showstopper
Cut into neat squares and stack slightly for presentation. A light dusting of cocoa powder adds a professional finish.
Variations to Try
- Add chopped toasted nuts for crunch.
- Mix in mini marshmallows for a rocky road style twist.
- Add shredded coconut for extra texture.
- Swirl in peanut butter before chilling.
FAQ’s
Q1: Can I use different biscuits?
Yes, most plain cookies work well.
Q2: Do I need to bake at all?
No, chilling sets the bars completely.
Q3: Can I make it less sweet?
Use dark chocolate and reduce sugar slightly.
Q4: How long do they need to chill?
At least 2 hours for firm slicing.
Q5: Can I double the recipe?
Yes, use a larger pan.
Q6: Can I use plant based butter?
Yes, it works well.
Q7: Why are my bars crumbly?
They may not have been pressed firmly enough.
Q8: Can I add dried fruit?
Yes, chopped dried fruit blends nicely.
Q9: How should I store them?
Keep refrigerated in an airtight container.
Q10: Can I cut them small for parties?
Absolutely, they are perfect bite sized.
Conclusion
No Bake Chocolate Biscuit Bars Easy prove that incredible desserts do not need complicated steps. With simple ingredients and no oven required, you get a rich, crunchy, chocolate packed treat that everyone will adore. Once you make them, you will find yourself coming back to this recipe again and again.
PrintNo Bake Chocolate Biscuit Bars Easy
Rich and fudgy no bake chocolate biscuit bars packed with crunchy biscuit pieces and topped with a smooth glossy chocolate layer, made with simple pantry ingredients and no oven required.
Ingredients
- 2 cups digestive biscuits, crushed, about 200 grams
- 2 cups semi sweet chocolate, chopped, about 340 grams
- 1 cup unsalted butter, 226 grams
- 1/2 cup granulated sugar, 100 grams
- 1/4 cup unsweetened cocoa powder, 25 grams
- 1 teaspoon vanilla extract
- 1/4 cup milk, 60 milliliters
Instructions
- Line an 8 inch square pan with parchment paper and set aside.
- In a saucepan over low heat, melt the unsalted butter and chopped semi sweet chocolate together, stirring gently until smooth.
- Stir in the granulated sugar, unsweetened cocoa powder, milk, and vanilla extract until fully combined and glossy.
- Remove from heat and fold in the crushed digestive biscuits, mixing until all pieces are evenly coated.
- Pour the mixture into the prepared pan and press down firmly into an even layer using a spatula.
- Smooth the top and refrigerate for at least 2 hours, or until fully firm.
- Lift from the pan using the parchment paper and slice into 12 bars before serving.
Notes
- Crush the biscuits into uneven chunks for better texture contrast.
- Melt the chocolate gently over low heat to prevent scorching.
- Press the mixture firmly into the pan to avoid crumbly bars.
- Store in the refrigerator to maintain firmness and clean slices.