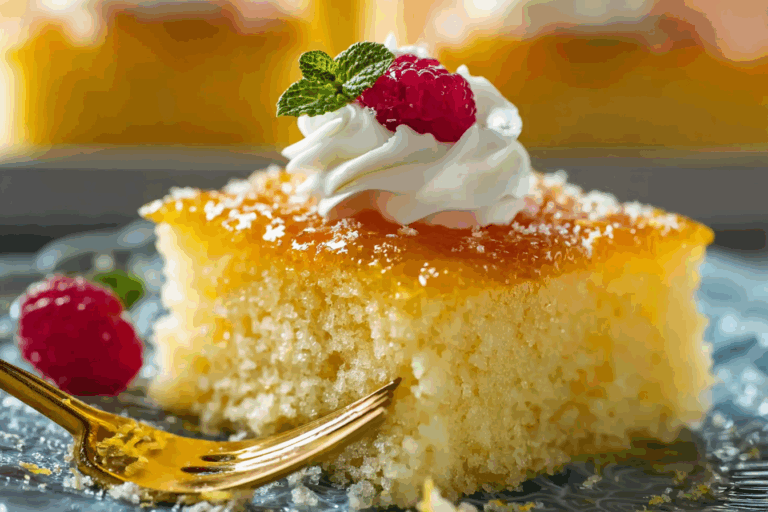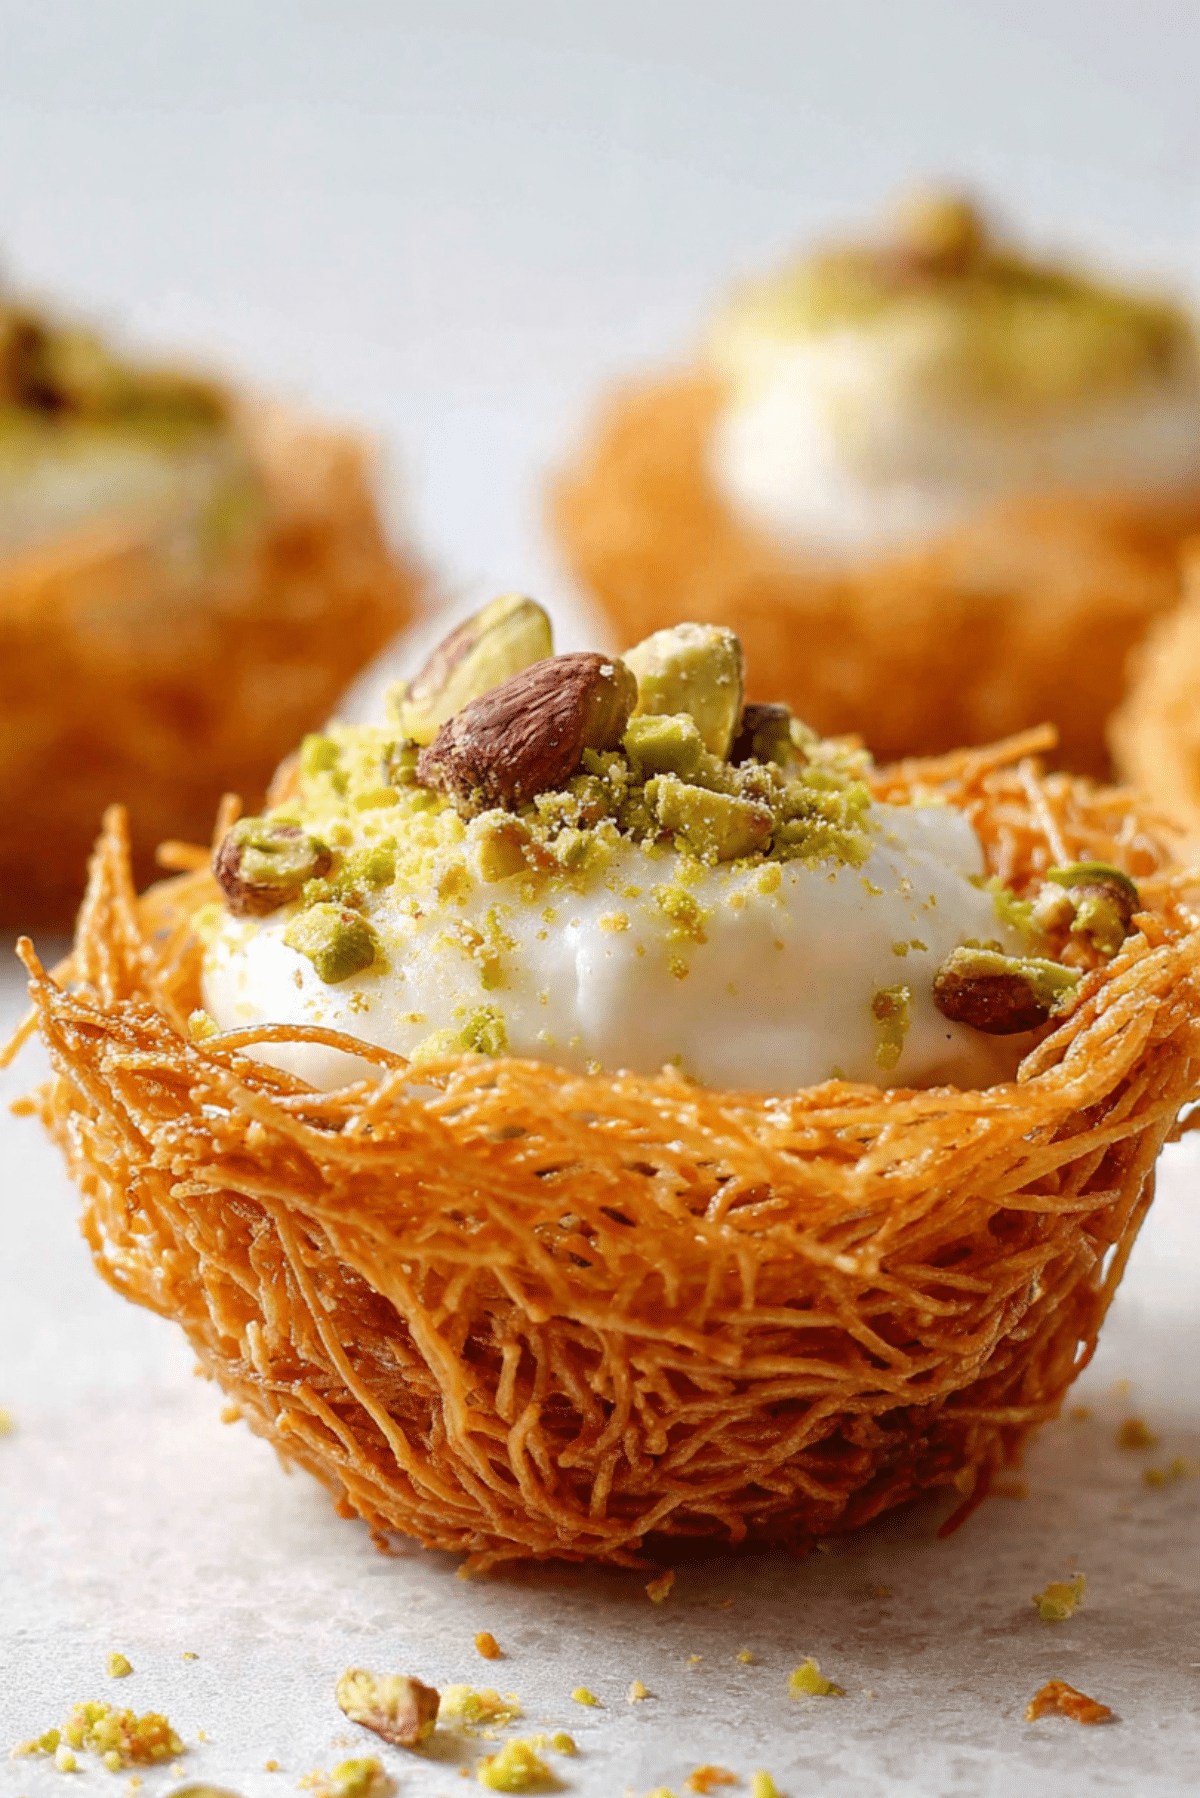
Lotus Pistachio Kunafa Cups
There is something magical about the moment crispy golden strands of kunafa meet a creamy, nutty filling. The first bite gives you that delicate crunch, then slowly melts into smooth lotus spread and rich pistachio. Trust me, you are going to love this. These little cups are elegant enough for celebrations yet simple enough to make when you are craving something sweet and comforting at home.
Why These Little Cups Steal the Show Every Time
You know those desserts that make people pause mid conversation just to take another bite. This is one of them. The contrast between crunchy pastry and silky filling makes every mouthful interesting. They look impressive on a serving platter, yet they are surprisingly easy to prepare. Let me tell you, it is worth every bite.
A Sweet Treat with Middle Eastern Roots
Kunafa has deep roots in Middle Eastern cuisine, where it is often served warm and soaked in fragrant syrup. Traditionally it is layered with cheese or cream, then baked until golden. Over time, creative twists began appearing, adding modern flavors like chocolate and lotus spread. These cups are a playful version of that heritage dessert, shaped individually for easy serving while still honoring the crisp texture and nutty richness that make kunafa so beloved.
Why You Can Always Count on This Dessert
Before we step into the kitchen, let me share why this one is a total game changer.
Versatile: These cups fit perfectly at dinner parties, holiday tables, or casual family nights. Dress them up or keep them simple.
Budget-Friendly: Most ingredients are pantry staples or easy to find, and a little goes a long way.
Quick and Easy: The steps are straightforward, and the oven does most of the work.
Customizable: You can adjust the filling, sweetness, or toppings to match your taste.
Crowd-Pleasing: Crunchy, creamy, nutty, sweet, it checks every box.
Make-Ahead Friendly: You can prepare them in advance and fill before serving.
Great for Leftovers: If you somehow have leftovers, they stay delicious the next day.
Chef Level Secrets for Perfect Crispiness
Getting that ideal crunch is easier than you think.
- Always separate the kunafa strands well before mixing with butter so they toast evenly.
- Use melted butter generously but evenly, every strand should be lightly coated.
- Press the mixture firmly into the muffin tin to help the cups hold their shape.
- Bake until deeply golden, not pale, because color equals flavor here.
The Kitchen Tools That Make It Effortless
Before we dive in, gather these essentials.
Muffin Tin: Shapes the kunafa into neat individual cups.
Mixing Bowl: For coating the pastry strands evenly with butter.
Spoon or Small Glass: Helps press the kunafa firmly into the tin.
Oven: Bakes everything to crispy perfection.
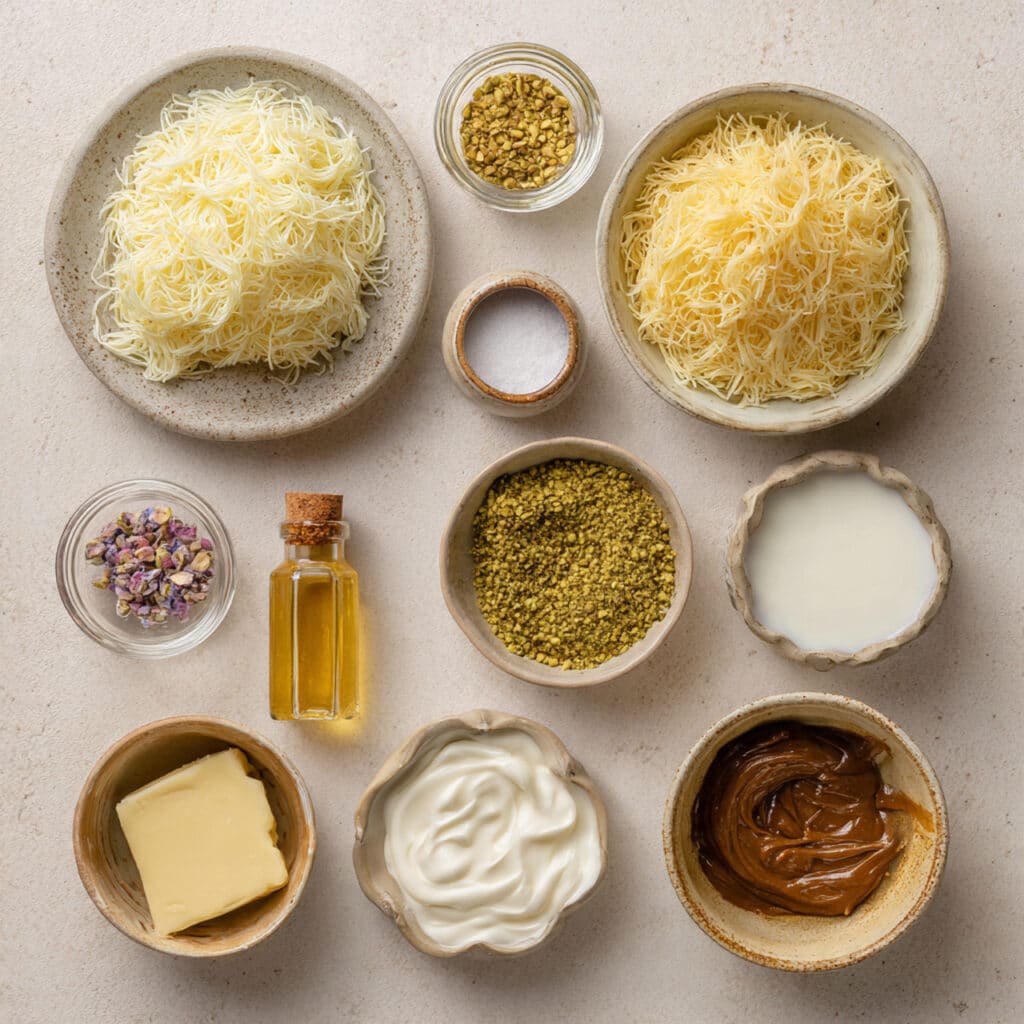
Ingredients That Bring It All Together
The beauty of this dessert lies in how each ingredient complements the other.
- Shredded Kunafa Dough: 300 grams, finely separated, forms the crispy golden base.
- Unsalted Butter: 150 grams, melted, coats the strands and ensures rich flavor and crunch.
- Lotus Biscoff Spread: 1 cup, creamy and smooth, adds deep caramelized sweetness.
- Sweetened Condensed Milk: 2 tablespoons, blended with the lotus for extra silkiness.
- Finely Ground Pistachios: 1 cup, adds nutty flavor and vibrant green color on top.
- Sugar Syrup: 1 cup, lightly drizzled after baking for balanced sweetness.
- Rose Water: 1 teaspoon, mixed into the syrup for subtle floral aroma.
Easy Swaps If You Need Them
Sometimes you work with what you have.
Lotus Spread: Substitute with hazelnut spread for a chocolate twist.
Pistachios: Use crushed almonds or walnuts.
Rose Water: Replace with a splash of vanilla extract.
The Stars of the Show
Let us pause and appreciate the heroes here.
Kunafa Dough: Those delicate strands crisp beautifully in the oven, creating the signature texture.
Pistachios: Their earthy nuttiness balances the sweetness and gives that classic finish.
Let Us Bake These Beauties Together
Now let us dive into the process, step by step.
- Preheat Your Equipment: Preheat your oven to 180 degrees Celsius and lightly grease a 12 cup muffin tin.
- Combine Ingredients: In a large bowl, gently separate the kunafa strands and mix thoroughly with the melted butter until evenly coated.
- Prepare Your Cooking Vessel: Divide the buttered kunafa into the muffin tin cavities and press firmly along the bottom and sides to create cup shapes.
- Assemble the Dish: Bake for 20 minutes or until golden brown and crisp. Meanwhile, mix lotus spread with sweetened condensed milk until smooth.
- Cook to Perfection: Once baked, remove from oven and immediately drizzle lightly with prepared sugar syrup mixed with rose water.
- Finishing Touches: Let the cups cool slightly, then fill each with a generous spoon of lotus cream and top with finely ground pistachios.
- Serve and Enjoy: Serve at room temperature and watch everyone reach for seconds.
The Texture and Flavor Experience
The first thing you notice is the crisp sound as you bite through the golden shell. Then comes the creamy lotus center, smooth and rich with caramel notes. The pistachios add a gentle crunch and a slightly earthy finish. It is a balance of textures and flavors that keeps you coming back for another bite.
Helpful Tips for Foolproof Results
A few small details make a big difference.
- Make sure the kunafa is fully thawed before using.
- Do not skip pressing the cups firmly, this prevents crumbling.
- Add syrup while the cups are hot so it absorbs properly.
Common Mistakes and How to Avoid Them
Even simple desserts can go wrong if rushed.
- Overbaking, which makes them too dark and slightly bitter. Keep an eye on color.
- Adding too much syrup, which can make them soggy. Drizzle lightly.
- Filling while too hot, which can thin the cream. Let them cool slightly first.
A Quick Look at the Nutrition
Servings: 12 cups
Calories per serving: 320
Note: These are approximate values.
Time Breakdown So You Can Plan Ahead
Prep Time: 20 minutes
Cook Time: 20 minutes
Total Time: 40 minutes
Make Ahead and Storage Guide
You can bake the cups a day ahead and store them in an airtight container at room temperature. Fill them the day you plan to serve for best texture. They can also be refrigerated for up to three days, though they are crispiest on day one. To refresh, warm briefly in the oven before filling.
How to Present Them Beautifully
Arrange them on a white platter and sprinkle a few extra pistachios on top for color. Pair with Arabic coffee or hot tea for a cozy serving idea.
Turn Leftovers into Something New
Crumble leftover cups over vanilla ice cream for a crunchy topping. You can also layer broken pieces with whipped cream in small glasses for a quick dessert parfait.
Extra Tips for Maximum Flavor
A tiny pinch of salt in the lotus filling enhances sweetness. Always use high quality pistachios for the freshest flavor.
Make Them Look Bakery Worthy
Use a piping bag to add the lotus filling neatly. Sprinkle pistachios evenly and wipe the edges of each cup before serving for a clean finish.
Fun Variations to Try
Add a thin layer of melted dark chocolate inside the cup before filling.
Mix crushed biscuits into the filling for extra texture.
Top with whole pistachio halves for a decorative touch.
Drizzle with extra lotus spread just before serving.
FAQ’s
Q1: Can I use frozen kunafa dough?
Yes, just thaw it completely and separate the strands before mixing with butter.
Q2: Can I make this without syrup?
You can, but the syrup adds moisture and traditional flavor.
Q3: How do I keep them crispy?
Store unfilled cups in an airtight container and fill just before serving.
Q4: Can I freeze them?
You can freeze the baked unfilled cups for up to one month.
Q5: Is rose water necessary?
It adds aroma, but you can use vanilla if preferred.
Q6: Can I reduce the sweetness?
Use less syrup and slightly less lotus spread.
Q7: What if I do not have a muffin tin?
You can shape them in small oven safe ramekins.
Q8: Can I make them larger?
Yes, use a larger mold and adjust baking time slightly.
Q9: How do I prevent sticking?
Grease the tin well before adding the pastry.
Q10: Can I add cheese like traditional kunafa?
Yes, but that creates a different style of dessert.
Conclusion
These golden cups bring together crisp texture, creamy sweetness, and nutty richness in the most satisfying way. They are simple to prepare yet feel special enough for any gathering. This one is a total game changer, and once you try it, it might just become your new favorite dessert to share.
PrintLotus Pistachio Kunafa Cups

Crispy golden kunafa cups filled with creamy lotus spread and topped with finely ground pistachios, offering the perfect balance of crunch, sweetness, and nutty richness in every bite.
Ingredients
- 300 grams shredded kunafa dough, finely separated
- 150 grams unsalted butter, melted
- 1 cup lotus Biscoff spread
- 2 tablespoons sweetened condensed milk
- 1 cup finely ground pistachios
- 1 cup sugar syrup
- 1 teaspoon rose water
Instructions
- Preheat oven to 180 degrees Celsius and lightly grease a 12 cup muffin tin.
- In a large bowl, gently separate the kunafa strands and mix thoroughly with the melted butter until evenly coated.
- Divide the buttered kunafa into the muffin tin cavities and press firmly along the bottom and sides to create cup shapes.
- Bake for 20 minutes or until golden brown and crisp.
- Mix lotus spread with sweetened condensed milk until smooth.
- Combine sugar syrup with rose water, then drizzle lightly over the hot baked cups.
- Allow cups to cool slightly, then fill each with lotus cream and top with finely ground pistachios.
- Serve at room temperature and enjoy.
Notes
- Make sure the kunafa is fully thawed before mixing with butter.
- Press the cups firmly to help them hold their shape after baking.
- Drizzle syrup lightly to prevent sogginess.
- Fill the cups once slightly cooled to maintain creamy texture.