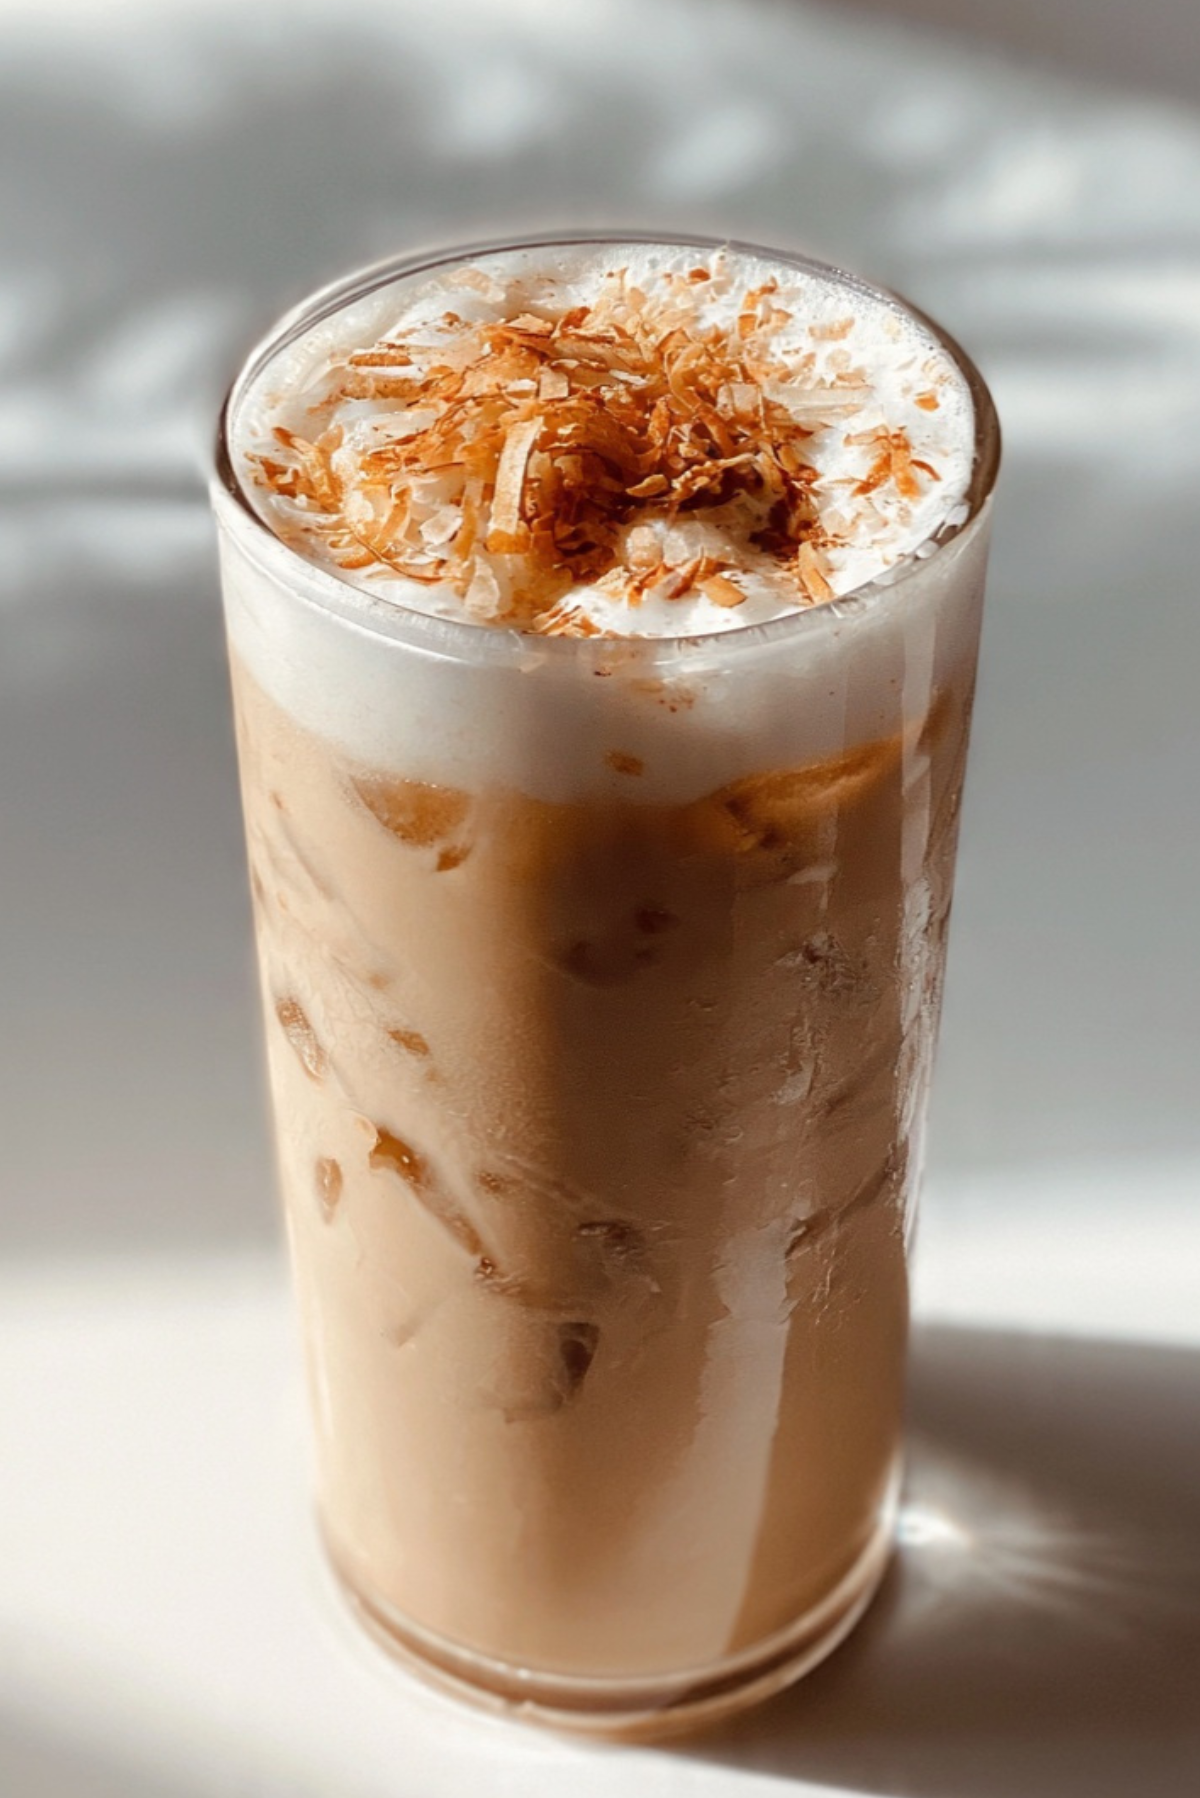
Iced Coconut Latte
There is something about a cold, creamy coffee on a warm afternoon that just resets your whole mood. Iced Coconut Latte is smooth, lightly sweet, and perfectly refreshing with that gentle tropical hint from coconut milk. The espresso blends into creamy layers over ice, creating those beautiful swirls that make you pause for a second before taking that first sip. And once you do, trust me, you’re going to love this. It feels like your favorite coffee shop treat, but made right in your own kitchen.
Why This Chilled Coffee Feels Like a Mini Vacation
Some drinks just feel special, and this is one of them. The rich espresso balances beautifully with the natural sweetness of coconut milk, while the ice keeps it crisp and refreshing. It is creamy without feeling heavy, sweet without being overpowering. And now let’s dive into how this tropical twist on a classic latte became so popular.
The Story Behind This Tropical Coffee Twist
Coconut milk has long been used in Southeast Asian beverages and desserts, adding richness and subtle sweetness. As dairy alternatives became more popular, coconut milk naturally found its way into coffee culture. Combining bold espresso with creamy coconut created a drink that feels indulgent yet light, and now it is a favorite in cafes everywhere.
Why This Recipe Works Every Time
Before we grab the coffee and ice, here is why this one is a keeper.
Versatile: Adjust sweetness, add flavored syrups, or use decaf if you prefer.
Budget-Friendly: Skip the coffee shop and make it at home for a fraction of the cost.
Quick and Easy: It comes together in minutes.
Customizable: Use light or full fat coconut milk depending on your preference.
Crowd-Pleasing: Even non coffee lovers enjoy the creamy coconut flavor.
Make-Ahead Friendly: Brew espresso in advance and chill it.
Great for Warm Days: It is refreshing and energizing at the same time.
Barista Style Tips for the Perfect Iced Latte
A few small techniques make a big difference.
- Use strong espresso: A bold base prevents the drink from tasting diluted over ice.
- Chill the coffee slightly before pouring: This keeps the ice from melting too quickly.
- Shake coconut milk before using: It ensures a smooth, creamy texture.
- Add sweetener while coffee is warm: It dissolves more evenly.
Tools You Will Need
Keeping it simple makes the process even more enjoyable.
Espresso Machine or Strong Coffee Maker: For brewing bold coffee.
Tall Glass: Shows off the beautiful layers.
Spoon or Stirrer: Helps blend flavors smoothly.
Measuring Cup: Keeps proportions balanced.
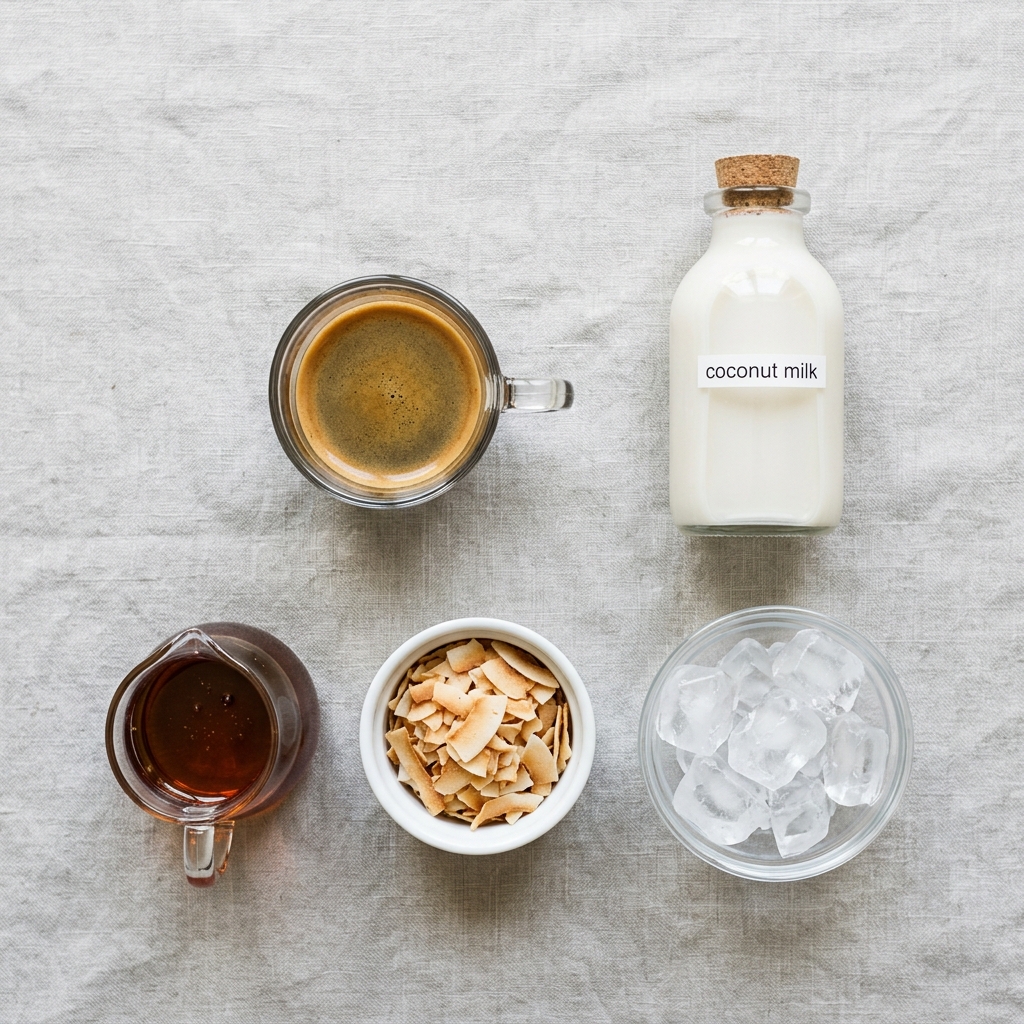
Ingredients You Will Need For Iced Coconut Latte
Each ingredient plays a role in building flavor and texture.
- Freshly brewed espresso: 2 shots, about 60 ml, provides bold coffee flavor.
- Coconut milk: 1 cup, about 240 ml, chilled, creates creamy texture.
- Ice cubes: 1 cup, fills the glass and keeps it refreshing.
- Maple syrup or simple syrup: 1 to 2 tablespoons, about 15 to 30 ml, optional, adds sweetness.
- Toasted coconut flakes: 1 teaspoon, optional garnish for texture and aroma.
Easy Ingredient Substitutions
You can easily adjust to your taste.
Espresso: Strong brewed coffee works well.
Coconut milk: Use light coconut milk for fewer calories.
Maple syrup: Honey or agave syrup are good alternatives.
Toasted coconut flakes: Skip if you prefer a smoother drink.
Spotlight on Coconut Milk
Coconut Milk: It brings natural sweetness and silky texture, softening the bold espresso while adding a subtle tropical aroma.
Let’s Build This Drink Step by Step
Now comes the fun part.
- Preheat Your Equipment: Brew your espresso and allow it to cool slightly for a few minutes.
- Combine Ingredients: If using sweetener, stir it into the warm espresso until dissolved.
- Prepare Your Cooking Vessel: Fill a tall glass with ice cubes.
- Assemble the Dish: Pour the espresso over the ice, then slowly add chilled coconut milk to create layered swirls.
- Cook to Perfection: No cooking needed here, just give it a gentle stir if you prefer it fully blended.
- Finishing Touches: Sprinkle toasted coconut flakes on top if using.
- Serve and Enjoy: Sip immediately while cold and creamy.
Flavor and Texture Experience
The first sip is cool and smooth. The espresso brings a bold, slightly bitter note, while the coconut milk adds creamy sweetness. The ice keeps everything crisp and refreshing. If you added toasted coconut, you get that subtle nutty aroma with each sip. This one’s a total game changer for your homemade coffee routine.
Helpful Tips for Best Results
- Use fresh espresso for the best flavor.
- Adjust sweetness gradually to match your taste.
- Stir gently to preserve the layered look if serving guests.
What to Avoid
- Using weak coffee, which can taste watered down.
- Adding coconut milk without shaking it first.
- Skipping ice, which gives the drink its refreshing character.
Nutrition Snapshot
Servings: 1
Calories per serving: Approximately 220
Note: Values vary based on sweetener and coconut milk used.
Time Breakdown
Prep Time: 5 minutes
Cook Time: 0 minutes
Total Time: 5 minutes
Make Ahead and Storage Tips
You can brew espresso in advance and refrigerate it for up to 24 hours. Store coconut milk in the refrigerator and shake before using. Assemble the drink fresh for best texture.
How to Serve It Beautifully
Serve in a clear glass to show off the creamy swirls. Add a light sprinkle of toasted coconut on top for visual appeal. Keep the presentation simple and clean.
Creative Variations to Try
- Add a splash of vanilla extract for warmth.
- Blend with ice for a frozen version.
- Sprinkle cinnamon on top for a cozy twist.
- Add a spoonful of cocoa powder for a mocha style variation.
FAQ’s
Q1: Can I use instant coffee?
Yes, dissolve it in hot water for a strong base.
Q2: Can I make it dairy free?
Yes, coconut milk makes it naturally dairy free.
Q3: How can I make it sweeter?
Add extra maple syrup or simple syrup.
Q4: Can I use cold brew?
Yes, cold brew works beautifully.
Q5: Does it taste strongly of coconut?
It has a subtle tropical note, not overpowering.
Q6: Can I skip sweetener?
Yes, especially if you prefer bold coffee flavor.
Q7: Can I froth the coconut milk?
Yes, lightly frothing adds extra creaminess.
Q8: Is it good without garnish?
Absolutely, the garnish is optional.
Q9: Can I double the recipe?
Yes, just maintain the same proportions.
Q10: Can I make it blended?
Yes, blend with ice for a thicker texture.
Conclusion
Iced Coconut Latte is smooth, refreshing, and just indulgent enough to feel special. It is quick, simple, and completely customizable. Let me tell you, it’s worth every sip. Make it once, and it might just become your new favorite homemade coffee treat.
PrintIced Coconut Latte

A smooth and refreshing iced coconut latte made with bold espresso, creamy coconut milk, and ice for the perfect tropical coffee treat. Lightly sweetened and topped with toasted coconut flakes, this chilled drink is creamy, energizing, and easy to make at home.
Ingredients
- 2 shots freshly brewed espresso (about 60 ml)
- 1 cup coconut milk, chilled (about 240 ml)
- 1 cup ice cubes
- 1 to 2 tablespoons maple syrup or simple syrup (about 15 to 30 ml), optional
- 1 teaspoon toasted coconut flakes, optional garnish
Instructions
- Brew 2 shots of espresso (about 60 ml) and allow it to cool slightly for a few minutes.
- If using sweetener, stir maple syrup or simple syrup into the warm espresso until fully dissolved.
- Fill a tall glass with 1 cup of ice cubes.
- Pour the espresso over the ice.
- Slowly add 1 cup chilled coconut milk over the espresso to create layered swirls.
- Gently stir if you prefer it fully blended.
- Sprinkle toasted coconut flakes on top if desired and serve immediately.
Notes
- Use strong espresso or bold coffee to prevent dilution from ice.
- Shake coconut milk well before using for a smooth texture.
- Adjust sweetness gradually to match your taste preference.
- For a frozen version, blend all ingredients with ice until smooth.