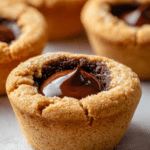
Hot Chocolate Stuffed Cookie Cups
There is something about warm chocolate tucked inside a soft cookie that feels like pure comfort. These Hot Chocolate Stuffed Cookie Cups bring together everything we love about a cozy mug of cocoa, but in handheld dessert form. The outside is golden and slightly crisp, the inside soft and tender, and right in the center is a rich, melty chocolate surprise. Trust me, you’re going to love this.
They are perfect for chilly evenings, holiday trays, or those moments when you want something that feels nostalgic yet a little extra special. And once you pull them from the oven and see that glossy chocolate center, you will know this one’s a total game-changer.
Why These Cozy Cookie Cups Are Impossible to Resist
Imagine biting through a warm cookie shell and discovering a smooth chocolate center that melts slowly with each chew. That contrast between slightly crisp edges and soft, gooey middle is what makes these so addictive.
They are comforting like hot cocoa, yet playful like your favorite bakery treat. The light dusting of powdered sugar on top gives them that snowy finish that instantly feels festive and inviting.
A Sweet Treat Inspired by Winter Comfort
Hot chocolate has been cherished for centuries, from early cocoa drinks in Central America to the creamy, sweet versions we sip today. Over time, bakers began capturing those comforting flavors in cakes, brownies, and cookies.
These cookie cups are a modern twist on that tradition. Instead of sipping chocolate from a mug, you get to enjoy it tucked inside a buttery cookie shell. It feels familiar, yet exciting at the same time.
Why You Can Always Count on This Recipe
Before we get into the baking, let me tell you why this recipe works so beautifully every time.
Versatile: Perfect for holidays, parties, bake sales, or cozy nights at home.
Budget-Friendly: Made with simple pantry staples you likely already have.
Quick and Easy: Straightforward mixing and baking steps.
Customizable: Change the chocolate type or add mini marshmallows.
Crowd-Pleasing: That molten center makes everyone smile.
Make-Ahead Friendly: Bake ahead and gently rewarm before serving.
Great for Leftovers: Enjoy at room temperature or warm them slightly for gooey centers again.
Expert Tips for Bakery Style Results
A few simple techniques will elevate your cookie cups.
- Use room temperature butter for smooth creaming.
- Do not overmix once flour is added to keep the texture tender.
- Press the dough evenly into the muffin pan to create uniform cups.
- Add the chocolate immediately after baking so it melts perfectly.
Essential Kitchen Tools for Success
You do not need fancy equipment, just a few basics.
Muffin Pan: Shapes the dough into perfect cups.
Mixing Bowls: For combining wet and dry ingredients.
Hand Mixer or Whisk: Helps cream butter and sugar smoothly.
Measuring Cups and Spoons: Ensures balanced flavor and texture.
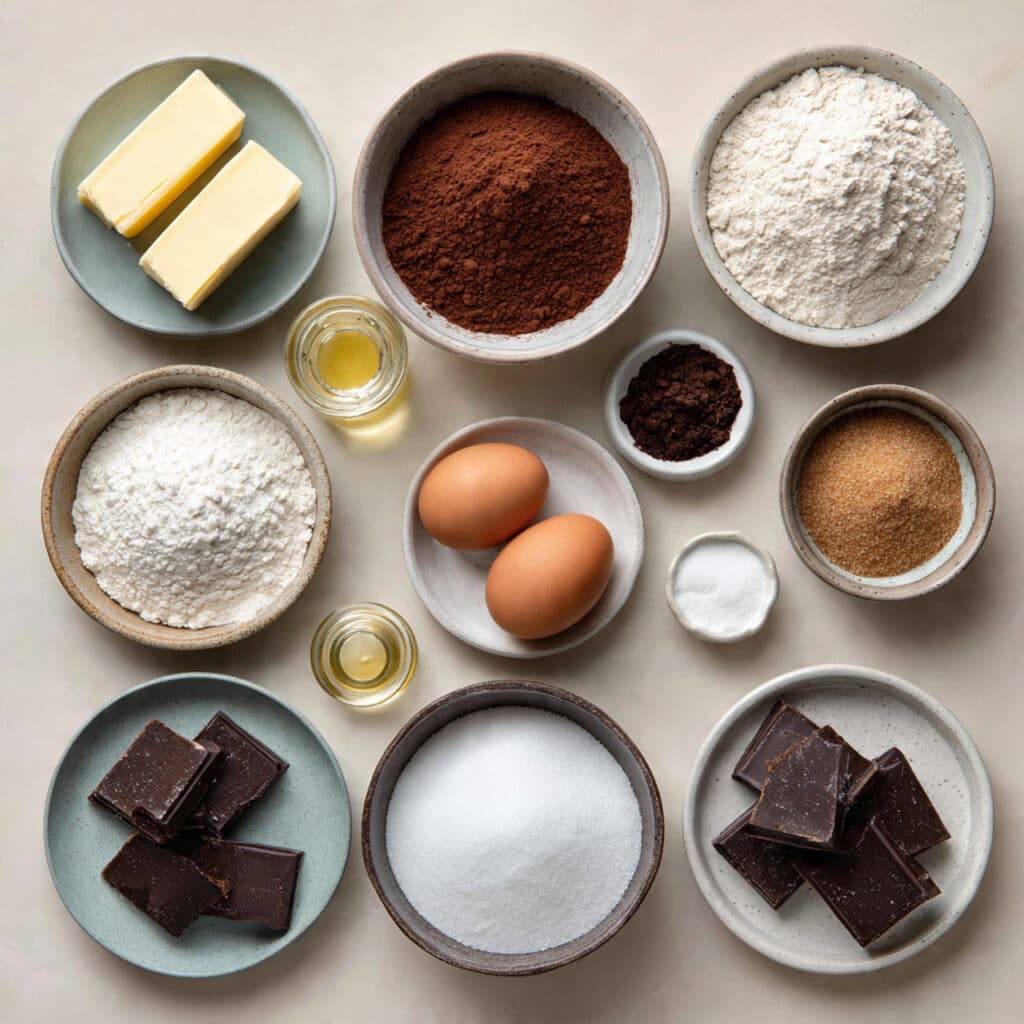
Ingredients You Will Need For These Cookie Cups
Each ingredient plays a role in creating that soft cookie and rich center.
- Unsalted Butter: 1/2 cup, softened. Provides richness and structure.
- Granulated Sugar: 1/2 cup. Adds sweetness and crisp edges.
- Brown Sugar: 1/4 cup, packed. Contributes moisture and depth.
- Egg: 1 large. Binds everything together.
- Vanilla Extract: 1 teaspoon. Enhances overall flavor.
- All Purpose Flour: 1 1/4 cups. Forms the base of the dough.
- Cocoa Powder: 2 tablespoons. Adds subtle chocolate flavor to the cookie.
- Baking Soda: 1/2 teaspoon. Helps the cups rise slightly.
- Salt: 1/4 teaspoon. Balances sweetness.
- Chocolate Squares or Chunks: 12 pieces, about 1 ounce each. Creates the molten center.
- Powdered Sugar: 1 tablespoon, for dusting. Adds a decorative finish.
Simple Ingredient Substitutions
You can easily adjust based on preference.
All Purpose Flour: Use a gluten free blend if needed.
Chocolate Squares: Dark chocolate or milk chocolate both work beautifully.
Cocoa Powder: Dutch processed cocoa for a deeper flavor.
Brown Sugar: Coconut sugar as an alternative.
Spotlight on the Star Ingredients
Let’s highlight what truly makes these shine.
Chocolate Squares: The heart of the dessert, melting into a luscious center.
Unsalted Butter: Creates that tender, bakery style crumb.
Let’s Start Baking
Now let’s dive into the delicious process. It is simple, cozy, and honestly so satisfying.
- Preheat Your Equipment: Preheat your oven to 350°F and lightly grease a 12 cup muffin pan.
- Combine Ingredients: In a bowl, cream the butter, granulated sugar, and brown sugar until light and fluffy. Add the egg and vanilla extract and mix until combined. In a separate bowl, whisk together flour, cocoa powder, baking soda, and salt, then gradually mix into the wet ingredients.
- Prepare Your Cooking Vessel: Divide the dough evenly into 12 portions and press each portion into the muffin cups, pressing up the sides slightly to form a cup shape.
- Assemble the Dish: Make a small indentation in the center of each dough cup.
- Cook to Perfection: Bake for 10 to 12 minutes until the edges are set but centers remain soft.
- Finishing Touches: Immediately press one chocolate square into the center of each hot cookie cup. Let sit for a few minutes to melt. Dust lightly with powdered sugar.
- Serve and Enjoy: Allow to cool slightly before removing from the pan. Serve warm for a gooey center.
Texture and Flavor That Feels Like a Hug
The outer cookie is tender with lightly crisp edges, while the inside stays soft and slightly chewy. The chocolate melts into a silky pool that contrasts beautifully with the cookie crumb. It is sweet, rich, and comforting without being overwhelming.
Helpful Baking Tips
To make sure yours turn out perfectly, remember these.
- Do not overbake or the centers will lose softness.
- Use high quality chocolate for best flavor.
- Let them cool slightly before removing to prevent breaking.
- Lightly grease the pan to ensure easy release.
What to Avoid for Perfect Cookie Cups
Even simple recipes need a little care.
- Avoid overmixing the dough.
- Do not skip greasing the pan.
- Do not add chocolate before baking.
- Avoid overfilling the muffin cups.
Nutrition Facts
Servings: 12
Calories per serving: 210
Note: These are approximate values.
Preparation Time
Prep Time: 15 minutes
Cook Time: 12 minutes
Total Time: 27 minutes
Make-Ahead and Storage Tips
Store in an airtight container at room temperature for up to 3 days. Reheat briefly in the microwave for 10 to 15 seconds to restore the molten center. You can freeze baked cookie cups for up to one month and thaw before reheating.
Serving Ideas for Extra Charm
Serve slightly warm with a glass of milk or alongside a scoop of vanilla ice cream. They also look beautiful arranged on a dessert platter with a light dusting of powdered sugar.
Creative Leftover Transformations
Crumble leftover cookie cups over ice cream for a decadent topping. Chop and mix into milkshakes. Or warm and sandwich between two scoops of ice cream.
Additional Tips for Success
Use room temperature ingredients for even mixing. Press the dough evenly for consistent baking. And always test one batch first if using a different oven.
Make It a Showstopper
Add a few mini marshmallows on top while the chocolate is still soft for a true hot chocolate feel. Serve on a white platter so the powdered sugar dusting really stands out.
Variations to Try
- Add mini marshmallows to the center along with the chocolate.
- Use white chocolate for a sweeter twist.
- Stir in chocolate chips into the dough.
- Add a pinch of cinnamon for warmth.
- Drizzle melted chocolate over the top for extra richness.
FAQ’s
1. Can I make these ahead of time?
Yes, bake them and reheat before serving.
2. How do I keep the center gooey?
Do not overbake and reheat briefly before serving.
3. Can I use chocolate chips instead of squares?
Yes, but the center may be less molten.
4. Can I freeze them?
Yes, freeze after baking and thaw before reheating.
5. Do I need paper liners?
No, just grease the pan well.
6. Can I double the recipe?
Yes, simply bake in batches.
7. Why did mine stick to the pan?
The pan may not have been greased enough.
8. Can I make them gluten free?
Yes, use a gluten free flour blend.
9. How should I store leftovers?
Keep in an airtight container at room temperature.
10. Can I make them without cocoa powder?
Yes, but they will taste more like classic cookie cups.
Conclusion
These Hot Chocolate Stuffed Cookie Cups are everything you love about a cozy cup of cocoa wrapped inside a soft, buttery cookie shell. Warm, gooey, and completely comforting, they are worth every bite. Bake a batch, share them with someone you love, and enjoy that melty chocolate center while it is still warm.
PrintHot Chocolate Stuffed Cookie Cups
Soft and buttery Hot Chocolate Stuffed Cookie Cups filled with a rich, melty chocolate center and finished with a light dusting of powdered sugar. A cozy dessert that combines the comfort of hot cocoa with the indulgence of freshly baked cookies.
Ingredients
- 1/2 cup unsalted butter, softened
- 1/2 cup granulated sugar
- 1/4 cup brown sugar, packed
- 1 large egg
- 1 teaspoon vanilla extract
- 1 1/4 cups all purpose flour
- 2 tablespoons cocoa powder
- 1/2 teaspoon baking soda
- 1/4 teaspoon salt
- 12 chocolate squares or chunks, about 1 ounce each
- 1 tablespoon powdered sugar, for dusting
Instructions
- Preheat oven to 350°F and lightly grease a 12 cup muffin pan.
- In a mixing bowl, cream softened butter, granulated sugar, and brown sugar until light and fluffy.
- Add the egg and vanilla extract and mix until fully combined.
- In a separate bowl, whisk together flour, cocoa powder, baking soda, and salt.
- Gradually mix the dry ingredients into the wet ingredients until just combined.
- Divide dough evenly into 12 portions and press each portion into the muffin cups, forming a cup shape with a small indentation in the center.
- Bake for 10 to 12 minutes until edges are set and centers remain soft.
- Immediately press one chocolate square into the center of each hot cookie cup and allow it to melt.
- Let cool slightly before removing from the pan, then dust with powdered sugar before serving.
Notes
- Do not overbake to keep the centers soft and tender.
- Use good quality chocolate for the best molten texture.
- Lightly grease the muffin pan to prevent sticking.
- Reheat for 10 to 15 seconds in the microwave to restore the gooey center.