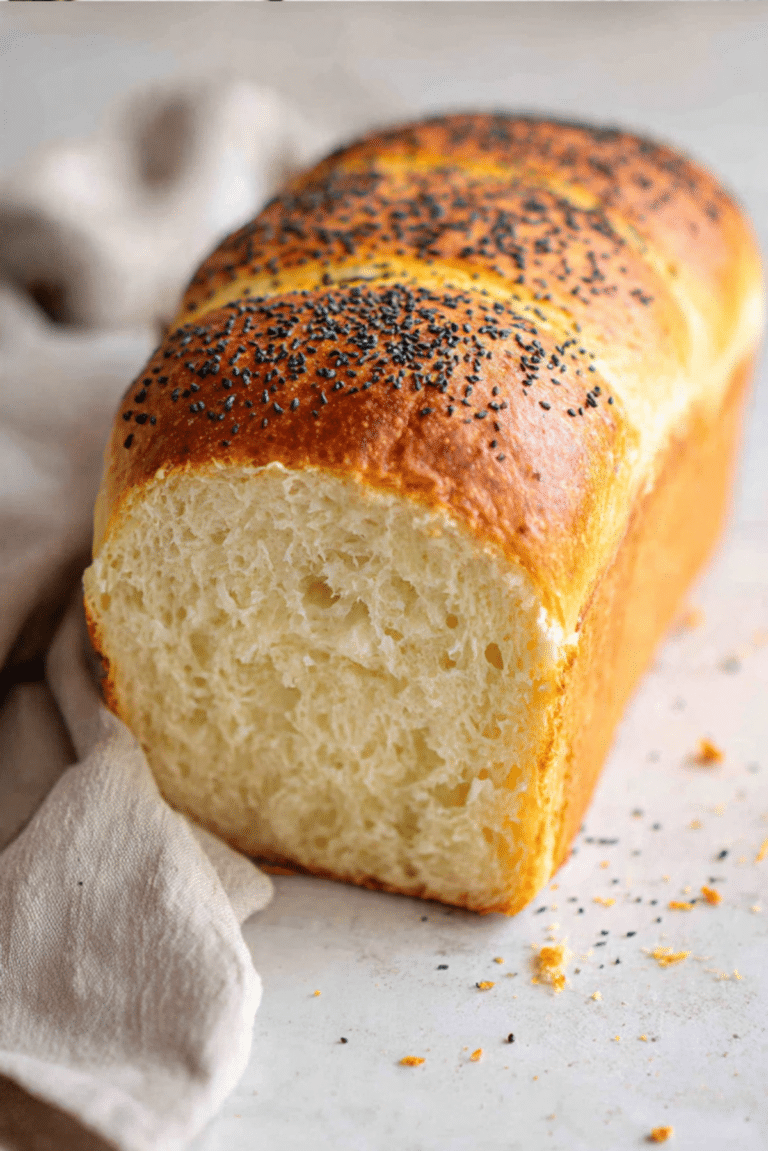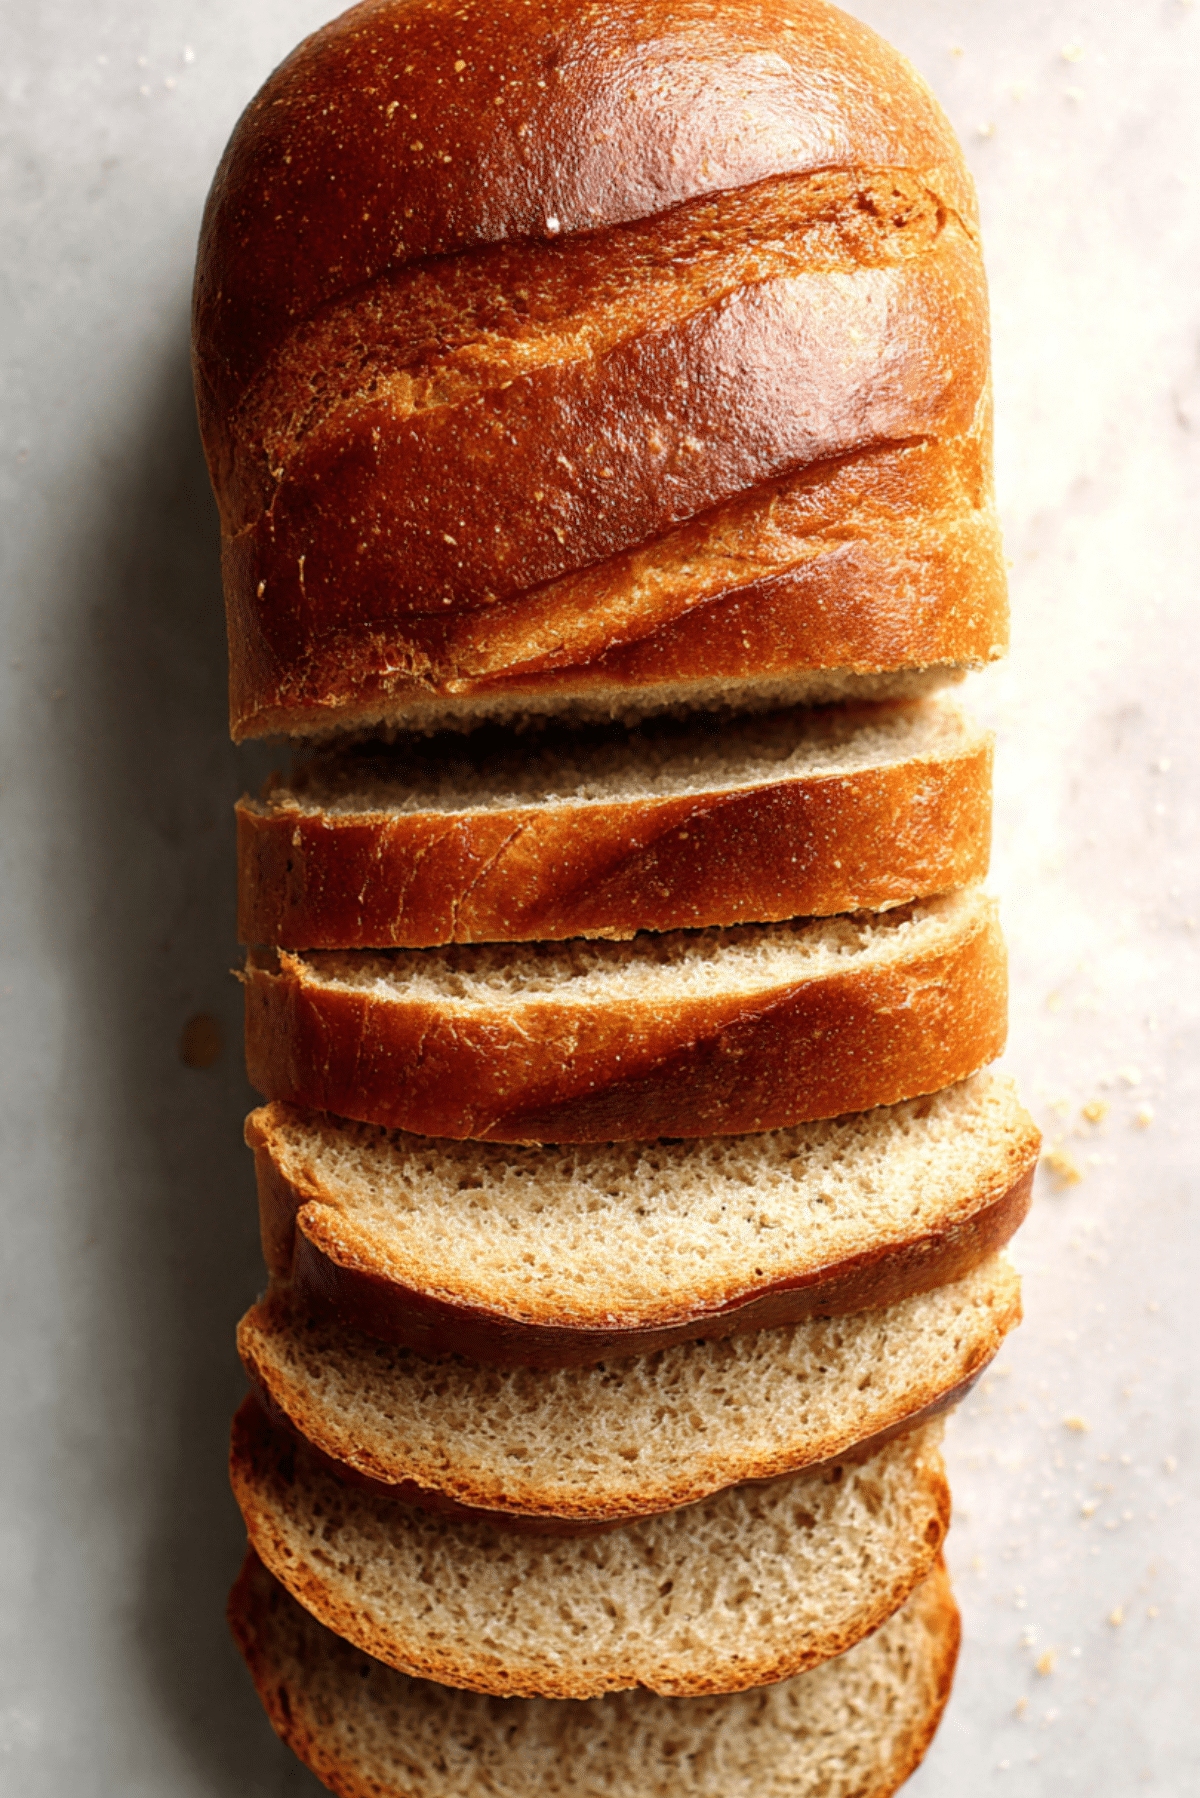
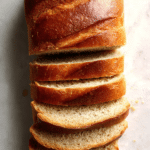
Honey Wheat Bread
There is something deeply comforting about pulling a warm loaf of Honey Wheat Bread out of the oven. The kitchen fills with the sweet scent of honey mingling with toasted wheat, and suddenly everything feels calmer, slower, just a little bit better. When you slice into that golden crust and see the soft, tender crumb inside, trust me, you’re going to love this. It is simple, wholesome, and worth every single bite.
A Loaf That Feels Like Home
Baking this bread feels like stepping back into a slower rhythm of life. The dough comes together with simple pantry staples, yet the result tastes like something far more special. The gentle sweetness from the honey balances the hearty wheat flavor, creating a loaf that works just as beautifully for breakfast toast as it does for a sandwich at lunch.
And now, before we get into the details of making it, let me share a little background that makes this loaf even more meaningful.
The Humble Roots of Wheat and Honey
Wheat bread has been a staple across cultures for centuries. Whole wheat flour brings nourishment and a rustic texture that people have relied on for generations. Honey, one of the oldest natural sweeteners, has long been used not just for flavor but for preserving freshness and adding moisture.
When these two ingredients come together, they create a loaf that feels both traditional and timeless. It is not flashy, it is not complicated, but it carries history in every slice.
Why This Recipe Never Fails You
Before we roll up our sleeves, let’s talk about why this one’s a total game changer in your kitchen.
Versatile: This loaf works for toast, sandwiches, or simply warm with butter. It adapts to whatever you need that day.
Budget-Friendly: Made with pantry staples like flour, yeast, and honey, it keeps things simple and affordable.
Quick and Easy: For a yeast bread, it comes together smoothly with straightforward steps.
Customizable: You can adjust the sweetness slightly or add seeds on top for extra texture.
Crowd-Pleasing: The mild sweetness makes it loved by both kids and adults.
Make-Ahead Friendly: It stores well and freezes beautifully.
Great for Leftovers: Day old slices make incredible French toast or croutons.
Baker’s Secrets for Perfect Texture
Now let’s talk like seasoned bakers for a moment.
- Use warm water, not hot. Around 110°F is perfect to wake up the yeast without harming it.
- Knead until the dough feels smooth and elastic, about 8 to 10 minutes by hand.
- Let the dough rise in a draft free spot so it doubles properly.
- Do not overbake. A golden crust and a hollow sound when tapped means it is ready.
Essential Tools for a Beautiful Loaf
You do not need fancy equipment, but a few basics help.
Large Mixing Bowl: For combining and rising the dough comfortably.
Measuring Cups and Spoons: Accuracy keeps the texture consistent.
Loaf Pan 9×5 inch: Gives the bread its classic shape.
Clean Kitchen Towel: To cover the dough while it rises.
Wire Rack: Allows the loaf to cool evenly.
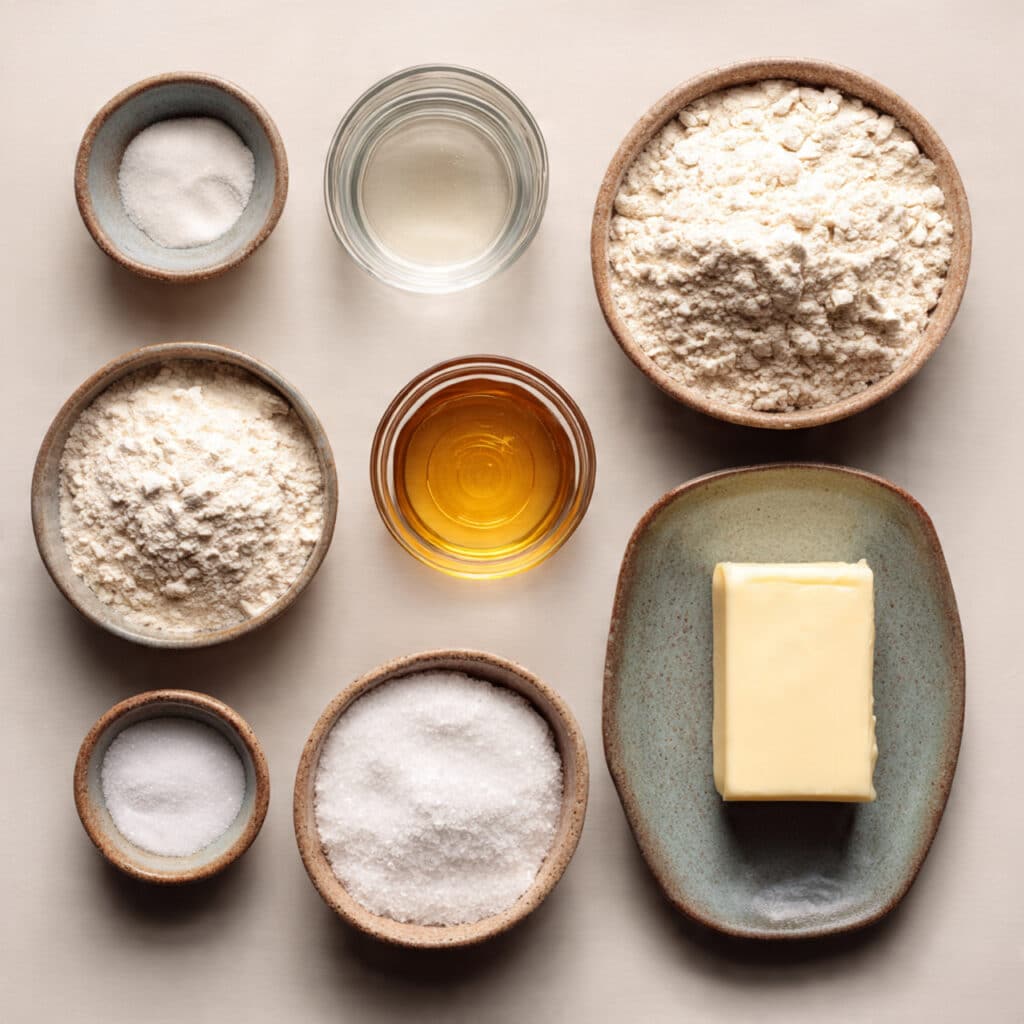
Ingredients That Build Flavor and Structure
Every ingredient here plays its part, and together they create magic.
- Whole Wheat Flour: 2 cups, adds hearty flavor and structure.
- All Purpose Flour: 1 ½ cups, keeps the crumb soft and balanced.
- Warm Water: 1 ¼ cups at about 110°F, activates the yeast.
- Honey: ¼ cup, provides natural sweetness and moisture.
- Active Dry Yeast: 2 ¼ teaspoons, helps the bread rise beautifully.
- Salt: 1 ½ teaspoons, enhances flavor and strengthens the dough.
- Unsalted Butter: 2 tablespoons melted, adds richness and tenderness.
Flexible Swaps If You Need Them
Sometimes you work with what you have, and that is perfectly fine.
Whole Wheat Flour: You can replace up to half with more all purpose flour for a lighter loaf.
Honey: Maple syrup can be used for a slightly different sweetness.
Unsalted Butter: Use olive oil in the same amount if preferred.
Spotlight on the Stars
Whole Wheat Flour: This gives the bread its nutty aroma and hearty texture.
Honey: It locks in moisture and adds that subtle sweetness that makes each slice special.
Let’s Bake Together
Now we dive into the heart of the process, and this is where the fun begins.
- Preheat Your Equipment: Preheat your oven to 350°F once the dough has completed its second rise and is ready to bake.
- Combine Ingredients: In a large bowl, dissolve honey in warm water. Sprinkle yeast over the top and let it sit for 5 minutes until foamy. Stir in melted butter, whole wheat flour, all purpose flour, and salt until a soft dough forms.
- Prepare Your Cooking Vessel: Grease a 9×5 inch loaf pan lightly with butter or oil.
- Assemble the Dish: Knead the dough on a floured surface for 8 to 10 minutes until smooth. Place it in a lightly greased bowl, cover, and let it rise for 1 hour until doubled. Shape into a loaf and place into the prepared pan. Let it rise again for 30 minutes.
- Cook to Perfection: Bake for 30 to 35 minutes until the top is golden brown and the loaf sounds hollow when tapped.
- Finishing Touches: Remove from the pan and let it cool on a wire rack before slicing.
- Serve and Enjoy: Slice and serve warm with butter, jam, or use for your favorite sandwich.
The Magic of Texture and Flavor
As it bakes, the honey caramelizes slightly on the crust, giving it that beautiful golden color. Inside, the crumb stays soft yet sturdy enough to hold fillings. The wheat adds depth, while the honey rounds everything out with gentle sweetness.
Helpful Hints for Even Better Results
If you want to take it up a notch, here are a few tips.
- Lightly brush the top with melted butter after baking for a softer crust.
- Sprinkle oats on top before baking for added texture.
- Let the bread cool fully before slicing to avoid squishing the crumb.
Mistakes to Skip for Best Results
Even simple bread has its tricks.
- Do not use water that is too hot, it can kill the yeast.
- Do not rush the rise, under proofed dough creates dense bread.
- Avoid adding too much flour while kneading, which can dry out the loaf.
Nourishing Facts at a Glance
Servings: 12 slices
Calories per serving: 170
Note: These are approximate values.
Timing Breakdown for Easy Planning
Prep Time: 20 minutes
Cook Time: 35 minutes
Total Time: 1 hour 55 minutes
Make It Ahead and Store with Confidence
You can bake this loaf a day in advance and keep it tightly wrapped at room temperature for up to 3 days. For longer storage, slice and freeze in an airtight bag for up to 2 months. Reheat slices in a toaster or warm oven for fresh baked flavor.
Serving Ideas You Will Love
Toast it and spread with butter and honey for breakfast. Use it for turkey or veggie sandwiches. Cut into cubes and toast for homemade croutons. It truly fits every meal.
Reinventing Leftovers in Creative Ways
Turn stale slices into French toast. Blend into breadcrumbs for coating vegetables. Cube and bake for a comforting bread pudding.
Extra Tips for Flavor and Ease
Add a tablespoon of seeds like sunflower or flax into the dough for extra nutrition. Use a thermometer if you are unsure about doneness, the internal temperature should reach about 190°F.
Make It Beautiful on the Table
Brush the crust lightly with honey right after baking for a glossy finish. Slice evenly and stack slightly fanned for a rustic look.
Fun Variations to Experiment With
- Add 2 tablespoons of rolled oats into the dough for extra chew.
- Mix in ¼ cup chopped nuts for texture.
- Add a teaspoon of cinnamon for a subtle warm note.
- Replace part of the water with warm milk for a softer crumb.
FAQ’s
1. Can I make this without a loaf pan?
Yes, you can shape it into a free form loaf and bake it on a lined baking sheet.
2. Why did my bread turn out dense?
It may not have risen long enough or too much flour was added.
3. Can I use instant yeast?
Yes, use the same amount and mix directly with the dry ingredients.
4. How do I know when it is done?
Tap the bottom, it should sound hollow.
5. Can I make it sweeter?
You can add an extra tablespoon of honey if desired.
6. Is it good for sandwiches?
Absolutely, it holds fillings very well.
7. Can I freeze the dough?
Yes, after the first rise, shape and freeze tightly wrapped.
8. How long does it stay fresh?
About 3 days at room temperature if stored properly.
9. Can I add seeds on top?
Yes, brush with water and sprinkle seeds before baking.
10. Why is my crust too hard?
It may have baked slightly too long or cooled without covering.
Conclusion
There is something so grounding about baking your own Honey Wheat Bread. The warmth, the aroma, the first slice with melting butter, it all feels special. This loaf brings comfort and simplicity to your table, and once you try it, you will see why it becomes a regular in so many kitchens. Let me tell you, it is worth every bite.
PrintHoney Wheat Bread
Soft and wholesome honey wheat bread with a golden crust and tender crumb, lightly sweetened with natural honey and perfect for toast or sandwiches.
Ingredients
- 2 cups whole wheat flour
- 1 1/2 cups all purpose flour
- 1 1/4 cups warm water (about 110°F)
- 1/4 cup honey
- 2 1/4 teaspoons active dry yeast
- 1 1/2 teaspoons salt
- 2 tablespoons unsalted butter, melted
Instructions
- Preheat oven to 350°F after the dough completes its second rise.
- In a large bowl, dissolve honey in warm water. Sprinkle yeast over the top and let sit for 5 minutes until foamy. Stir in melted butter, whole wheat flour, all purpose flour, and salt until a soft dough forms.
- Grease a 9×5 inch loaf pan lightly with butter or oil.
- Knead the dough on a floured surface for 8 to 10 minutes until smooth. Place in a lightly greased bowl, cover, and let rise for 1 hour until doubled. Shape into a loaf and place in the prepared pan. Let rise again for 30 minutes.
- Bake for 30 to 35 minutes until golden brown and hollow sounding when tapped.
- Remove from pan and cool on a wire rack before slicing.
- Slice and serve as desired.
Notes
- Brush the top with melted butter after baking for a softer crust.
- Allow the bread to cool completely before slicing for best texture.
- Freeze sliced bread in an airtight bag for up to 2 months.