Honey Walnut Tartlets
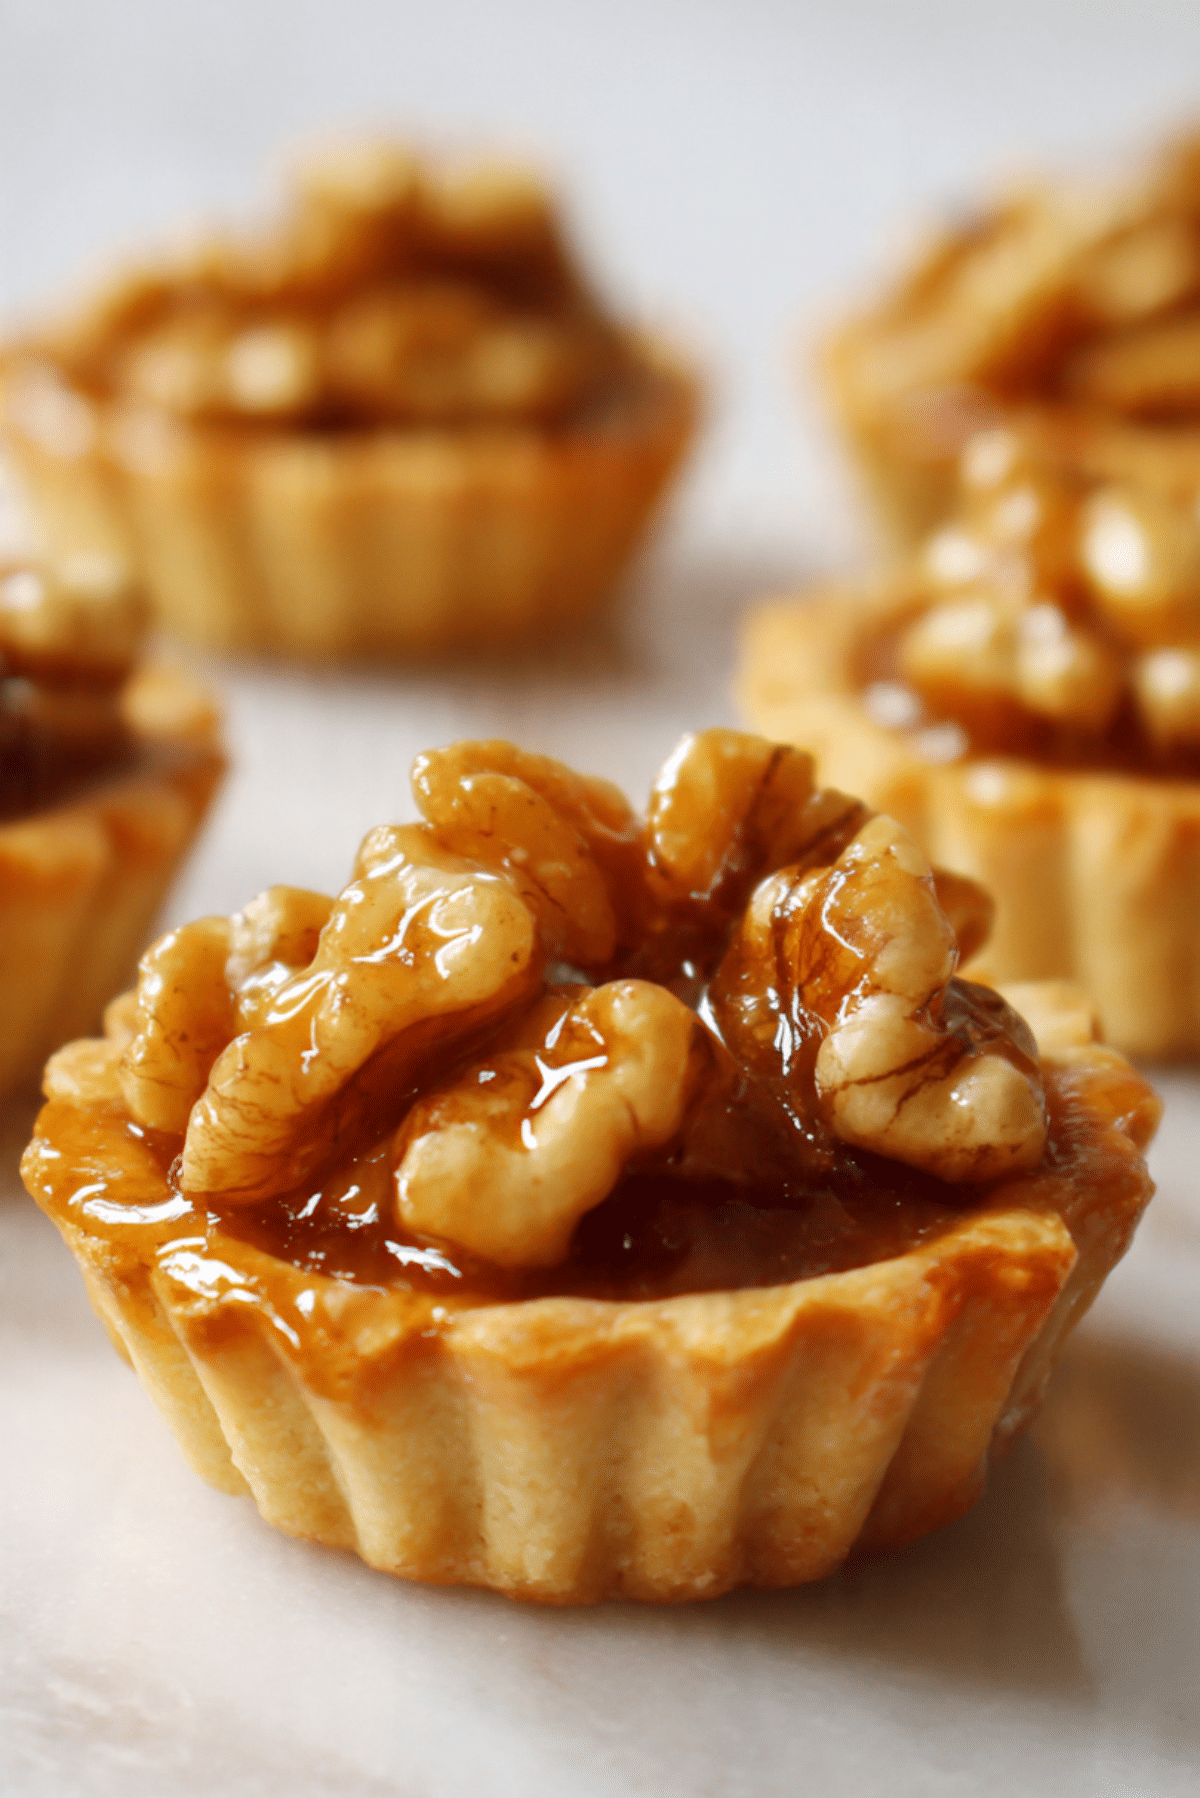
There is something almost magical about the moment you bite into a crisp tart shell and meet that sticky, golden honey filling tucked inside. These little beauties are sweet, nutty, and just rich enough to feel indulgent without being overwhelming. The walnuts sit proudly on top, glazed and glossy, almost like little crowns. Trust me, you’re going to love this. It feels fancy, but it is surprisingly simple, and let me tell you, it’s worth every bite.
A Sweet Little Treat That Feels Bakery Worthy
What makes these tartlets so irresistible is that balance between textures. The pastry is buttery and lightly crisp, the filling is smooth and caramel like, and the walnuts bring a toasty crunch that ties everything together. They look like something you would pick up from a small artisan bakery, yet they come together right in your own kitchen.
And now as we talk about how lovely they taste, it feels natural to wonder where this charming combination even came from.
A Touch of European Pastry Tradition
Small nut filled tarts have long been part of European baking traditions, especially in French and Swiss kitchens where honey and nuts are common pantry staples. Walnut tarts in particular have been served during holidays and gatherings for generations. Honey adds a floral sweetness that refined sugar simply cannot match, giving these tartlets a slightly old fashioned, comforting feel.
Over time, home bakers adapted the larger tart into smaller, individual portions, which makes them perfect for entertaining or gifting. And honestly, there is something extra special about having your own little tart.
Why This Recipe Works Every Single Time
Before we roll up our sleeves, let me share why this one is a total game changer.
Versatile: These tartlets fit right in at afternoon tea, holiday dessert tables, or even as a sweet snack with coffee.
Budget-Friendly: The ingredients are simple, pantry friendly staples like flour, butter, honey, sugar, and walnuts.
Quick and Easy: The steps are straightforward and manageable, even if you are not an expert baker.
Customizable: You can adjust the sweetness or swap nuts if needed.
Crowd-Pleasing: That sticky honey and crunchy walnut combo wins people over instantly.
Make-Ahead Friendly: You can bake them a day in advance and store them easily.
Great for Leftovers: If you somehow have any left, they taste even better the next day.
And now let’s make sure you have everything you need before we begin.
Insider Secrets for Perfect Tartlets
Baking may look delicate, but a few simple tips make all the difference.
- Chill the dough before shaping, it keeps the shells from shrinking.
- Toast the walnuts lightly to deepen their flavor.
- Do not overfill the shells, the honey mixture will bubble as it bakes.
- Let the tartlets cool completely so the filling can set properly.
With that in mind, let’s gather our tools.
Tools That Make the Process Smooth
Having the right equipment makes this feel effortless.
Mixing Bowl: For combining the dough and filling ingredients.
Mini Tart Pan or Muffin Tin: Shapes the pastry into neat little shells.
Saucepan: Gently heats the honey mixture until smooth.
Rolling Pin: Helps you roll the dough evenly.
Cooling Rack: Allows air to circulate so the bottoms stay crisp.
Now that the kitchen is ready, let’s talk ingredients.
Ingredients You Will Need For These Tartlets
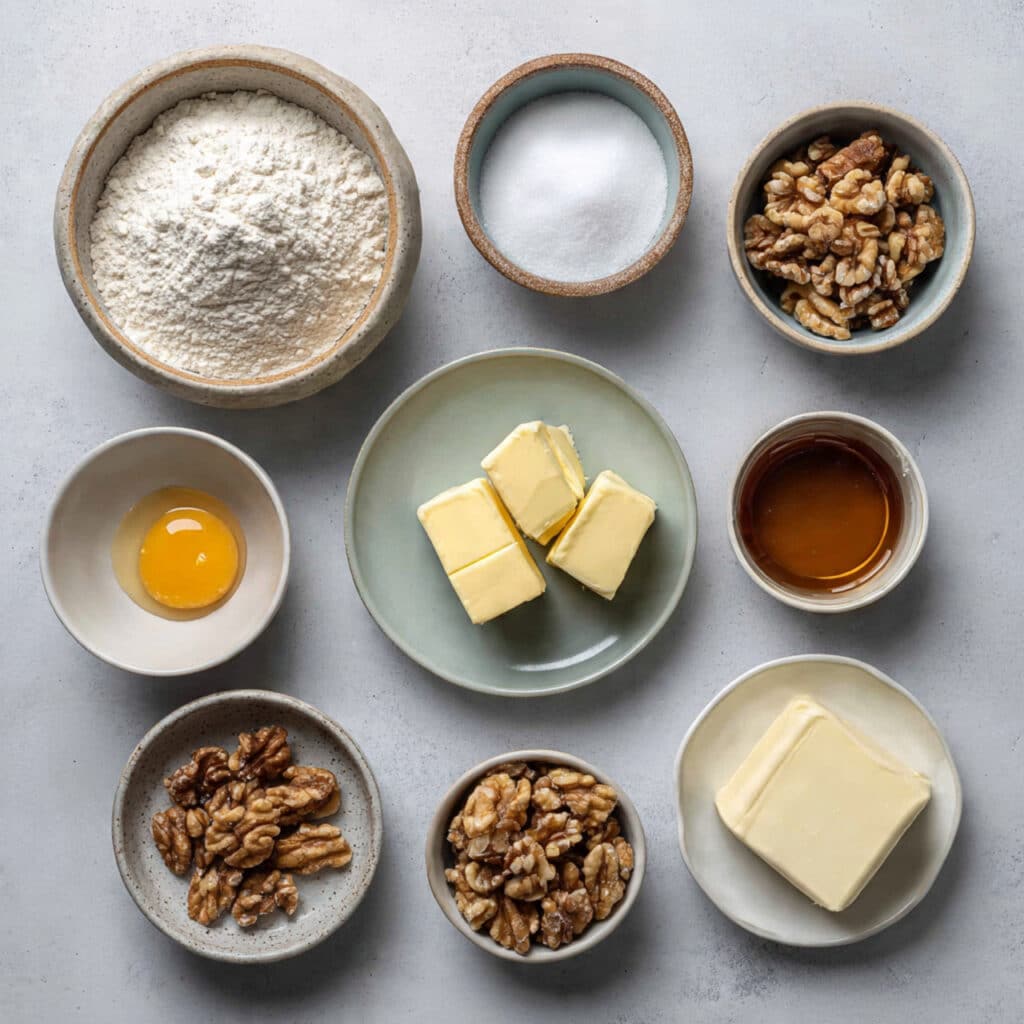
Each ingredient plays its own beautiful role in building flavor and texture.
- All Purpose Flour: 1 1/2 cups, forms the structure of the tender tart shells.
- Unsalted Butter: 1/2 cup cold and cubed, creates that flaky, rich pastry.
- Granulated Sugar: 1/4 cup for the dough, plus 1/4 cup for the filling, adds balanced sweetness.
- Salt: 1/4 teaspoon, enhances every flavor.
- Egg: 1 large, binds the dough and enriches the filling.
- Honey: 1/2 cup, brings floral sweetness and that signature sticky texture.
- Heavy Cream: 1/4 cup, softens the honey into a smooth caramel like filling.
- Chopped Walnuts: 1 cup, toasted lightly, for crunch and nutty depth.
And if you need flexibility, do not worry.
Easy Ingredient Swaps If Needed
Sometimes you work with what you have.
All Purpose Flour: Use a gluten free baking blend.
Honey: Maple syrup can work, though the flavor will shift slightly.
Walnuts: Pecans are a delicious alternative.
Heavy Cream: Half and half can substitute in a pinch.
Now let’s spotlight what truly makes these shine.
The Stars of the Show
Honey: This is not just sweetness, it is aroma and depth. It caramelizes gently in the oven and gives the filling its glossy finish.
Walnuts: Their slightly bitter edge balances the sugar and honey, creating a layered flavor that keeps you coming back for more.
And now let’s dive into the part we have been waiting for, the baking.
Let’s Bake These Little Beauties
This is where the kitchen starts to smell incredible.
- Preheat Your Equipment: Preheat your oven to 350 degrees Fahrenheit and lightly grease a mini tart pan or muffin tin.
- Combine Ingredients: In a bowl, mix flour, 1/4 cup sugar, and salt. Cut in the cold butter until the mixture resembles coarse crumbs. Add the egg and mix until a dough forms.
- Prepare Your Cooking Vessel: Press small portions of dough into each cavity, forming even shells along the bottom and sides.
- Assemble the Dish: In a saucepan over low heat, combine honey, heavy cream, and remaining 1/4 cup sugar. Stir until smooth and slightly thickened. Fold in the toasted walnuts. Spoon the mixture evenly into each shell.
- Cook to Perfection: Bake for 18 to 22 minutes, until the filling is bubbling gently and the crust is golden brown.
- Finishing Touches: Remove from the oven and let them cool in the pan for 10 minutes, then transfer to a cooling rack.
- Serve and Enjoy: Once fully cooled, serve with coffee or tea and enjoy every sticky, crunchy bite.
Texture and Flavor Harmony
As they bake, the honey thickens and wraps itself around the walnuts, creating a glossy topping that contrasts beautifully with the crisp pastry shell. The edges turn golden and slightly firm, while the center remains soft and chewy. That contrast is what makes these so satisfying.
Extra Baking Tips for Success
A few thoughtful tweaks can elevate your results.
- Toast the walnuts for 5 minutes before adding them to enhance flavor.
- Chill the filled tartlets for a firmer texture if serving later.
- Use high quality honey for the best aroma.
Common Mistakes and How to Avoid Them
Even simple desserts can trip you up if you rush.
- Overworking the dough can make it tough, mix just until combined.
- Overfilling the shells may cause overflow, leave a little space at the top.
- Removing them too early can result in runny filling, allow proper cooling time.
Nutritional Snapshot Per Serving
Servings: 12 tartlets
Calories per serving: 220
Note: These are approximate values.
Time Breakdown for Planning
Prep Time: 20 minutes
Cook Time: 20 minutes
Total Time: 40 minutes
Make Ahead and Storage Tips
You can prepare the dough a day in advance and refrigerate it tightly wrapped. Once baked, store the tartlets in an airtight container at room temperature for up to two days. For longer storage, refrigerate up to five days and bring to room temperature before serving. They can also be frozen for up to one month, then thawed gently.
Serving Ideas That Elevate the Experience
Serve them slightly warm with a scoop of vanilla ice cream, or drizzle with a touch of extra honey for shine. They also pair beautifully with strong coffee or black tea.
Creative Ways to Use Leftovers
If you have extras, crumble them over yogurt for a decadent breakfast. You can also chop them and fold into whipped cream for a quick dessert topping.
A Few More Helpful Notes
Use room temperature egg for smoother mixing. Always measure flour properly by spooning and leveling. Small details make a big difference.
Make Them Look Bakery Perfect
Brush the tops lightly with warm honey after baking for extra gloss. Arrange them on a simple white platter so their golden color stands out beautifully.
Fun Variations to Experiment With
- Add a pinch of cinnamon to the filling for warmth.
- Stir in a tablespoon of melted butter to the honey mixture for extra richness.
- Sprinkle a tiny bit of sea salt on top before baking.
- Mix in a few finely chopped dried cranberries for contrast.
FAQ’s
Q1: Can I make the dough ahead of time?
Yes, wrap it tightly and refrigerate up to 24 hours.
Q2: Can I use store bought pastry?
Yes, though homemade gives a better texture.
Q3: How do I know they are done?
The filling should bubble gently and the crust should look golden.
Q4: Can I reduce the sugar?
You can slightly reduce it, but keep the honey for structure.
Q5: Do they need refrigeration?
Not immediately, but store in the fridge after two days.
Q6: Can I make them larger?
Yes, just adjust baking time slightly.
Q7: Are they overly sweet?
No, the walnuts balance the sweetness nicely.
Q8: Can I freeze them?
Yes, freeze in an airtight container.
Q9: What type of honey works best?
A mild floral honey works beautifully.
Q10: Can I add chocolate?
A small drizzle on top can be delicious.
Conclusion
These honey walnut tartlets bring together crisp pastry, sticky honey, and crunchy walnuts in a way that feels both comforting and elegant. This one’s a total game changer when you want something impressive without stress. Gather your ingredients, preheat that oven, and let the sweet aroma fill your kitchen. Trust me, you are going to come back to this one again and again.
PrintHoney Walnut Tartlets
Buttery mini tart shells filled with a rich honey caramel mixture and toasted walnuts, baked until golden and perfectly set. These little tartlets are crisp on the outside, sticky and nutty inside, and ideal for holidays, tea time, or an elegant homemade dessert.
Ingredients
- 1 1/2 cups all purpose flour
- 1/2 cup unsalted butter, cold and cubed
- 1/4 cup granulated sugar (for dough)
- 1/4 teaspoon salt
- 1 large egg
- 1/2 cup honey
- 1/4 cup granulated sugar (for filling)
- 1/4 cup heavy cream
- 1 cup chopped walnuts, lightly toasted
Instructions
- Preheat Your Equipment: Preheat oven to 350 degrees Fahrenheit and lightly grease a mini tart pan or muffin tin.
- Combine Ingredients: In a mixing bowl, combine flour, 1/4 cup sugar, and salt. Cut in cold butter until mixture resembles coarse crumbs. Add the egg and mix until a soft dough forms.
- Prepare Your Cooking Vessel: Divide the dough evenly and press into each cavity, forming tart shells along the bottom and sides.
- Assemble the Dish: In a saucepan over low heat, combine honey, heavy cream, and remaining 1/4 cup sugar. Stir until smooth and slightly thickened. Fold in toasted walnuts. Spoon filling evenly into each shell, leaving a little space at the top.
- Cook to Perfection: Bake for 18 to 22 minutes until the filling is gently bubbling and the crust is golden brown.
- Finishing Touches: Remove from oven and cool in the pan for 10 minutes, then transfer to a cooling rack to cool completely.
- Serve and Enjoy: Serve at room temperature and enjoy the crisp pastry and sticky honey walnut center.
Notes
- Lightly toast the walnuts for 5 minutes before adding for deeper flavor.
- Allow tartlets to cool completely so the filling sets properly.
- Store in an airtight container at room temperature for up to 2 days or refrigerate up to 5 days.