Honey Garlic Chicken Rice Cups
There is something incredibly satisfying about a meal that is perfectly portioned, packed with flavor, and easy to grab. Honey Garlic Chicken Rice Cups check all those boxes and then some. Imagine tender chicken coated in a glossy honey garlic sauce, nestled on top of fluffy rice that has baked into a perfectly shaped cup. It is sweet, savory, slightly sticky, and completely comforting. Trust me, you’re going to love this. These little cups feel fun, but the flavor is seriously bold.
A Sweet and Savory Combo That Never Disappoints
Honey and garlic are one of those classic pairings that just work. The honey brings a gentle sweetness that caramelizes slightly as it cooks, while the garlic adds depth and aroma that balances everything beautifully.
When spooned over warm rice and baked into tidy cups, the sauce seeps slightly into the grains, giving every bite a glossy, flavorful finish. It is satisfying without being heavy, and simple without being boring.
Inspired by Takeout, Made for Real Life
Many honey garlic chicken dishes are inspired by Asian flavors, where sweet and savory sauces are a staple. This version keeps those familiar flavors but turns them into something practical and meal prep friendly.
Instead of serving everything in a bowl, we press the rice into muffin tins, creating structured cups that hold the saucy chicken perfectly. It is a modern twist that makes serving and storing so much easier.
Why This Recipe Is a Total Game-Changer
Before we jump into cooking, here is why these rice cups deserve a spot in your weekly rotation.
Versatile: Great for lunch boxes, dinners, or party appetizers.
Budget-Friendly: Uses simple ingredients like rice, chicken, and pantry staples.
Quick and Easy: Ready in about 40 minutes from start to finish.
Customizable: Add vegetables or adjust sweetness easily.
Crowd-Pleasing: Sweet and savory flavors appeal to both kids and adults.
Make-Ahead Friendly: Perfect for meal prep and reheats beautifully.
Great for Leftovers: Store well and maintain texture when reheated.
Pro Tips for Sticky, Flavorful Perfection
A few small techniques make all the difference.
- Use cooked rice that is slightly cooled so it presses easily into cups.
- Do not overcrowd the pan when cooking chicken.
- Let the sauce simmer briefly to thicken naturally.
- Press the rice firmly into the muffin tin so it holds its shape.
- Garnish right before serving for freshness.
Essential Kitchen Tools You Will Need
Keeping it simple makes this process smooth.
Large Skillet: For cooking chicken evenly and reducing the sauce.
Mixing Bowl: To toss chicken pieces evenly with sauce.
Muffin Tin: Standard 12 cup size to shape the rice cups.
Spatula: For flipping chicken and scooping rice.
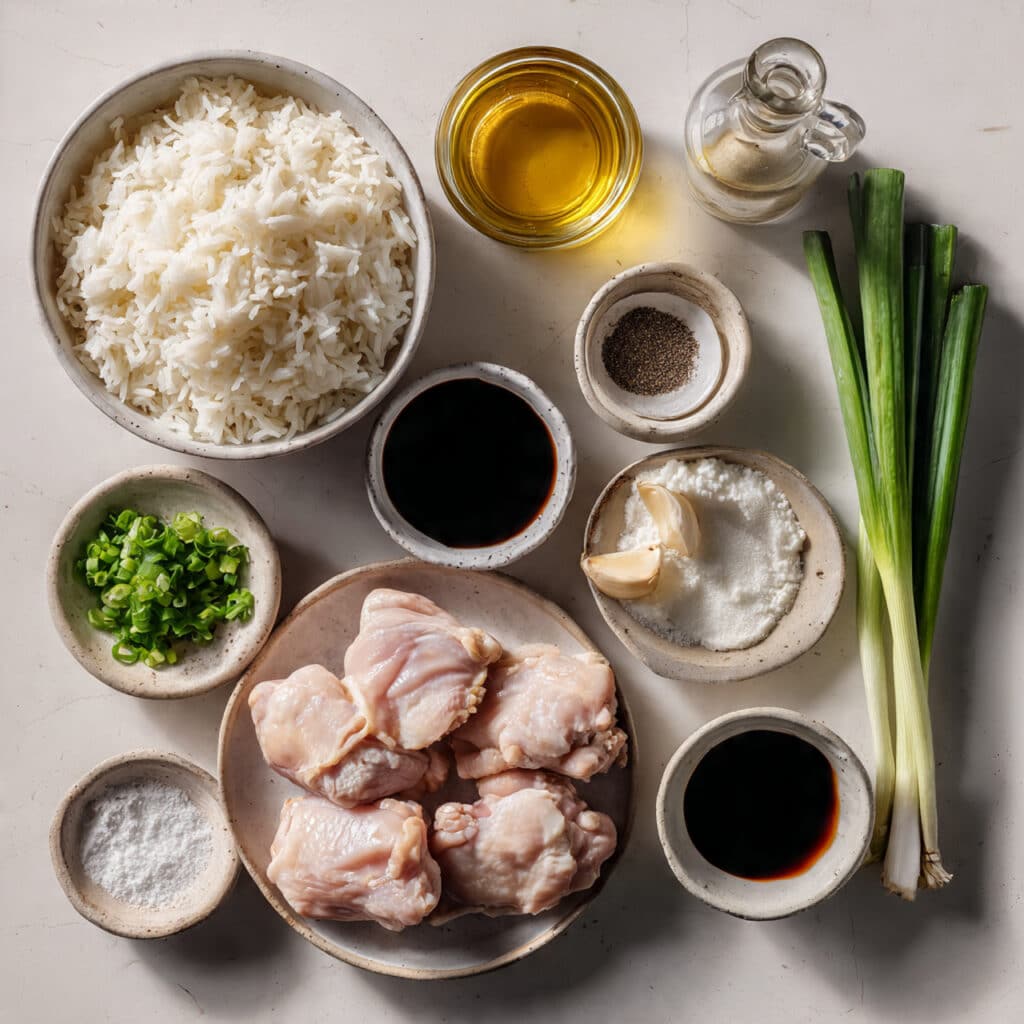
Ingredients You Will Need for These Flavor Packed Cups
Each ingredient plays a role in building that sweet and savory balance.
- Cooked White Rice: 3 cups, slightly cooled, forms the sturdy base.
- Boneless Skinless Chicken Thighs: 1 1/2 pounds, diced into small pieces for tenderness.
- Salt: 1 teaspoon, enhances overall flavor.
- Black Pepper: 1/2 teaspoon, adds gentle warmth.
- Olive Oil: 1 tablespoon, for cooking the chicken.
- Garlic Cloves: 4 cloves, minced, bring aromatic depth.
- Honey: 1/3 cup, creates sweetness and glaze.
- Low Sodium Soy Sauce: 1/4 cup, adds savory richness.
- Cornstarch: 1 tablespoon, mixed with 2 tablespoons water, thickens the sauce.
- Green Onions: 2 tablespoons, chopped, for garnish and freshness.
Easy Ingredient Swaps
Flexibility makes this recipe even more practical.
Chicken Thighs: Chicken breast can be used for a leaner option.
White Rice: Brown rice for added fiber.
Honey: Maple syrup for a slightly different sweetness.
Green Onions: Chopped parsley for a milder garnish.
Spotlight on the Key Ingredients
Honey: It caramelizes slightly in the pan, creating that glossy finish that makes the dish shine.
Garlic: Fresh minced garlic builds the backbone of flavor and balances the sweetness.
Let’s Start Cooking
Now that everything is prepped and ready, let’s bring these rice cups to life.
- Preheat Your Equipment: Preheat your oven to 375 degrees F and lightly grease a 12 cup muffin tin.
- Combine Ingredients: Season diced chicken with salt and black pepper.
- Prepare Your Cooking Vessel: Heat olive oil in a large skillet over medium heat. Add chicken and cook for 6 to 8 minutes until golden and cooked through.
- Assemble the Dish: Add minced garlic to the skillet and cook for 30 seconds. Stir in honey and soy sauce. Let it simmer gently for 2 to 3 minutes. Add the cornstarch slurry and cook until the sauce thickens.
- Cook to Perfection: Press cooked rice firmly into each muffin cup to form a base. Spoon honey garlic chicken evenly over the rice. Bake for 10 minutes to help everything set together.
- Finishing Touches: Remove from oven and let cool for 5 minutes before gently removing from the tin.
- Serve and Enjoy: Garnish with chopped green onions and serve warm.
Texture and Flavor That Work Together
The rice forms a lightly crisp outer layer while staying soft inside. The chicken is tender and coated in a glossy, sticky sauce that clings beautifully. Every bite delivers sweet, savory, and garlicky notes in perfect balance.
Helpful Cooking Tips for Best Results
Small details elevate the outcome.
- Use medium heat to prevent burning the honey.
- Stir the sauce constantly once thickening begins.
- Press rice firmly so cups hold their shape.
- Let them rest briefly before removing from the pan.
What to Avoid for Perfect Rice Cups
Even simple dishes benefit from attention.
- Skipping the cornstarch, which prevents proper thickening.
- Using freshly cooked hot rice, which may not hold shape.
- Overcooking the chicken, which can dry it out.
- Forgetting to grease the muffin tin.
Nutrition Overview
Servings: 12 cups
Calories per serving: 290
Note: These are approximate values.
Preparation Time Overview
Prep Time: 15 minutes
Cook Time: 25 minutes
Total Time: 40 minutes
Make Ahead and Storage Tips
Store cooled rice cups in an airtight container in the refrigerator for up to 4 days. Reheat in the microwave for about 1 minute or warm in the oven at 350 degrees F.
They can also be frozen for up to 2 months. Thaw overnight in the refrigerator and reheat gently.
How to Serve Them
Serve with a side of steamed vegetables or a crisp salad. They also work wonderfully as part of a party platter.
Creative Leftover Transformations
Break the cups apart and serve in a bowl with extra vegetables. Wrap in lettuce leaves for a lighter option. Or chop and toss into a quick stir fry.
Additional Tips for Flavor Boost
Little enhancements can make them even better.
- Add a pinch of red pepper flakes for gentle heat.
- Sprinkle sesame seeds on top before serving.
- Stir a splash of lemon juice into the sauce for brightness.
- Taste and adjust sweetness before baking.
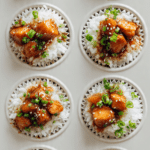
Make It a Showstopper
Arrange the rice cups neatly on a white serving platter and sprinkle fresh green onions over the top. The glossy sauce and bright garnish make them look as good as they taste.
Variations to Try
- Add diced bell peppers to the chicken mixture.
- Use brown rice for extra texture.
- Stir in steamed broccoli before baking.
- Add a small spoon of chili sauce for heat.
- Top with shredded carrots for crunch.
FAQ’s
1. Can I use chicken breast?
Yes, just avoid overcooking.
2. Can I make them ahead?
Yes, they are great for meal prep.
3. Do they freeze well?
Yes, freeze for up to 2 months.
4. How do I keep the rice from sticking?
Grease the muffin tin well.
5. Can I reduce sweetness?
Yes, slightly lower the honey amount.
6. Can I add vegetables?
Absolutely, diced peppers or broccoli work well.
7. Is this kid friendly?
Yes, the sweet and savory flavor is very appealing.
8. Can I use brown rice?
Yes, just ensure it is cooked and slightly cooled.
9. How do I thicken the sauce?
Use the cornstarch slurry as directed.
10. Can I double the recipe?
Yes, use two muffin tins.
Conclusion
Honey Garlic Chicken Rice Cups bring together sweet, savory, and satisfying flavors in a fun and practical way. They are perfect for busy days, meal prep, or sharing with family. This one’s a total game-changer when you want bold flavor without complicated steps. Give them a try, and let me tell you, they are worth every bite.
PrintHoney Garlic Chicken Rice Cups
Sweet and savory honey garlic chicken rice cups made with tender glazed chicken, fluffy rice, and a sticky garlic sauce, perfect for meal prep or easy dinners.
Ingredients
- 3 cups cooked white rice, slightly cooled
- 1 1/2 pounds boneless skinless chicken thighs, diced
- 1 teaspoon salt
- 1/2 teaspoon black pepper
- 1 tablespoon olive oil
- 4 cloves garlic, minced
- 1/3 cup honey
- 1/4 cup low sodium soy sauce
- 1 tablespoon cornstarch mixed with 2 tablespoons water
- 2 tablespoons green onions, chopped
Instructions
- Preheat oven to 375 degrees F and lightly grease a 12 cup muffin tin.
- Season diced chicken with salt and black pepper.
- Heat olive oil in a large skillet over medium heat and cook chicken for 6 to 8 minutes until golden and fully cooked.
- Add minced garlic and cook for 30 seconds until fragrant.
- Stir in honey and soy sauce, then simmer for 2 to 3 minutes.
- Add the cornstarch mixture and stir until the sauce thickens and becomes glossy.
- Press cooked rice firmly into each muffin cup to form a base.
- Spoon honey garlic chicken evenly over the rice cups.
- Bake for 10 minutes to help the cups set together.
- Allow to cool for 5 minutes before removing from the tin. Garnish with chopped green onions and serve warm.
Notes
- Use slightly cooled rice so it holds shape better.
- Stir the sauce continuously while thickening.
- Grease the muffin tin well to prevent sticking.
- Store leftovers in an airtight container for up to 4 days.