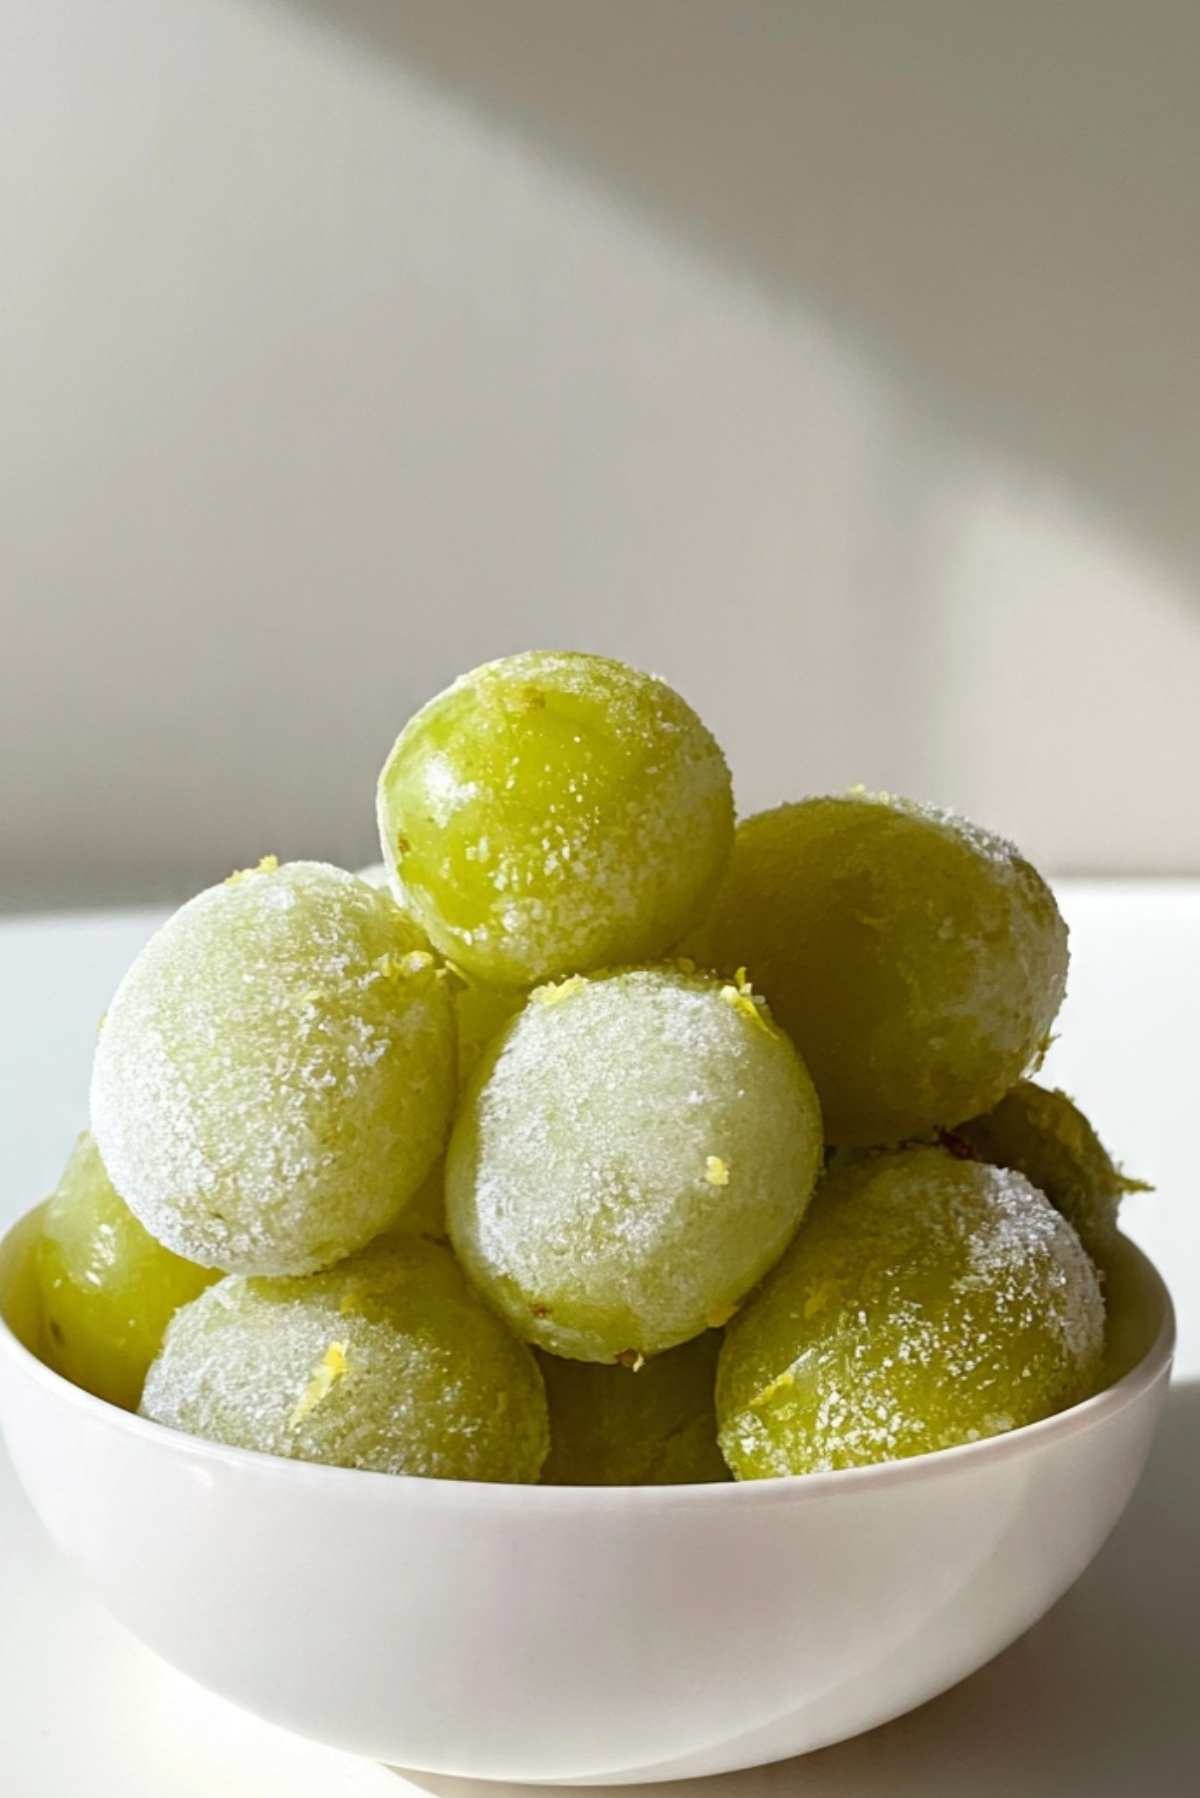
Frozen Lemon Grapes
There is something almost magical about biting into a frozen grape on a hot day. The outside is lightly frosted, the inside bursts with icy sweetness, and that bright pop of lemon wakes up your whole palate. It is simple, refreshing, and surprisingly addictive. Trust me, you’re going to love this. Frozen Lemon Grapes are one of those effortless treats that feel special even though they take barely any time to make.
A Bright, Zesty Snack That Feels Like Summer in Every Bite
The beauty of this recipe is in its contrast. You get the natural sweetness of grapes, a delicate tang from fresh lemon juice, and a subtle sparkle from sugar that freezes into a thin, crisp coating.
They are light, refreshing, and perfect when you want something sweet without feeling heavy. Let me tell you, it’s worth every bite, especially when you need a quick cool down.
Where This Cool Trend Comes From
Frozen grapes have been a popular healthy snack for years, often shared as a smart alternative to sugary desserts. Adding lemon and a touch of sugar gives them a flavor boost that feels almost like candy, but still fresh and fruit forward.
It is a simple idea that proves sometimes the smallest twist can completely transform a basic ingredient.
Why This Recipe Is a Keeper
Before we head into the kitchen, here is why this one stands out.
Versatile: Perfect as a snack, dessert, or party treat.
Budget-Friendly: Made with just a few affordable ingredients.
Quick and Easy: Minimal prep and no cooking required.
Customizable: Adjust the sweetness or tartness to your liking.
Crowd-Pleasing: Both kids and adults love the icy texture.
Make-Ahead Friendly: Keep a batch in the freezer for whenever cravings hit.
Great for Leftovers: They store beautifully in the freezer.
Pro Tips for the Best Frozen Texture
A few small details make a big difference.
- Use seedless grapes for the best snacking experience.
- Pat the grapes dry after washing so the coating sticks properly.
- Freeze in a single layer to prevent clumping.
- Let them sit at room temperature for 2 minutes before serving for the best bite.
Simple Tools You Will Need
You really do not need much.
Mixing Bowl: For tossing the grapes with lemon and sugar.
Baking Sheet: To freeze the grapes in a single layer.
Parchment Paper: Prevents sticking during freezing.
Zester: For fresh lemon zest if desired.
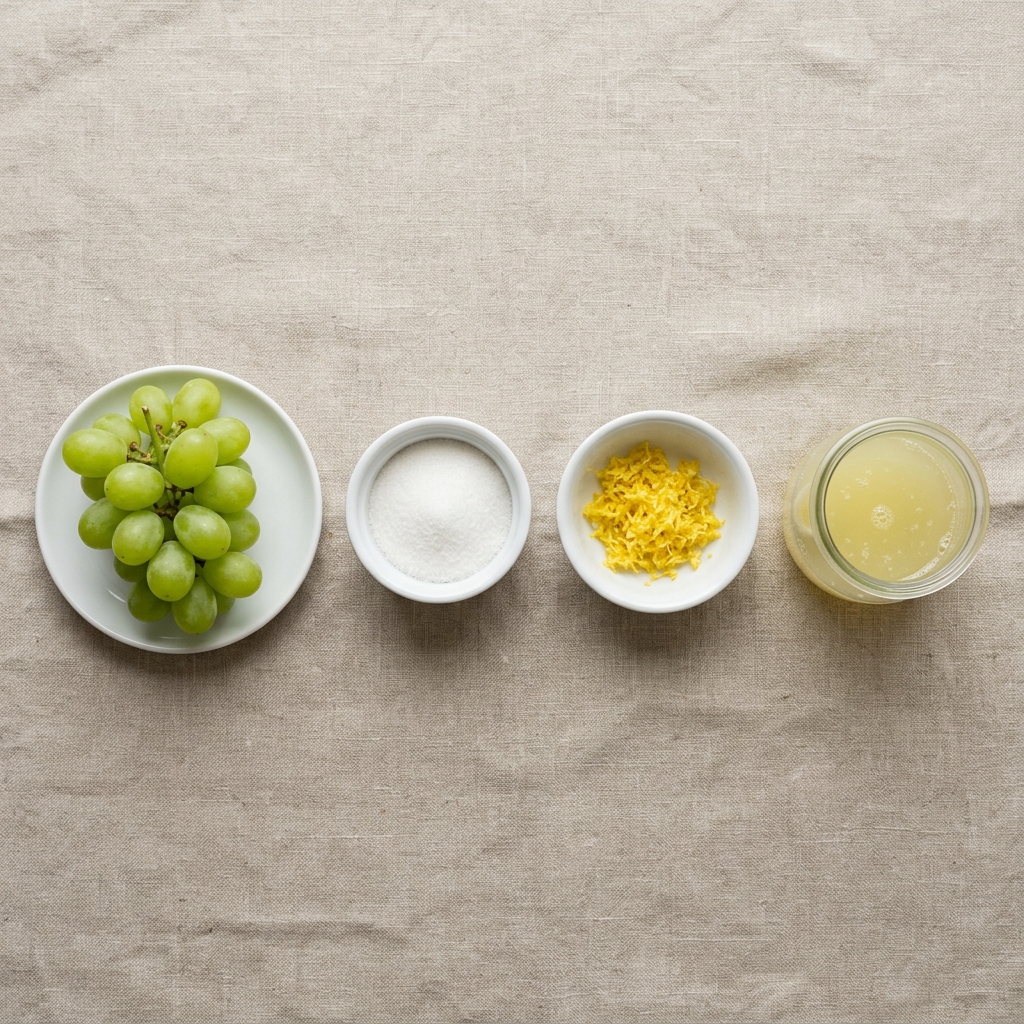
Ingredients You Will Need For This Refreshing Treat
Each ingredient plays a small but important role.
- Seedless Green Grapes: 4 cups, about 600 grams, washed and dried, provide natural sweetness and juiciness.
- Fresh Lemon Juice: 2 tablespoons, about 30 milliliters, adds bright tangy flavor.
- Granulated Sugar: 2 tablespoons, about 25 grams, creates a light frosty coating.
- Lemon Zest: 1 teaspoon, optional, enhances citrus aroma and flavor.
Easy Ingredient Swaps
Feel free to adjust based on preference.
Green Grapes: Red grapes work just as well for a slightly deeper sweetness.
Granulated Sugar: Use a sugar substitute if desired.
Lemon Juice: Try lime juice for a different citrus twist.
Spotlight on the Star Ingredient
There is one ingredient that truly transforms this snack.
Fresh Lemon Juice: Its bright acidity balances the natural sugars in the grapes and keeps the flavor lively and refreshing.
Let’s Make This Icy Snack
Now let’s dive into the simple steps you are going to follow.
- Preheat Your Equipment: There is no oven needed, but clear space in your freezer for a baking sheet.
- Combine Ingredients: In a mixing bowl, toss the dried grapes with fresh lemon juice until evenly coated. Sprinkle in the granulated sugar and lemon zest, then toss again until the grapes are lightly covered.
- Prepare Your Cooking Vessel: Line a baking sheet with parchment paper.
- Assemble the Dish: Spread the coated grapes in a single layer on the prepared baking sheet so they do not touch.
- Cook to Perfection: Place the baking sheet in the freezer and freeze for at least 2 to 3 hours, or until fully solid.
- Finishing Touches: Once frozen, gently separate any grapes that may have stuck together.
- Serve and Enjoy: Serve straight from the freezer for a refreshing, icy treat.
Texture and Flavor Development
As the grapes freeze, their juices turn icy and slightly firm while still remaining juicy inside. The sugar forms a delicate frosty shell, and the lemon adds a bright zing that cuts through the sweetness. The result is crisp, juicy, and refreshingly tart all at once.
Helpful Tips for Best Results
Keep these simple pointers in mind.
- Dry the grapes thoroughly before coating.
- Freeze in a single layer for even freezing.
- Store in a sealed container to prevent freezer burn.
What to Avoid
A few small mistakes can affect texture.
- Do not skip drying, excess water prevents proper coating.
- Avoid overcrowding on the baking sheet.
- Do not thaw completely before serving, they are best slightly icy.
Nutrition Facts
Servings: 6
Calories per serving: 90
Note: These are approximate values.
Preparation Time
Prep Time: 10 minutes
Cook Time: 0 minutes
Total Time: 10 minutes plus freezing time
Make Ahead and Storage Tips
Store frozen grapes in an airtight container in the freezer for up to two weeks. They are perfect to grab straight from the freezer whenever you want a refreshing snack. No reheating required, just serve and enjoy.
How to Serve
Serve in a chilled bowl on a warm day. They also make a fun topping for yogurt or can be added to sparkling water for a refreshing drink.
Creative Leftover Transformations
Blend frozen grapes into smoothies for natural sweetness. Add them to fruit salads for a cool twist. Use them as edible ice cubes in beverages.
Additional Tips
Taste your grapes before adding sugar, some batches are naturally sweeter than others. Adjust lemon juice to match your preference for tartness.
Make It a Showstopper
Serve in a frosty white bowl and sprinkle a little extra lemon zest on top for visual appeal. The light sparkle from the sugar coating makes them look almost like little gems.
Variations to Try
- Add a pinch of chili powder for a sweet and spicy kick.
- Toss with finely chopped mint for a fresh herbal note.
- Use a mix of green and red grapes for color contrast.
- Try orange zest instead of lemon for a softer citrus flavor.
- Roll lightly in powdered sugar for a snowy finish.
FAQ’s
Q1: Can I use red grapes instead of green?
Yes, both work beautifully.
Q2: How long do they need to freeze?
At least 2 to 3 hours until fully solid.
Q3: Can I skip the sugar?
Yes, they will still be refreshing and sweet naturally.
Q4: How long do they last in the freezer?
Up to two weeks in an airtight container.
Q5: Are they very hard when frozen?
They are firm but still biteable after a minute at room temperature.
Q6: Can I use bottled lemon juice?
Fresh lemon juice gives the best flavor.
Q7: Do I need to peel the grapes?
No, leave the skins on.
Q8: Can I add other flavors?
Yes, try lime juice or a hint of orange zest.
Q9: Are they healthy?
They are fruit based and lighter than many desserts.
Q10: Can I double the recipe?
Absolutely, just use multiple baking sheets if needed.
Conclusion
Frozen Lemon Grapes are proof that simple ingredients can create something truly refreshing and delightful. Bright, sweet, and perfectly icy, they are the kind of treat you will want to keep stocked in your freezer all summer long. Once you try them, you will see how easy it is to turn everyday fruit into something exciting.
PrintFrozen Lemon Grapes
Refreshing Frozen Lemon Grapes coated in fresh lemon juice and a light sugar sparkle, then frozen until perfectly icy and juicy. A simple, bright, and naturally sweet treat that is perfect for warm days.
Ingredients
- 4 cups seedless green grapes, about 600 grams, washed and dried
- 2 tablespoons fresh lemon juice, about 30 milliliters
- 2 tablespoons granulated sugar, about 25 grams
- 1 teaspoon lemon zest, optional
Instructions
- Wash the grapes thoroughly and pat them completely dry with a clean towel.
- In a mixing bowl, toss the dried grapes with fresh lemon juice until evenly coated.
- Sprinkle the granulated sugar and lemon zest over the grapes and toss again until lightly coated.
- Line a baking sheet with parchment paper.
- Spread the coated grapes in a single layer on the prepared baking sheet, making sure they do not touch.
- Place the baking sheet in the freezer and freeze for at least 2 to 3 hours, or until fully solid.
- Once frozen, separate any grapes that may have stuck together and serve straight from the freezer.
Notes
- Dry the grapes thoroughly before coating so the sugar adheres properly.
- Freeze in a single layer to prevent clumping.
- Store in an airtight container in the freezer for up to two weeks.
- Let sit at room temperature for 1 to 2 minutes before eating for the best texture.