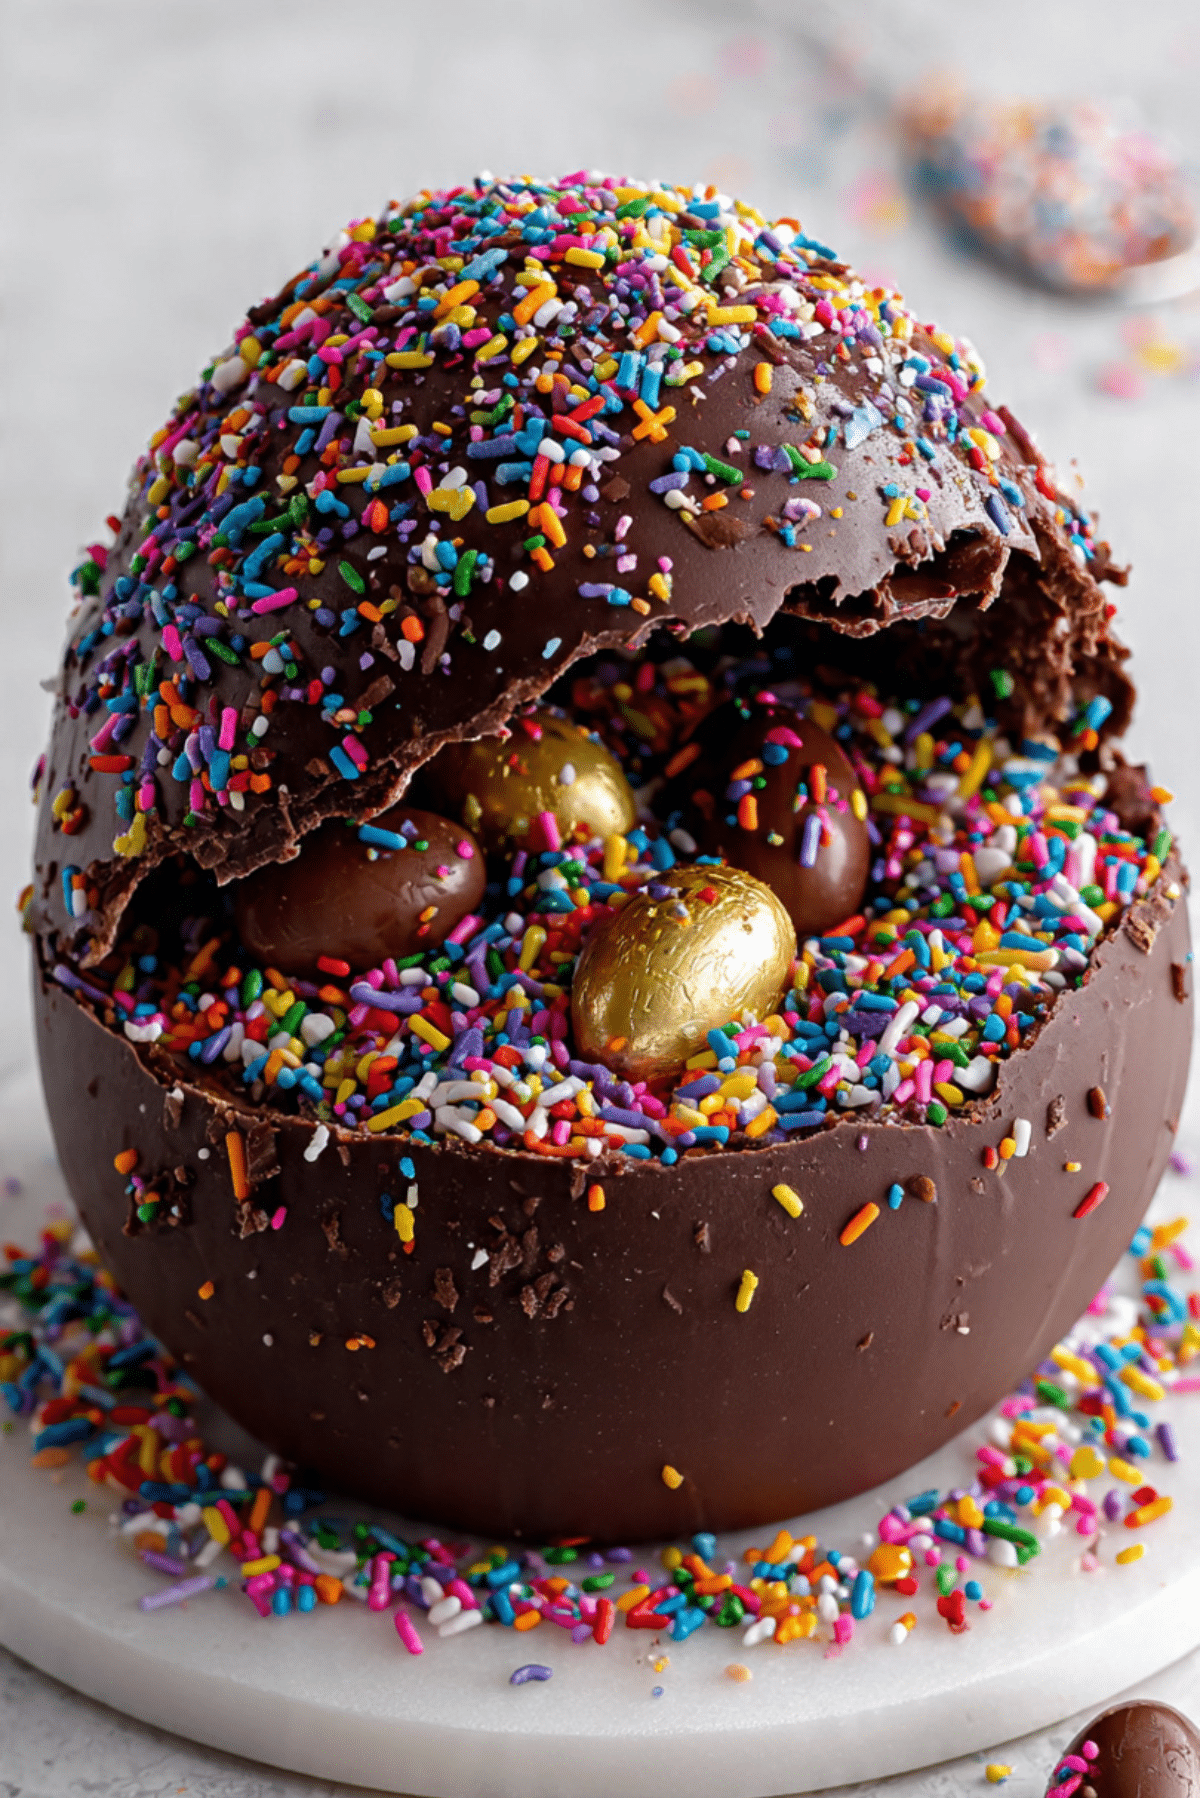
Easter Chocolate Egg Smash Cake
There is something magical about bringing a dessert to the table that makes everyone pause mid conversation. This Easter Chocolate Egg Smash Cake does exactly that. With its glossy chocolate shell, colorful sprinkles, and candy filled center, it feels playful and indulgent all at once. When you crack into it and reveal the rich chocolate cake and hidden sweets inside, trust me, you are going to love this. It is dramatic, fun, and honestly worth every bite.
Why This Showstopping Easter Dessert Steals the Spotlight
Every holiday needs a centerpiece, and this one is pure joy on a plate. The smooth chocolate coating gives way to soft, moist cake, and then comes the surprise of bright foil wrapped eggs and chocolates tucked inside. It is part dessert, part experience. Kids adore it, adults get nostalgic over it, and everyone gathers around when it is time to slice. This one’s a total game changer when you want something festive that actually tastes as good as it looks.
And now let us talk about how this playful creation became such a beloved Easter table tradition.
A Sweet Nod to Easter Traditions
Chocolate eggs have long symbolized new beginnings and celebration during springtime. Across many cultures, eggs represent renewal and fresh starts, which makes them perfect for Easter gatherings. Over time, simple chocolate eggs evolved into beautifully decorated treats filled with surprises. This cake takes that classic idea and transforms it into a sliceable centerpiece that feels nostalgic yet modern.
And now that we have explored its roots, let me tell you why this dessert works so beautifully every single time you make it.
Why You Can Count on This Cake Every Time
This is one of those desserts that looks impressive but is surprisingly manageable in your own kitchen.
Versatile: You can decorate it with pastel sprinkles, bold rainbow colors, or themed candies depending on your celebration.
Budget-Friendly: Most ingredients are simple pantry staples like flour, cocoa, sugar, and eggs, which keeps costs reasonable.
Quick and Easy: The batter mixes together in minutes, and shaping the dome is easier than you might expect.
Customizable: You can switch the candy filling to match your favorites or dietary needs.
Crowd-Pleasing: Chocolate cake plus candy surprise, let me tell you, it is worth every bite.
Make-Ahead Friendly: Bake the layers the day before and assemble when you are ready to serve.
Great for Leftovers: The cake stays moist, and those hidden candies keep each slice interesting.
Before we step into the kitchen, here are a few insider tips that make all the difference.
Pro Tips for a Perfect Chocolate Egg Cake
A little preparation goes a long way here.
- Use room temperature eggs and milk so the batter blends smoothly.
- Let the cake layers cool completely before shaping to prevent crumbling.
- Chill the frosted cake before pouring the melted chocolate so the shell sets evenly.
- Melt chocolate slowly and stir frequently to keep it silky and smooth.
Now let us gather the tools that make this process feel effortless.
Essential Tools for a Smooth Baking Experience
Having the right equipment keeps everything simple and stress free.
Mixing Bowls: Large enough to comfortably whisk together dry and wet ingredients.
Electric Mixer or Whisk: Helps create a smooth batter without lumps.
Two 8 Inch Round Cake Pans: Ensure even baking and consistent layers.
Serrated Knife: Perfect for trimming and shaping the dome.
Offset Spatula: Makes frosting and smoothing the chocolate coating much easier.
And now, let us talk ingredients, because this is where the flavor really begins.
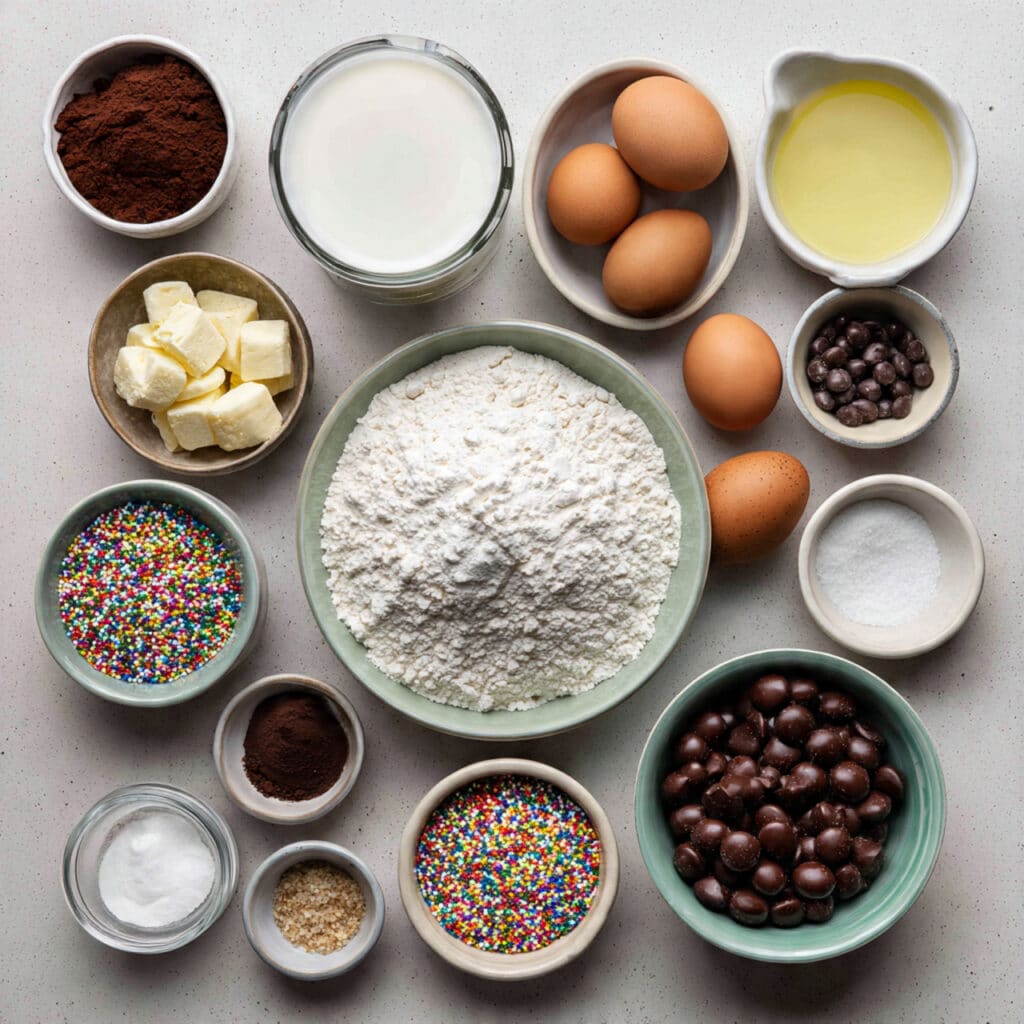
Ingredients You Will Need For This Easter Chocolate Egg Smash Cake
Each ingredient plays a specific role in building the structure, flavor, and texture of this showpiece dessert.
- All Purpose Flour: 2 cups, gives structure and stability to the cake layers.
- Unsweetened Cocoa Powder: 3/4 cup, delivers deep, rich chocolate flavor.
- Granulated Sugar: 2 cups, sweetens the cake and keeps it tender.
- Baking Powder: 2 teaspoons, helps the cake rise evenly.
- Baking Soda: 1 1/2 teaspoons, adds extra lift and lightness.
- Salt: 1/2 teaspoon, balances sweetness and enhances flavor.
- Eggs: 2 large, bind the ingredients and add richness.
- Whole Milk: 1 cup, provides moisture and softness.
- Vegetable Oil: 1/2 cup, keeps the crumb moist and delicate.
- Vanilla Extract: 2 teaspoons, rounds out the chocolate flavor.
- Boiling Water: 1 cup, intensifies the cocoa and creates a smooth batter.
- Chocolate Frosting: 2 cups, used for filling and coating the cake.
- Milk Chocolate Chips: 2 cups, melted to create the glossy outer shell.
- Rainbow Sprinkles: 1/2 cup, add color and playful texture.
- Assorted Chocolate Easter Candies: 1 1/2 cups, create the hidden surprise center.
If you need flexibility, here are a few simple swaps.
Easy Ingredient Swaps If You Need Them
Sometimes we work with what we have, and that is perfectly fine.
Whole Milk: Almond milk or oat milk can be used instead.
Vegetable Oil: Melted unsalted butter works beautifully.
Milk Chocolate Chips: Dark chocolate chips for a more intense flavor.
All Purpose Flour: A good quality gluten free flour blend can be substituted.
Now let us highlight two ingredients that truly make this cake unforgettable.
Spotlight on the Stars of the Cake
Unsweetened Cocoa Powder: This is where the bold chocolate flavor begins. Choosing a high quality cocoa makes the taste deeper and more satisfying.
Milk Chocolate Chips: These form the shell that gives that satisfying snap when sliced. When melted gently, they create a smooth and glossy finish that looks professional.
And now let us dive into the baking process itself.
Let’s Bring This Easter Centerpiece to Life
This is the part where everything comes together, and it is more straightforward than it looks.
- Preheat Your Equipment: Preheat your oven to 350 degrees F and grease two 8 inch round cake pans.
- Combine Ingredients: In a large bowl, whisk together flour, cocoa powder, sugar, baking powder, baking soda, and salt. Add eggs, milk, vegetable oil, and vanilla extract. Mix until smooth. Carefully stir in boiling water until fully incorporated.
- Prepare Your Cooking Vessel: Divide the batter evenly between the prepared pans and smooth the tops with a spatula.
- Assemble the Dish: Bake for 30 to 35 minutes, or until a toothpick inserted in the center comes out clean. Allow the cakes to cool completely. Trim the tops if needed and gently shape into a dome. Spread frosting between the layers and over the entire cake. Chill for 20 minutes.
- Cook to Perfection: Melt the milk chocolate chips until smooth. Pour and spread the melted chocolate over the chilled cake to create a shell. Immediately sprinkle with rainbow sprinkles before the chocolate sets.
- Finishing Touches: Once the shell has set, carefully cut a small section from the center and hollow slightly. Fill with assorted chocolate Easter candies. Replace the top piece if desired.
- Serve and Enjoy: Slice through the shell to reveal the candy surprise and serve immediately.
A Symphony of Textures and Flavors
The outer shell gives a gentle snap before your fork sinks into moist chocolate cake. The frosting adds creamy sweetness, while the candy center brings pops of crunch and bursts of sugary delight. It is layered, indulgent, and surprisingly balanced. Each bite offers something slightly different, which keeps everyone reaching for another slice.
Helpful Tips for the Best Results
A few simple adjustments can elevate the final result.
- Chill the cake thoroughly before adding melted chocolate for a smoother finish.
- Use a warm, sharp knife for clean slices through the shell.
- Add the candy filling just before serving for maximum crunch.
What to Avoid for Perfect Results
Even simple recipes can have small pitfalls, so keep these in mind.
- Do not rush the cooling process, or the frosting may melt.
- Avoid overheating the chocolate, as it can seize and become grainy.
- Do not overfill the center, which can make slicing messy.
Nutrition Facts and Serving Details
Servings: 12
Calories per serving: 520
Note: These are approximate values and may vary based on candy selection.
Preparation Time at a Glance
Prep Time: 30 minutes
Cook Time: 35 minutes
Total Time: 1 hour 5 minutes
Make Ahead and Storage Tips for Freshness
You can bake the cake layers up to one day in advance and wrap them tightly in plastic wrap. Once assembled, store the cake in a cool place or refrigerate in an airtight container for up to three days. Allow slices to come to room temperature before serving to maintain the best texture. Freezing individual slices is also possible if wrapped securely.
How to Serve This Easter Delight
Place it proudly in the center of your table. Pair it with vanilla ice cream, fresh berries, or a drizzle of warm chocolate sauce. It also pairs beautifully with coffee or a glass of cold milk for a comforting finish.
Creative Leftover Transformations
Turn leftover slices into cake pops by mixing crumbs with frosting and dipping in chocolate. Layer pieces into dessert cups with whipped cream. Blend small portions into a thick chocolate milkshake for a fun treat.
Additional Tips for Flavor and Ease
Keep decorations simple so the cake remains the star. Use high quality chocolate for the shell for best flavor and texture. Take your time shaping the dome for a smooth final appearance.
Make It a Showstopper on Your Table
Add pastel themed candies for a softer spring look or mix in metallic sprinkles for extra sparkle. Display the cake on a raised stand to give it height and presence. A clean white platter makes the colors pop beautifully.
Variations to Try for a Fun Twist
Create a white chocolate shell for contrast. Add chopped nuts to the filling for extra crunch. Use flavored frosting like chocolate hazelnut for a new layer of flavor. Add a thin layer of strawberry jam between cake layers for a fruity surprise.
FAQ’s
Q1: Can I prepare this cake ahead of time?
Yes, bake the layers in advance and assemble the day you plan to serve it.
Q2: Can I use a boxed cake mix instead?
Absolutely, it works well if you are short on time.
Q3: How do I keep the chocolate shell smooth?
Chill the cake first and melt the chocolate gently, stirring often.
Q4: Can I freeze the completed cake?
Freezing the layers is best. Assemble fresh for optimal texture.
Q5: What candies work best for the filling?
Mini chocolate eggs and chocolate coated candies hold their shape nicely.
Q6: Can I use dark chocolate for the shell?
Yes, it will create a richer and slightly less sweet finish.
Q7: How do I shape the dome neatly?
Trim carefully with a serrated knife and work slowly.
Q8: Is this cake overly sweet?
It is indulgent but balanced by cocoa and frosting.
Q9: Can I make a smaller version?
Yes, use smaller pans and adjust baking time slightly.
Q10: Is this suitable for kids to help with?
Yes, decorating and filling the center is especially fun for them.
Conclusion
This Easter Chocolate Egg Smash Cake is more than just dessert, it is an experience that brings laughter and excitement to the table. From the glossy chocolate shell to the candy filled surprise inside, every slice feels festive and joyful. Trust me, you are going to love this. It is playful, indulgent, and absolutely worth every bite.
PrintEaster Chocolate Egg Smash Cake
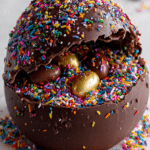
A festive chocolate cake shaped like a giant Easter egg, coated in a glossy chocolate shell and filled with colorful candy for a fun smash-and-reveal dessert centerpiece.
- Prep Time: 30 minutes
- Cook Time: 35 minutes
- Total Time: 1 hour 5 minutes
- Yield: 12 servings
- Category: Dessert
- Method: Baking
- Cuisine: American
- Diet: Vegetarian
Ingredients
- 2 cups all purpose flour
- 3/4 cup unsweetened cocoa powder
- 2 cups granulated sugar
- 2 teaspoons baking powder
- 1 1/2 teaspoons baking soda
- 1/2 teaspoon salt
- 2 large eggs
- 1 cup whole milk
- 1/2 cup vegetable oil
- 2 teaspoons vanilla extract
- 1 cup boiling water
- 2 cups chocolate frosting
- 2 cups milk chocolate chips
- 1/2 cup rainbow sprinkles
- 1 1/2 cups assorted chocolate Easter candies
Instructions
- Preheat oven to 350 degrees F and grease two 8 inch round cake pans.
- In a large bowl whisk flour, cocoa powder, sugar, baking powder, baking soda, and salt. Add eggs, milk, vegetable oil, and vanilla extract. Mix until smooth. Carefully stir in boiling water.
- Divide batter evenly between pans and smooth the tops.
- Bake for 30 to 35 minutes or until a toothpick inserted in the center comes out clean. Cool completely.
- Trim and gently shape cakes into a dome. Spread chocolate frosting between layers and over the entire cake. Chill for 20 minutes.
- Melt milk chocolate chips until smooth. Pour and spread over the chilled cake to form a shell. Immediately add rainbow sprinkles before the chocolate sets.
- Once set, carefully cut a small section from the center and hollow slightly. Fill with assorted chocolate Easter candies.
- Slice through the shell to reveal the candy center and serve.
Notes
- Chill the cake before adding melted chocolate for a smoother finish.
- Use a warm sharp knife for clean slices through the shell.
- Add the candy filling just before serving for maximum crunch.
Nutrition
- Serving Size: 1 slice
- Calories: 520
- Sugar: 45g
- Sodium: 320mg
- Fat: 28g
- Saturated Fat: 14g
- Unsaturated Fat: 12g
- Trans Fat: 0g
- Carbohydrates: 65g
- Fiber: 3g
- Protein: 6g
- Cholesterol: 55mg