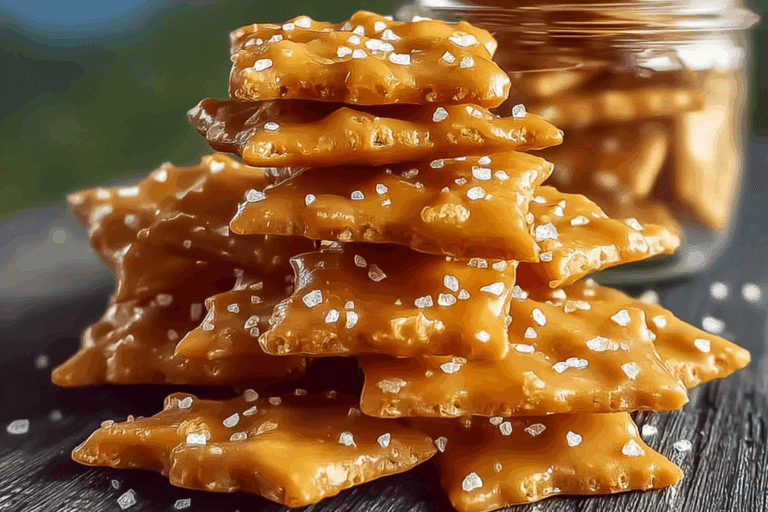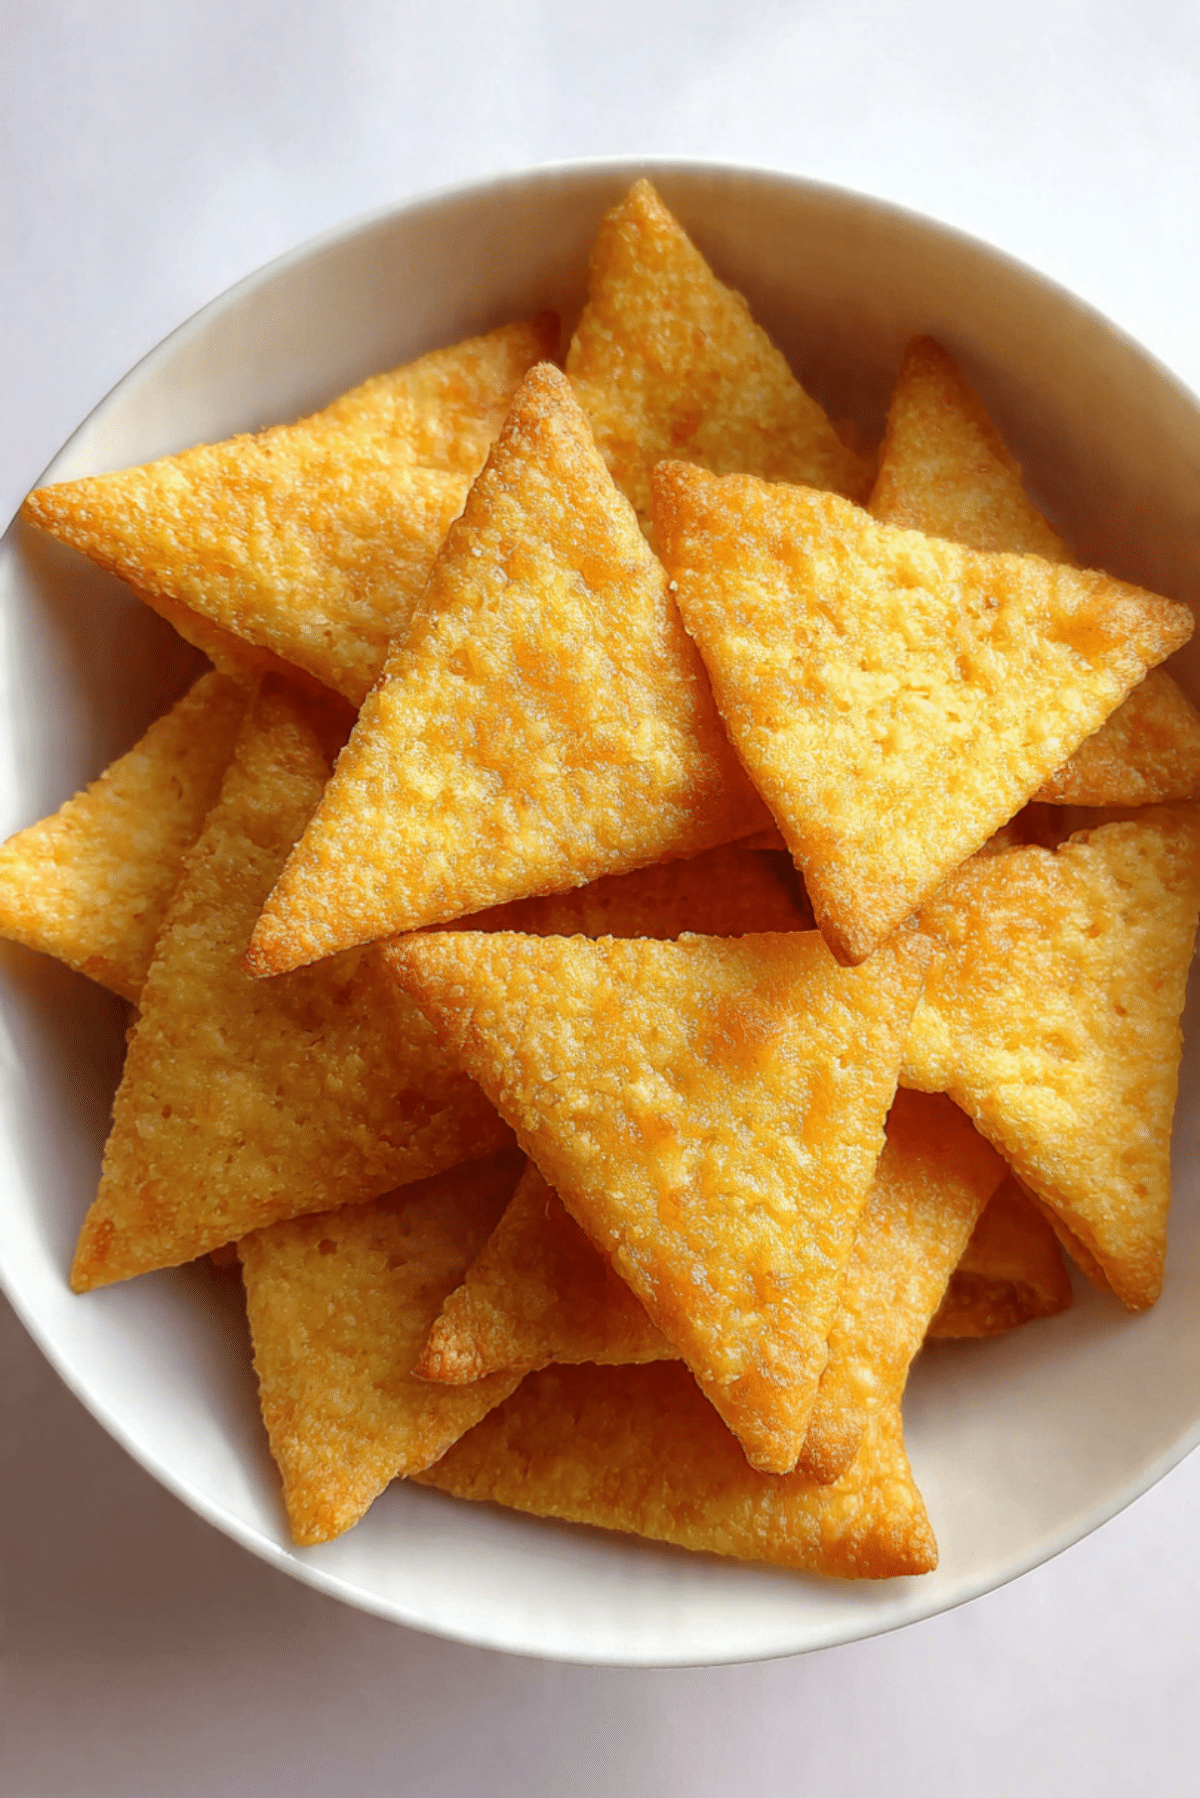
Crunchy Cheese Crackers
There’s something undeniably comforting about the smell of cheese and butter wafting through the kitchen as golden, flaky crackers crisp up in the oven. These homemade crunchy cheese crackers bring you that nostalgic bakery-style snack right into your hands. Each bite is rich, salty, crumbly, and oh-so-satisfying. Whether you’re nibbling them with soup, adding them to a snack board, or munching straight from the jar, trust me, you’re going to love this.
Behind the Recipe
I first made these crunchy cheese crackers on a rainy afternoon when the snack cupboard was looking a little too bare. Armed with only a block of cheddar and some pantry basics, I whipped together a dough, rolled it out, and before I knew it, these addictive little bites came out of the oven. What started as a casual experiment quickly became a weekly must-bake.
Recipe Origin or Trivia
Cheese crackers have long been a staple in American snacking, tracing their roots back to classic Southern baking traditions. Often found at holiday parties or tucked into lunchboxes, their simplicity and bold flavor made them a hit across generations. Inspired by popular boxed versions like Cheez-Its but made from real, wholesome ingredients, these crackers deliver that same salty crunch with homemade charm.
Why You’ll Love Crunchy Cheese Crackers
These crackers are more than just cheesy snacks. They’re little bites of joy with endless possibilities.
Versatile: Great on a charcuterie board, packed in lunchboxes, or served with soups and dips.
Budget-Friendly: Uses everyday pantry ingredients, no need for fancy cheese or tools.
Quick and Easy: The dough comes together in minutes and bakes in under 15.
Customizable: Change up the cheese, spices, or shapes to suit your taste.
Crowd-Pleasing: Everyone loves a cheesy, crunchy snack, from kids to adults.
Make-Ahead Friendly: Store the dough or the baked crackers in advance.
Great for Leftovers: Perfect way to use up those last bits of cheese in your fridge.
Chef’s Pro Tips for Perfect Results
Making crunchy cheese crackers at home is super simple, but these tips will make them next-level:
- Use cold butter: It helps create that flaky, crisp texture when baked.
- Shred cheese finely: Finely grated cheese blends better and bakes more evenly.
- Roll dough evenly: Keep it thin and uniform for consistent crispiness.
- Chill before baking: A short chill helps the crackers hold shape and enhances the crunch.
- Watch closely near the end: They go from golden to burnt quickly in the last minutes.
Kitchen Tools You’ll Need
You don’t need much to get these beauties on the table.
Mixing bowl: For bringing the dough together.
Rolling pin: To roll out the cracker dough nice and thin.
Pastry cutter or sharp knife: To cut those signature shapes.
Baking sheet: Where all the crunchy magic happens.
Parchment paper: For non-stick, easy baking.
Ingredients in Crunchy Cheese Crackers
These simple ingredients work together to give you the bold, cheesy flavor and signature crunch.
- Sharp Cheddar Cheese: 1 ½ cups finely shredded. Brings that rich, savory cheese flavor.
- All-Purpose Flour: 1 cup. Forms the structure and body of the cracker.
- Unsalted Butter: 4 tablespoons, cold and cubed. Adds richness and the perfect crisp bite.
- Salt: ½ teaspoon. Enhances the cheese and balances the richness.
- Paprika: ¼ teaspoon. Adds a subtle smoky note and color.
- Cold Water: 2–3 tablespoons. Helps bring the dough together smoothly.
Ingredient Substitutions
Sometimes your fridge or pantry needs a little wiggle room. Here’s how to switch it up:
Sharp Cheddar Cheese: Try Colby, Monterey Jack, or a smoky gouda.
All-Purpose Flour: Use whole wheat flour for a nuttier, rustic version.
Butter: You can substitute with margarine or a plant-based alternative for dairy-free.
Paprika: Swap with chili powder or garlic powder for a new twist.
Ingredient Spotlight
Sharp Cheddar Cheese: The heart of this recipe. Aged cheddar melts beautifully, adds sharp flavor, and crisps up with the butter for that signature bite.
Paprika: Though subtle, it deepens the flavor and adds that slight golden-orange tint we associate with cheesy snacks.

Instructions for Making Crunchy Cheese Crackers
Making these is just as fun as eating them. It’s a process that invites creativity, from the dough to the final crunch.
- Preheat Your Equipment:
Preheat your oven to 375°F (190°C) and line a baking sheet with parchment paper. - Combine Ingredients:
In a mixing bowl, combine the shredded cheese, flour, salt, and paprika. Add the cubed cold butter and mix with your hands or a pastry cutter until it forms a crumbly dough. Gradually add cold water, 1 tablespoon at a time, until the dough just holds together. - Prepare Your Cooking Vessel:
Dust your countertop lightly with flour and roll out the dough to about 1/8 inch thick. - Assemble the Dish:
Cut into small squares, triangles, or fun shapes using a knife or cookie cutter. Transfer to the prepared baking sheet. - Cook to Perfection:
Bake for 12 to 15 minutes, or until the edges are golden brown and crisp. - Finishing Touches:
Let cool completely on the baking sheet to firm up. You can sprinkle with a touch of flaky salt while they’re warm if you like. - Serve and Enjoy:
Serve them in a bowl, on a cheese board, or just sneak a few as you walk past the kitchen.
Texture & Flavor Secrets
What makes these crackers unforgettable is the combination of crisp texture with a melt-in-your-mouth cheesy richness. The cold butter puffs ever so slightly in the oven, creating flaky layers, while the cheddar caramelizes just enough to bring a toasted depth. Each bite is crunchy at the edges, tender in the center, and loaded with flavor.
Cooking Tips & Tricks
There’s always room for a little kitchen wisdom:
- Use extra-sharp cheese for a more intense flavor punch.
- If dough feels sticky, chill it for 10 minutes before rolling.
- For spicier crackers, add a pinch of cayenne or cracked black pepper.
What to Avoid
A few small mistakes can stand between you and cracker perfection:
- Overmixing the dough, which makes them tough.
- Rolling too thick, resulting in soft crackers.
- Crowding the pan, which can cause uneven baking.
Nutrition Facts
Servings: 6
Calories per serving: 180
Note: These are approximate values.
Preparation Time
Prep Time: 15 minutes
Cook Time: 15 minutes
Total Time: 30 minutes
Make-Ahead and Storage Tips
You can easily prepare the dough ahead and refrigerate it for up to 2 days. Baked crackers can be stored in an airtight container at room temperature for up to a week. For longer storage, freeze them in a zip-top bag and re-crisp in the oven before serving.
How to Serve Crunchy Cheese Crackers
These crackers go beyond snacking. Try them:
- Alongside tomato soup for a cozy lunch
- On a cheeseboard with fruit and nuts
- Crumbled over a salad for crunch
- Packed in lunchboxes for kids and grown-ups alike
Creative Leftover Transformations
Don’t let a single cracker go to waste:
- Crush them as a topping for mac and cheese.
- Use as a crunchy crust for baked chicken or veggies.
- Serve with dips like hummus or pimento cheese.
Additional Tips
For an extra boost of flavor, mix in a teaspoon of dried herbs like rosemary or thyme. You can also experiment with different shapes to make snack time even more fun for kids.
Make It a Showstopper
Presentation matters. Stack them in a mason jar with a rustic ribbon for a homemade gift, or serve them in a mini basket lined with parchment for a cozy party vibe.
Variations to Try
- Spicy Jalapeño: Add finely diced jalapeños for a kick.
- Garlic Herb: Mix in garlic powder and dried Italian herbs.
- Everything Seasoning: Sprinkle with everything bagel spice before baking.
- Parmesan Twist: Sub half the cheddar with parmesan for a nuttier flavor.
- Mini Shapes: Use mini cookie cutters for fun bite-size versions.
FAQ’s
Q1: Can I use pre-shredded cheese?
Pre-shredded cheese contains anti-caking agents, so fresh-grated melts and blends better.
Q2: Can I freeze the dough?
Yes, tightly wrap and freeze for up to 3 months. Thaw overnight in the fridge before using.
Q3: How do I get them super crispy?
Roll the dough very thin and bake until deep golden at the edges.
Q4: Are these crackers gluten-free?
Not as written, but you can try a 1:1 gluten-free flour blend.
Q5: Can I use whole wheat flour?
Absolutely, though the crackers will be slightly denser and nuttier.
Q6: What cheese works best?
Sharp cheddar gives the boldest flavor, but experiment with what you love.
Q7: How long do they stay fresh?
About a week in an airtight container, but they rarely last that long.
Q8: Can I make them without butter?
You can try plant-based alternatives, but texture may vary.
Q9: Can kids help with this recipe?
Yes! It’s a fun, hands-on recipe for little helpers to cut shapes.
Q10: What dip pairs best with these crackers?
Try spicy hummus, cream cheese dips, or even guacamole.
Conclusion
These crunchy cheese crackers are simple to make but bursting with flavor and texture. Whether you’re baking them as a quick snack, party treat, or homemade gift, they’ll become a staple in your kitchen. Let me tell you, they’re worth every bite.
PrintCrunchy Cheese Crackers
These crunchy cheese crackers are a homemade twist on a classic snack. With sharp cheddar, buttery crispness, and a hint of paprika, they’re perfect for parties, lunchboxes, or cozy nights in.
Ingredients
- 1 ½ cups finely shredded sharp cheddar cheese
- 1 cup all-purpose flour
- 4 tablespoons cold unsalted butter, cubed
- ½ teaspoon salt
- ¼ teaspoon paprika
- 2–3 tablespoons cold water
Instructions
- Preheat oven to 375°F (190°C) and line a baking sheet with parchment paper.
- In a mixing bowl, combine shredded cheese, flour, salt, and paprika. Add cold butter and mix until crumbly.
- Add cold water gradually, 1 tablespoon at a time, until dough comes together.
- Roll dough out on a lightly floured surface to 1/8 inch thick.
- Cut into desired shapes and place on baking sheet.
- Bake for 12–15 minutes until golden and crisp.
- Let cool on the baking sheet before serving or storing.
Notes
- Chill the dough before baking for extra crispness.
- Use finely grated cheese for better texture.
- Store in an airtight container for up to a week.