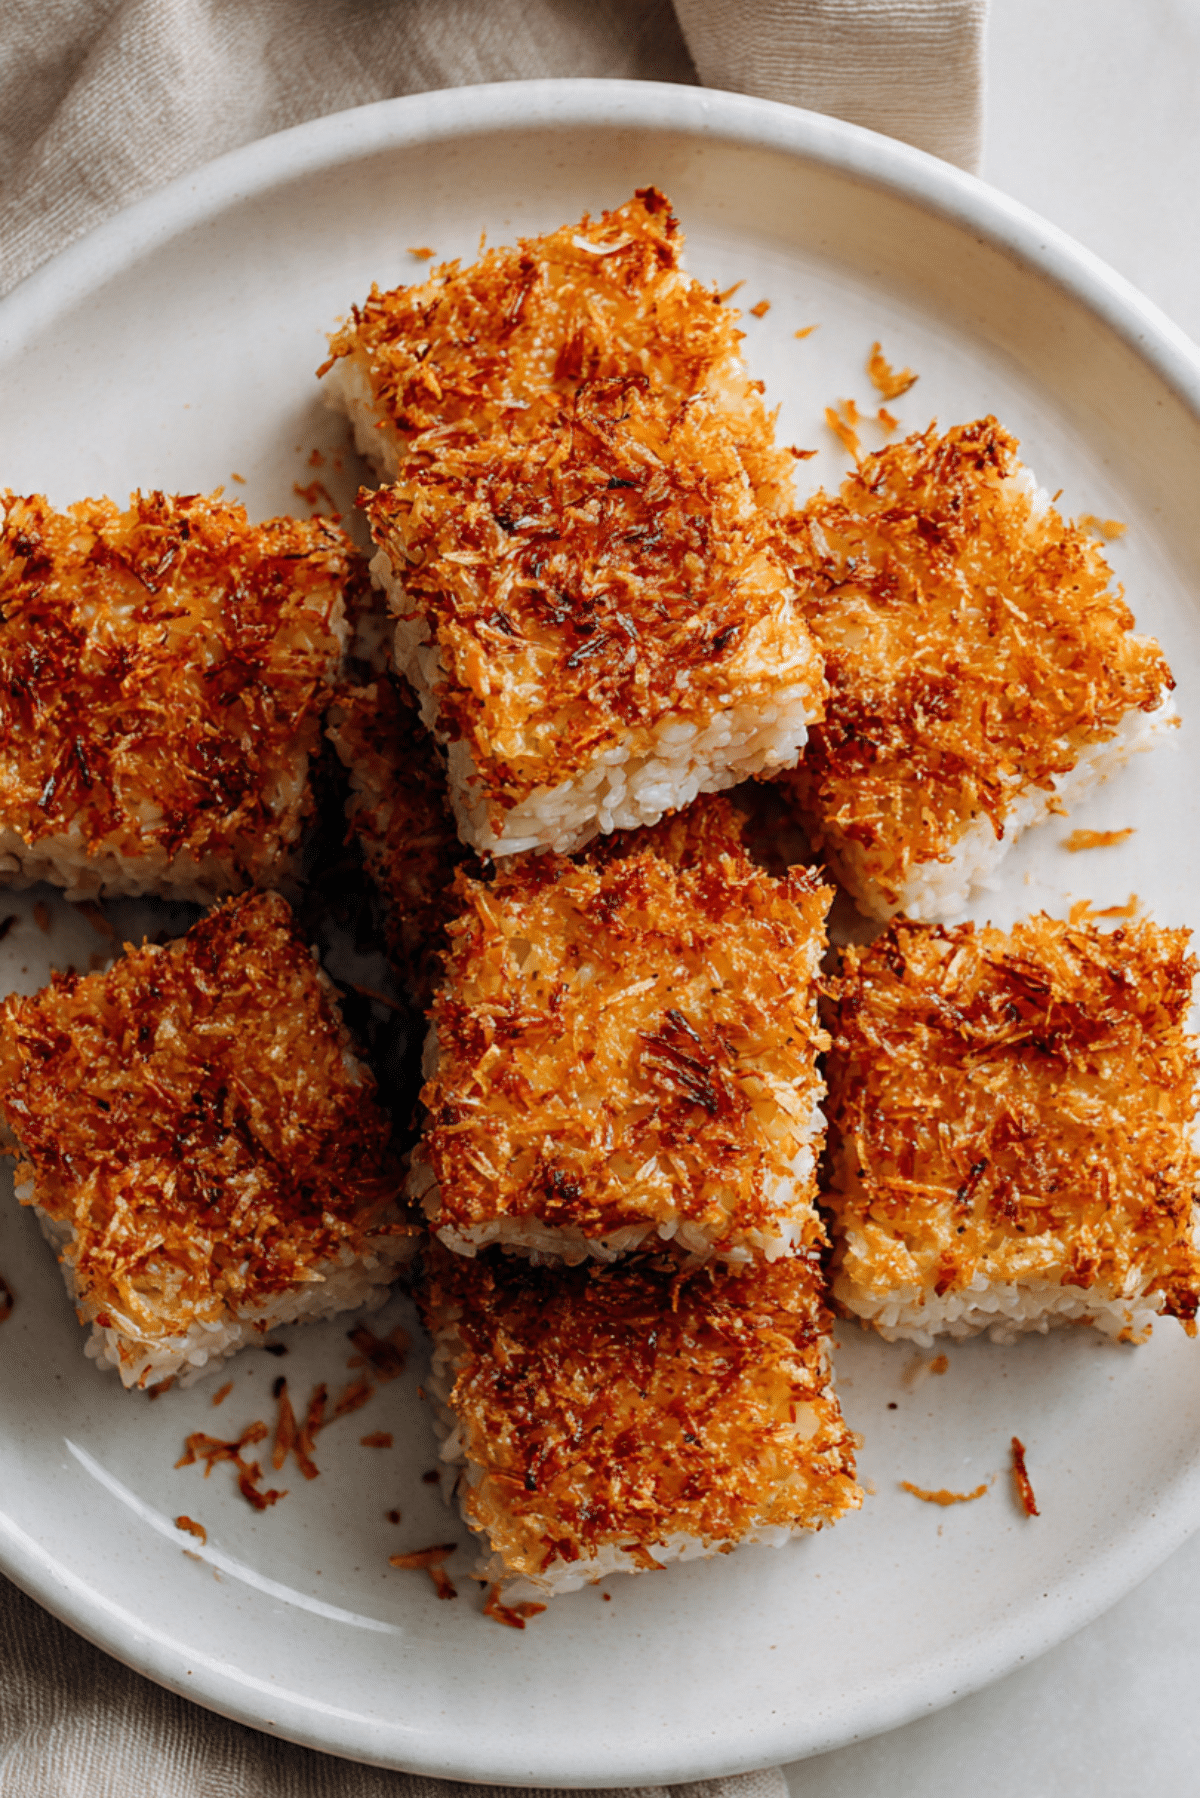
Crispy Nori Rice Squares
There is something so satisfying about biting into a perfectly crisp square that crackles gently before giving way to soft, tender rice inside. The contrast alone makes you pause for a second and appreciate it. Crispy nori rice squares are one of those snacks that feel a little special, yet they are surprisingly simple to make at home. Trust me, you’re going to love this. Once you taste that crunchy golden top with the delicate hint of seaweed and warm rice underneath, you will be hooked.
The Perfect Balance of Crunch and Comfort
The magic of these little squares lies in their texture. The outside becomes beautifully crisp, almost crackly, while the inside stays soft and slightly chewy. That balance makes every bite feel complete. They are savory, lightly salty, and deeply comforting. You can serve them as an appetizer, a light lunch, or part of a larger spread. This one’s a total game-changer when you want something different that still feels cozy and satisfying.
A Little Inspiration from Japanese Flavors
Nori, the dried seaweed often wrapped around sushi, brings a subtle ocean flavor that pairs naturally with rice. While these squares are not traditional sushi, they are inspired by Japanese pantry staples and the love for rice in many Asian cuisines. Rice is often shaped, grilled, or fried into different forms, creating endless variations. Combining nori and rice like this feels familiar, yet playful and modern.
Why You Will Make This Again and Again
Before we move into the kitchen, let’s talk about why this recipe earns a permanent spot in your rotation.
Versatile: You can top them with spicy mayo, sliced avocado, or keep them simple and classic.
Budget-Friendly: Rice and nori are affordable and easy to find.
Quick and Easy: Once the rice is cooked, everything comes together quickly.
Customizable: Adjust seasoning, add herbs, or experiment with toppings.
Crowd-Pleasing: The crispy texture makes them instantly appealing to everyone.
Make-Ahead Friendly: Shape them in advance and fry just before serving.
Great for Leftovers: A brilliant way to transform leftover rice into something exciting.
Chef Tips for Extra Crispiness
Now let dive to a few small secrets that make all the difference.
- Use short grain rice for better stickiness and structure.
- Press the rice firmly into a compact layer before cutting.
- Make sure the oil is properly heated before frying.
- Avoid flipping too early, allow a solid crust to form first.
Kitchen Tools That Make It Easy
You do not need much, just a few reliable tools.
Medium Saucepan or Rice Cooker: For cooking fluffy yet sticky rice.
Sharp Knife: To cut clean and even squares.
Nonstick Skillet: Helps create an even crisp surface without sticking.
Spatula: For flipping the squares gently without breaking them.
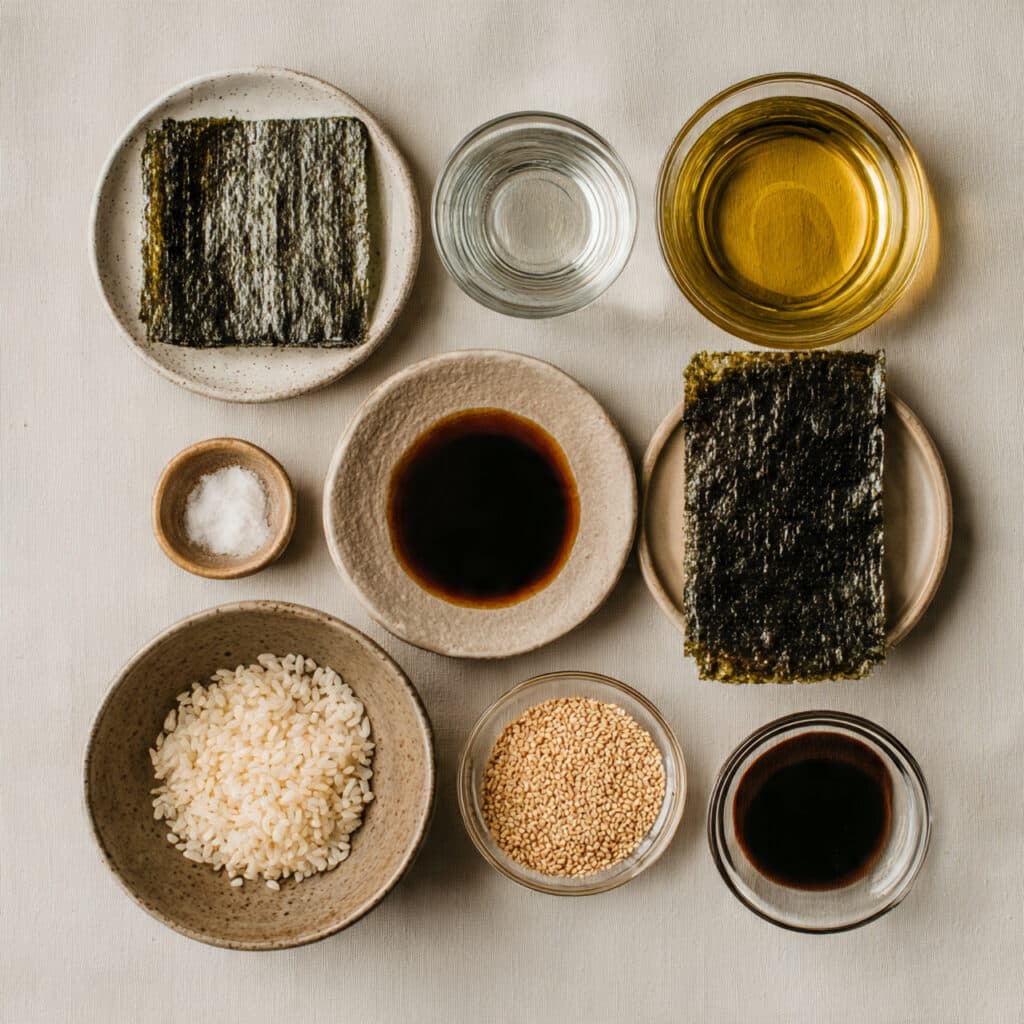
Ingredients You Will Need For Crispy Nori Rice Squares
Every ingredient works together to build flavor and texture, creating something truly satisfying.
- Short Grain White Rice: 2 cups cooked, sticky enough to hold its shape.
- Water: 2 1/2 cups, used for cooking the rice.
- Nori Sheets: 2 sheets, finely crushed for signature flavor.
- Salt: 1/2 teaspoon, enhances the overall taste.
- Soy Sauce: 1 tablespoon, adds savory depth.
- Sesame Oil: 1 teaspoon, brings a subtle nutty aroma.
- Vegetable Oil: 3 tablespoons, for pan frying until golden.
- Sesame Seeds: 2 tablespoons, sprinkled on top for added crunch.
Simple Ingredient Substitutions
Cooking should feel flexible and fun.
Short Grain White Rice: Sushi rice works perfectly.
Soy Sauce: Tamari can be used for a gluten free option.
Sesame Oil: Olive oil can be used for a milder flavor.
Spotlight on Flavor Builders
Some ingredients truly define the final result.
Nori Sheets: They provide that gentle umami flavor that makes these squares unique.
Sesame Oil: Just a touch elevates the aroma beautifully.
Let’s Cook Them Together
Here is where everything comes to life in the pan.
- Preheat Your Equipment: Heat a nonstick skillet over medium heat.
- Combine Ingredients: In a bowl, mix the cooked rice with crushed nori, salt, soy sauce, and sesame oil until evenly combined.
- Prepare Your Cooking Vessel: Lightly grease a flat dish and press the rice mixture firmly into an even layer about 1 inch thick. Allow it to cool slightly.
- Assemble the Dish: Cut the pressed rice into even squares. Sprinkle sesame seeds on top and press lightly so they adhere.
- Cook to Perfection: Add vegetable oil to the skillet and fry each square for 3 to 4 minutes per side until golden brown and crisp.
- Finishing Touches: Transfer to a plate lined with paper towel to absorb excess oil.
- Serve and Enjoy: Serve warm and enjoy that satisfying crunch in every bite.
The Texture and Flavor Experience
As the squares fry, the exterior forms a thin golden crust that crackles when you bite into it. Inside, the rice remains tender and slightly chewy. The nori blends into the rice, offering subtle depth without overpowering it. The sesame seeds add little bursts of nuttiness and crunch. Every bite feels layered and balanced.
Helpful Cooking Tips
- Use freshly cooked or properly reheated rice for best structure.
- Do not overcrowd the skillet while frying.
- Maintain medium heat to prevent burning before crisping fully.
What to Avoid
- Do not use long grain rice, it will not hold together well.
- Avoid pressing the rice too loosely, which can cause breaking.
- Do not skip the brief cooling step before cutting.
Nutrition Facts Overview
Servings: 4
Calories per serving: 320
Note: These values are approximate.
Time Breakdown
Prep Time: 15 minutes
Cook Time: 15 minutes
Total Time: 30 minutes
Make-Ahead and Storage Tips
You can press and cut the rice squares several hours in advance and store them in the refrigerator. Fry just before serving for maximum crispiness. Leftovers can be refrigerated for up to 2 days and reheated in a skillet to restore texture.
How to Serve
Top with a drizzle of spicy mayo or a thin slice of avocado for added richness. Serve alongside cucumber salad or a simple bowl of soup for a balanced meal.
Creative Leftover Transformations
Chop leftover squares into bite sized pieces and toss into a salad for added crunch. You can also layer them with sliced vegetables for a quick rice sandwich style snack.
Additional Helpful Tips
Keep your knife slightly damp when cutting to prevent sticking. Taste the rice mixture before pressing to adjust seasoning. Most importantly, enjoy the process of shaping and crisping them.
Make It a Showstopper
Arrange the squares neatly on a white platter and sprinkle extra sesame seeds on top for contrast. Serve immediately while they are warm and crisp for the best presentation.
Variations to Try
- Add finely chopped scallions to the rice mixture.
- Sprinkle a pinch of chili powder for gentle heat.
- Press a small cube of cheese inside each square before frying.
- Brush lightly with extra soy sauce after frying for deeper flavor.
FAQ’s
Q1: Can I bake instead of fry?
Yes, bake at 400 degrees Fahrenheit for about 20 minutes, flipping halfway through.
Q2: Can I air fry them?
Yes, air fry at 375 degrees Fahrenheit for about 10 minutes, flipping once.
Q3: Why are my squares falling apart?
They may not have been pressed firmly enough or the rice was not sticky enough.
Q4: Can I freeze them?
It is best to freeze them before frying, then cook directly from frozen.
Q5: What oil works best?
Neutral oils like vegetable oil are ideal.
Q6: Can I make them gluten free?
Use tamari instead of soy sauce.
Q7: How do I keep them crispy longer?
Serve immediately after frying for best texture.
Q8: Can I add protein?
Top them with cooked shrimp or tofu after frying.
Q9: Do I need sushi rice?
Short grain rice works best for structure.
Q10: Can I skip sesame seeds?
Yes, but they add extra crunch and flavor.
Conclusion
Crispy nori rice squares are simple, comforting, and surprisingly addictive. That golden crust paired with a soft, tender center creates a balance that keeps you reaching for another piece. Once you make them at home, you will see how easy it is to turn humble rice into something special. Let me tell you, it’s worth every bite.
PrintCrispy Nori Rice Squares
Golden, crispy rice squares infused with crushed nori, lightly seasoned with soy sauce and sesame oil, and pan fried until perfectly crunchy on the outside and tender inside.
Ingredients
- 2 cups short grain white rice, cooked
- 2 1/2 cups water
- 2 nori sheets, finely crushed
- 1/2 teaspoon salt
- 1 tablespoon soy sauce
- 1 teaspoon sesame oil
- 3 tablespoons vegetable oil
- 2 tablespoons sesame seeds
Instructions
- Heat a nonstick skillet over medium heat.
- In a bowl, combine the cooked short grain rice, crushed nori, salt, soy sauce, and sesame oil. Mix until evenly incorporated.
- Lightly grease a flat dish and press the rice mixture firmly into an even layer about 1 inch thick. Allow it to cool slightly to set.
- Cut the pressed rice into even squares. Sprinkle sesame seeds on top and press gently so they adhere.
- Add vegetable oil to the skillet. Fry the rice squares for 3 to 4 minutes per side until golden brown and crisp.
- Transfer to a plate lined with paper towel to absorb excess oil.
- Serve warm and enjoy immediately for maximum crispiness.
Notes
- Press the rice firmly to prevent breaking during frying.
- Use short grain rice for best stickiness and structure.
- Do not overcrowd the pan while frying.
- Reheat leftovers in a skillet to restore crisp texture.