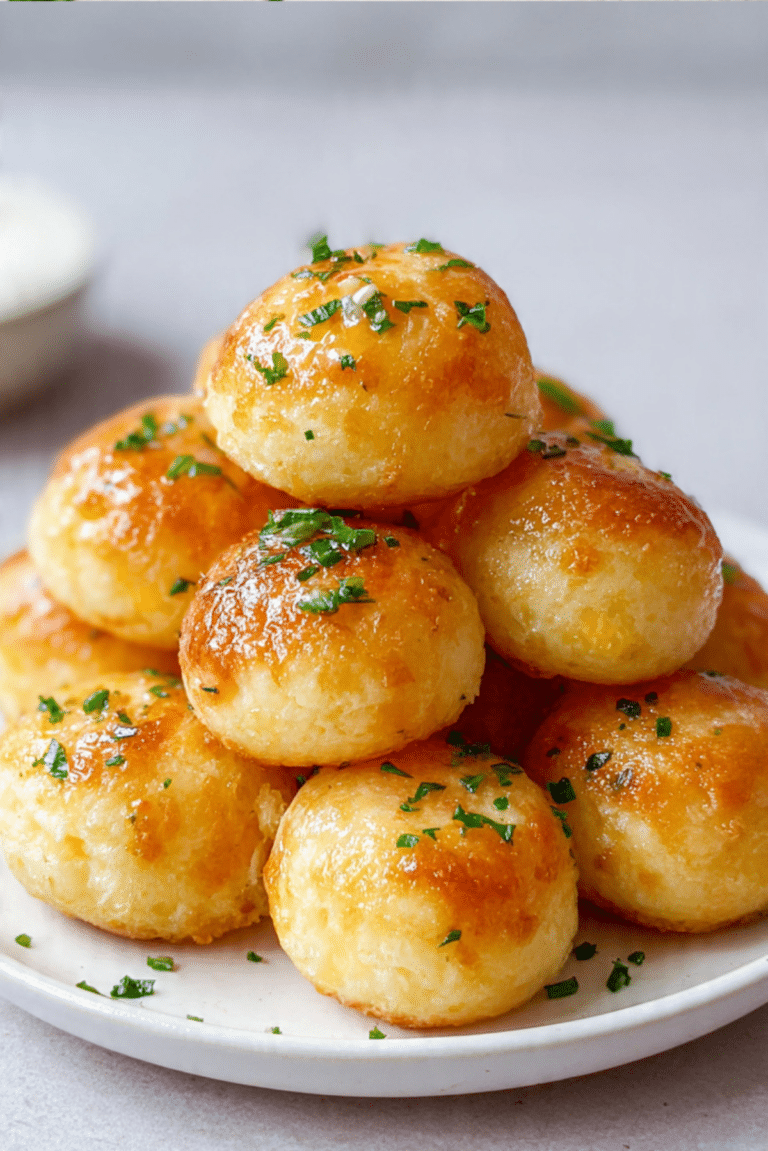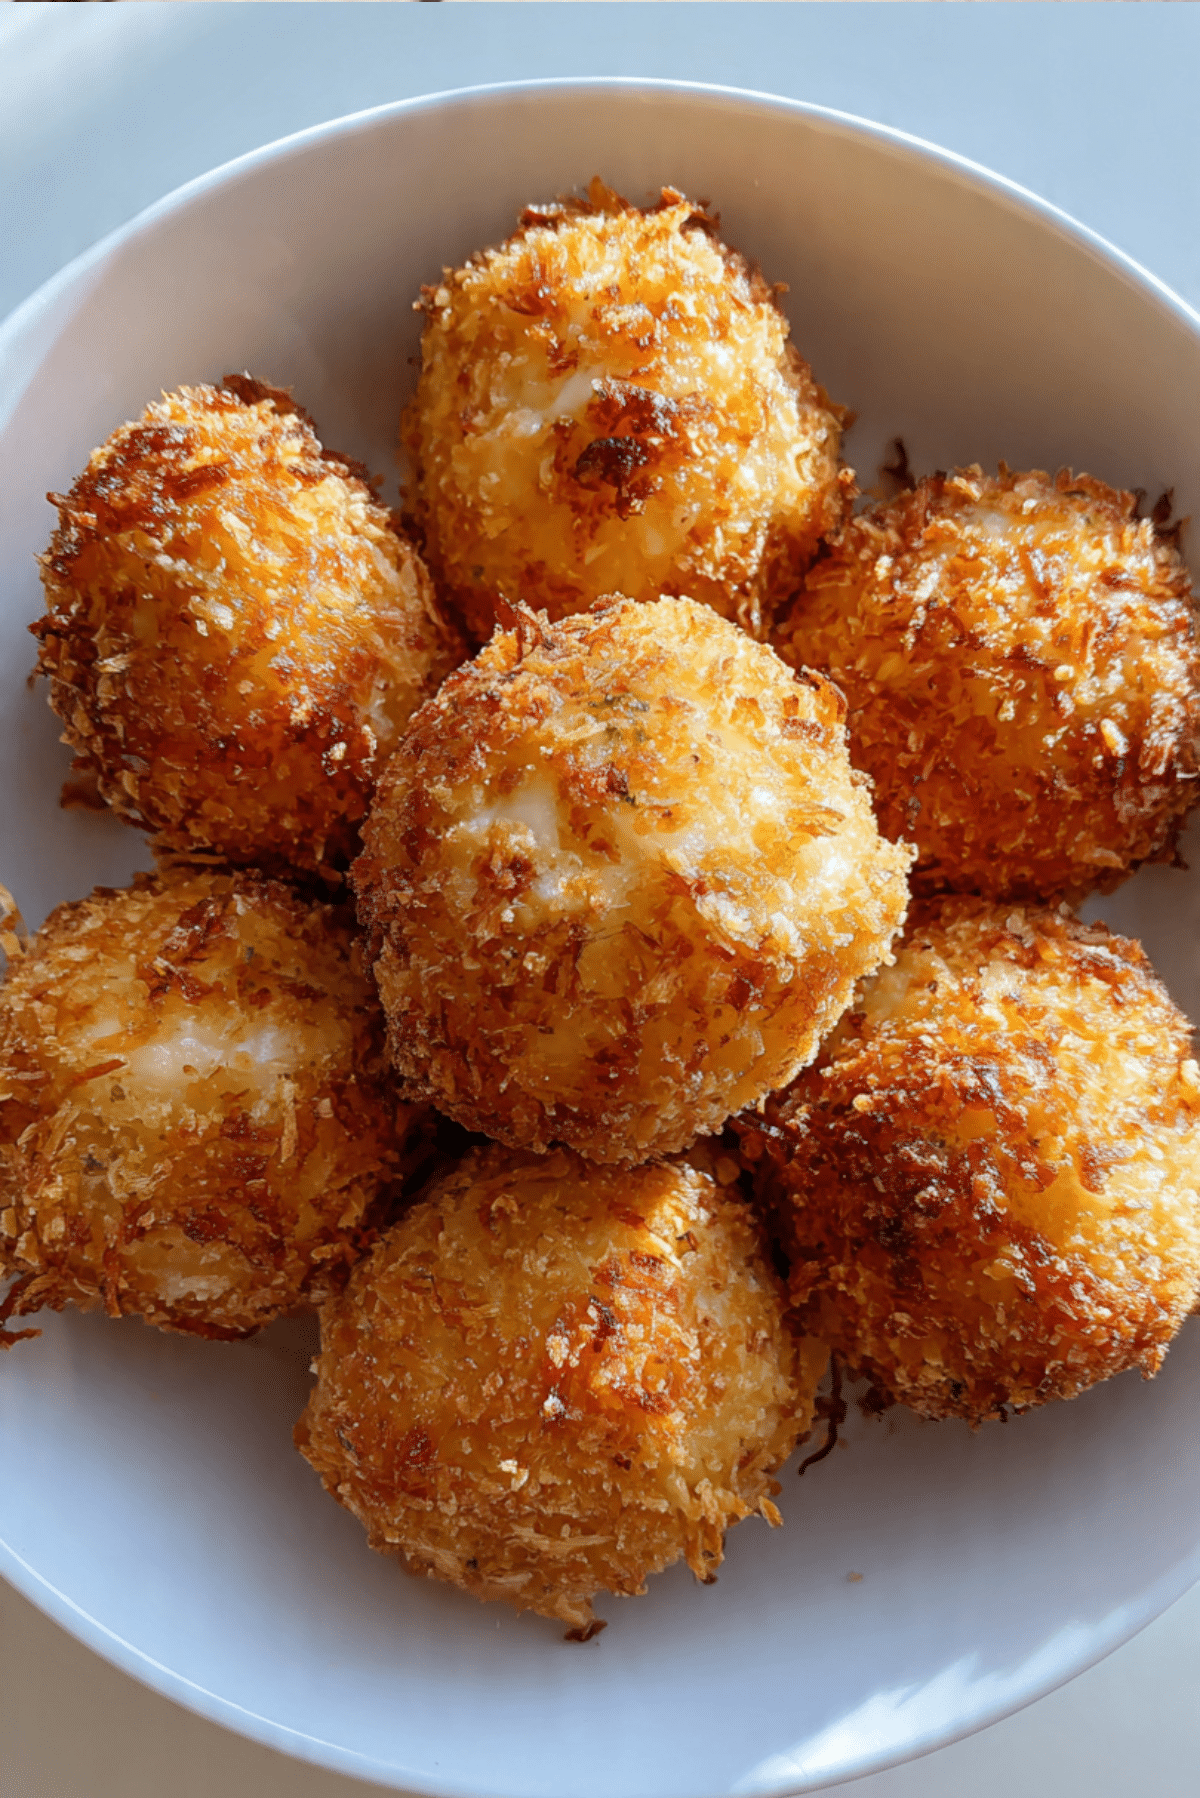
Crispy Mozzarella Rice Balls
Imagine biting through a perfectly golden, shatteringly crisp crust to find a heart of tender, savory rice and a molten center of gooey, melted mozzarella cheese. These Crispy Mozzarella Rice Balls, often known as Arancini, are the ultimate labor of love that delivers a symphony of textures in every single mouthful. The aroma of toasted breadcrumbs and fragrant parmesan wafting through your kitchen is enough to make anyone’s mouth water before the first batch even leaves the oil. Trust me, you’re going to love this because it transforms simple pantry staples into a sophisticated appetizer that feels like a true Italian celebration.
The Sicilian Legacy of Arancini
These delightful golden spheres have a storied history that stretches back to tenth-century Sicily during the period of Kalbid rule. Traditionally, they were designed as a clever way to use up leftover risotto, making the rice portable for hunters and travelers who needed a hearty meal on the go. The name Arancini actually translates to little oranges, a nod to their distinct shape and the vibrant orange hue they take on after being deep-fried to perfection. Over the centuries, they have evolved from a humble street food into a beloved culinary icon found in high-end trattorias and family kitchens across the globe.
Why These Golden Bites Are a Total Game-Changer
I have served these at countless gatherings, and let me tell you, it’s worth every bite. There is something universally appealing about the combination of a crunchy exterior and a cheesy, decadent interior that brings people together.
Versatile: You can stick with the classic cheese center or experiment with adding peas, diced ham, or even a dab of spicy tomato sauce inside.
Budget-Friendly: By using affordable short-grain rice and common pantry aromatics, you can create a high-end appetizer for a fraction of restaurant prices.
Quick and Easy: Once you have your rice base prepared, the rolling and frying process moves quickly and efficiently.
Customizable: Feel free to swap the mozzarella for provolone or fontina if you prefer a sharper or more complex cheese pull.
Crowd-Pleasing: These are always the first things to disappear at a party, as their bite-sized nature makes them the perfect finger food.
Make-Ahead Friendly: You can assemble the balls and coat them in breadcrumbs a day in advance, keeping them chilled until you are ready to fry.
Great for Leftovers: Even if they lose their initial crunch, a quick stint in the air fryer brings them right back to life for a delicious snack.
Expert Secrets for the Perfect Golden Crunch
The secret to a successful rice ball lies in the starch content of the rice and the temperature of your frying oil. You want a rice that is sticky enough to hold its shape but tender enough to melt in your mouth alongside the cheese.
- Use the Right Rice: Always opt for Arborio or another short-grain rice, as the high starch content is what acts as the natural glue for the ball.
- Cool the Rice Completely: Trying to form balls with warm rice is a recipe for disaster, so spread your cooked rice on a baking sheet to cool and firm up.
- The Ice Cube Secret: If you want an extra-gooey center, ensure your mozzarella cubes are cold when they go into the rice so they melt slowly and perfectly.
- Maintain Oil Temperature: Use a thermometer to keep your oil at 350 degrees Fahrenheit, which ensures a golden crust without a greasy interior.
Essential Tools for Your Kitchen
Having the right equipment ensures that your rice balls come out uniform in size and perfectly cooked every time. These tools help manage the sticky nature of the rice and the heat of the frying process.
- Large Heavy-Bottomed Pot: A Dutch oven or deep skillet is essential for maintaining a steady oil temperature during frying.
- Small Cookie Scoop: This is the best way to ensure every rice ball is exactly the same size for even cooking and a professional look.
- Fine Mesh Spider or Slotted Spoon: Necessary for safely lowering the balls into hot oil and retrieving them once they are golden.
- Instant-Read Thermometer: The most reliable way to monitor your oil heat and prevent the breadcrumbs from burning.
Ingredients You Will Need For Crispy Rice Balls
The ingredient list is simple but relies on the quality of the cheese and the seasoning of the rice. We are building layers of flavor from the inside out to ensure no bite is ever bland.
- Arborio Rice: 1.5 cups of short-grain rice which provides the necessary starch and sticky texture for shaping.
- Chicken or Vegetable Broth: 3 cups of flavorful liquid to simmer the rice until it is tender and seasoned.
- Fresh Mozzarella Cheese: 4 ounces cut into small half-inch cubes to create that signature molten center.
- Parmesan Cheese: 1/2 cup of finely grated cheese stirred into the rice for a salty and nutty depth.
- Breadcrumbs: 1 cup of fine or Panko breadcrumbs to create the ultimate crunchy outer layer.
- Large Eggs: 2 eggs used in the dredging station to help the breadcrumbs adhere perfectly to the rice.
- All-Purpose Flour: 1/2 cup for the initial coating which keeps the moisture in and the crust out.
- Fresh Garlic: 2 cloves minced and sautéed to infuse the rice with a warm and savory aroma.
- Vegetable Oil: 3 cups or as needed for frying the balls to a perfect golden brown.
- Salt and Black Pepper: 1 teaspoon of each to season the rice and the breadcrumb coating.
Smart Substitutions for Every Pantry
If you find yourself missing an ingredient, don’t panic, because the basic structure of a rice ball is very adaptable to what you have available.
- Arborio Rice: If you cannot find Arborio, a standard sushi rice or short-grain white rice will provide a similar stickiness.
- Fresh Mozzarella: Low-moisture mozzarella or even small cubes of mild cheddar can work as a delicious cheesy substitute.
- Breadcrumbs: Crushed crackers or even finely crushed cornflakes can create a unique and extra-crunchy crust.
- Broth: If you are out of broth, water seasoned with a bit of extra salt and a bay leaf will do the trick.

Key Ingredients in the Spotlight
Let’s focus on the two stars that make this dish a total game-changer for your appetizer game.
Arborio Rice: This specific grain is the backbone of the dish, releasing its starch to create a creamy, cohesive texture that holds the mozzarella securely.
Fresh Mozzarella: This cheese is chosen for its superior melting capabilities, providing that iconic “cheese pull” that makes these rice balls so irresistible.
Let’s Get Cooking: Your Step-by-Step Guide
The process of making rice balls is tactile and rewarding, perfect for a slow afternoon in the kitchen. Follow these steps to ensure your Arancini are as beautiful as they are delicious.
- Preheat Your Equipment: Begin by heating a large pot over medium heat and adding a touch of oil to prepare for sautéing your aromatics.
- Combine Ingredients: Sauté the garlic and onion until fragrant, then add the rice and broth, simmering until the liquid is fully absorbed and the rice is tender.
- Prepare Your Cooking Vessel: Spread the cooked rice onto a large parchment-lined tray and let it cool completely in the refrigerator for at least one hour.
- Assemble the Dish: Take a small handful of chilled rice, flatten it in your palm, place a cube of mozzarella in the center, and roll it into a tight, smooth ball.
- Cook to Perfection: Dredge each ball in flour, then beaten egg, and finally breadcrumbs, then fry in 350-degree oil until they are deeply golden and crispy.
- Finishing Touches: Drain the hot rice balls on a wire rack or paper towels and sprinkle them immediately with a little extra salt and grated parmesan.
- Serve and Enjoy: Present them while they are still hot so your guests can experience the full effect of the melted cheese center.
A Symphony of Texture and Flavor
When you finally break into one of these golden spheres, the contrast is nothing short of incredible. The outer shell provides a loud, satisfying crunch that gives way to the soft, velvety rice seasoned with garlic and parmesan. Then comes the main event: the mozzarella center which has transformed into a pool of warm, mild creaminess. The flavors are savory and comforting, with the nuttiness of the toasted breadcrumbs perfectly balancing the rich dairy notes of the cheese. It is a harmonious experience that hits every sensory note.
Extra Tips for Culinary Success
To make your rice-ball making experience as smooth as possible, keep these little tricks in mind.
- Wet your hands slightly with cold water before rolling the balls to prevent the starchy rice from sticking to your skin.
- Don’t crowd the frying pot, as adding too many balls at once will drop the oil temperature and lead to a soggy crust.
- If you want a more vibrant color, add a pinch of saffron or turmeric to the rice while it is simmering in the broth.
What to Avoid for the Best Results
Avoid these common mistakes to ensure your rice balls don’t fall apart or end up greasy.
- Using Long-Grain Rice: Steer clear of Basmati or Jasmine rice, as they are too fluffy and won’t hold the ball shape during frying.
- Frying Cold Oil: If the oil isn’t hot enough, the rice balls will soak up the grease like a sponge instead of searing the outside.
- Skipping the Cooling Step: If the rice is even slightly warm, the mozzarella will start to melt too early and the ball will lose its structural integrity.
Nutrition Facts
While these are an indulgent treat, they provide a good amount of energy and protein from the rice and cheese.
Servings: 6
Calories per serving: 320
Note: These are approximate values.
Preparation Time
Planning ahead is key since the rice needs time to chill before you can begin the fun part of shaping and frying.
Prep Time: 20 minutes (plus 1 hour cooling)
Cook Time: 20 minutes
Total Time: 1 hour 40 minutes
Make-Ahead and Storage Tips
These are fantastic for planning ahead because the components actually benefit from a bit of time in the fridge.
You can prepare the rice a day in advance and store it in an airtight container. Once the balls are breaded, they can be kept in the fridge for up to twenty-four hours before frying. If you have leftover fried rice balls, store them in the refrigerator and reheat them in a 375-degree oven or air fryer for five to eight minutes to restore their signature crunch.
How to Serve
These rice balls are versatile enough to be a standalone snack or the centerpiece of a larger meal.
Serve them on a large platter with a bowl of warm marinara sauce or a zesty garlic aioli for dipping. They also pair beautifully with a simple arugula salad dressed with lemon and olive oil to cut through the richness of the fried cheese.
Creative Leftover Transformations
If you find yourself with extra rice balls, you can easily repurpose them into a different meal format the next day.
- Rice Ball Sliders: Place a reheated rice ball between two small buns with a slice of tomato and some extra sauce.
- Arancini Salad: Break up a cold rice ball over a bed of greens for a crouton-like crunch with a cheesy surprise.
- Mini Casserole: Place leftover balls in a small baking dish, top with extra mozzarella and sauce, and bake until bubbly.
Additional Tips
For an extra layer of flavor, try mixing some dried oregano or basil into your breadcrumb mixture before dredging.
Always use a high-smoke-point oil like vegetable, canola, or grapeseed for frying to ensure you don’t end up with a burnt flavor. Also, make sure your parmesan is finely grated so it incorporates smoothly into the rice without creating large lumps.
Make It a Showstopper
Visual presentation is key for these little golden treasures, especially if you are serving them to guests.
Garnish the platter with fresh basil leaves and a few lemon wedges to provide a pop of color against the golden brown balls. Serving them in a paper-lined wire basket gives them a professional street-food vibe that is both fun and inviting.
Variations to Try
Once you have mastered the basic mozzarella filling, the possibilities for customization are endless.
- Pesto Rice Balls: Stir two tablespoons of basil pesto into the rice before cooling for a vibrant green color and herbal flavor.
- Mushroom and Thigh Rice Balls: Add sautéed finely chopped mushrooms to the rice mixture for an earthy, umami-rich version.
- Spicy Arancini: Include a small slice of pickled jalapeño inside with the mozzarella for a surprising kick of heat.
- Sweet Rice Balls: Swap the savory seasonings for sugar and cinnamon, and fill with a piece of dark chocolate for a dessert twist.
FAQ’s
- Can I bake these instead of frying? You can, but they won’t be quite as crispy; spray them generously with oil and bake at 400 degrees for 20 minutes.
- What is the best rice to use? Arborio is the gold standard because of its high starch content which holds everything together.
- Can I freeze them? Yes, freeze the breaded, unfried balls on a tray, then transfer to a bag; fry them directly from frozen, adding 2 minutes to the cook time.
- Why did my rice balls fall apart? This usually happens if the rice was too wet or if it wasn’t cooled completely before shaping.
- Do I need to use eggs? The eggs act as the glue for the breadcrumbs, so they are highly recommended for the best crust.
- Can I use brown rice? It is difficult because brown rice isn’t as starchy, but you could try adding an extra egg to the rice mixture as a binder.
- What sauce goes best with these? A classic marinara is traditional, but spicy mayo or pesto are also fantastic.
- How small should the mozzarella cubes be? Keep them around a half-inch so they have enough room to melt without leaking out of the rice.
- How do I keep them warm for a party? Keep them on a wire rack in a 200-degree oven until you are ready to serve.
- Can I make them vegan? Yes, use vegetable broth, a flax egg for dredging, and a vegan mozzarella substitute.
Conclusion
Mastering the art of the Crispy Mozzarella Rice Ball is a journey that ends in pure, cheesy bliss. There is a reason these have remained a staple of Italian cuisine for centuries, they are the perfect marriage of simple ingredients and thoughtful technique. Whether you are serving them as a fancy appetizer or enjoying them as a cozy weekend snack, they are sure to bring a smile to everyone’s face. I can’t wait for you to hear that first crunch and see that perfect cheese pull. Happy cooking, and enjoy every golden, crispy bite!
PrintCrispy Mozzarella Rice Balls
Golden and shatteringly crisp Italian rice balls filled with savory Arborio rice, parmesan, and a molten heart of melted fresh mozzarella cheese.
Ingredients
- 1.5 cups Arborio Rice [cite: 42]
- 3 cups Chicken or Vegetable Broth [cite: 42]
- 4 ounces Fresh Mozzarella Cheese (cut into half-inch cubes) [cite: 42, 44]
- 1/2 cup Parmesan Cheese (finely grated) [cite: 42]
- 1 cup Breadcrumbs (fine or Panko) [cite: 42]
- 2 Large Eggs (beaten) [cite: 42]
- 1/2 cup All-Purpose Flour [cite: 42]
- 2 cloves Fresh Garlic (minced) [cite: 42]
- 3 cups Vegetable Oil (for frying) [cite: 42]
- 1 teaspoon Salt and Black Pepper [cite: 42]
Instructions
- Preheat Your Equipment: Heat a large pot over medium heat and add a touch of oil. [cite: 46]
- Combine Ingredients: Sauté garlic and onion; add rice and broth, simmering until liquid is absorbed and rice is tender. [cite: 46]
- Prepare Your Cooking Vessel: Spread cooked rice on a parchment-lined tray and chill in the refrigerator for at least one hour. [cite: 46]
- Assemble the Dish: Flatten a handful of chilled rice, place a mozzarella cube in the center, and roll into a tight ball. [cite: 46]
- Cook to Perfection: Dredge balls in flour, then egg, then breadcrumbs; fry in 350°F oil until golden brown. [cite: 46]
- Finishing Touches: Drain on paper towels and sprinkle with salt and extra parmesan. [cite: 46]
- Serve and Enjoy: Present hot with marinara sauce for the perfect cheese pull. [cite: 46, 51]
Notes
- Cool the rice completely to ensure the balls hold their shape during frying. [cite: 39]
- Maintain oil temperature at 350°F to prevent greasiness. [cite: 39, 48]
- Wet your hands slightly to keep the starchy rice from sticking while rolling. [cite: 52]