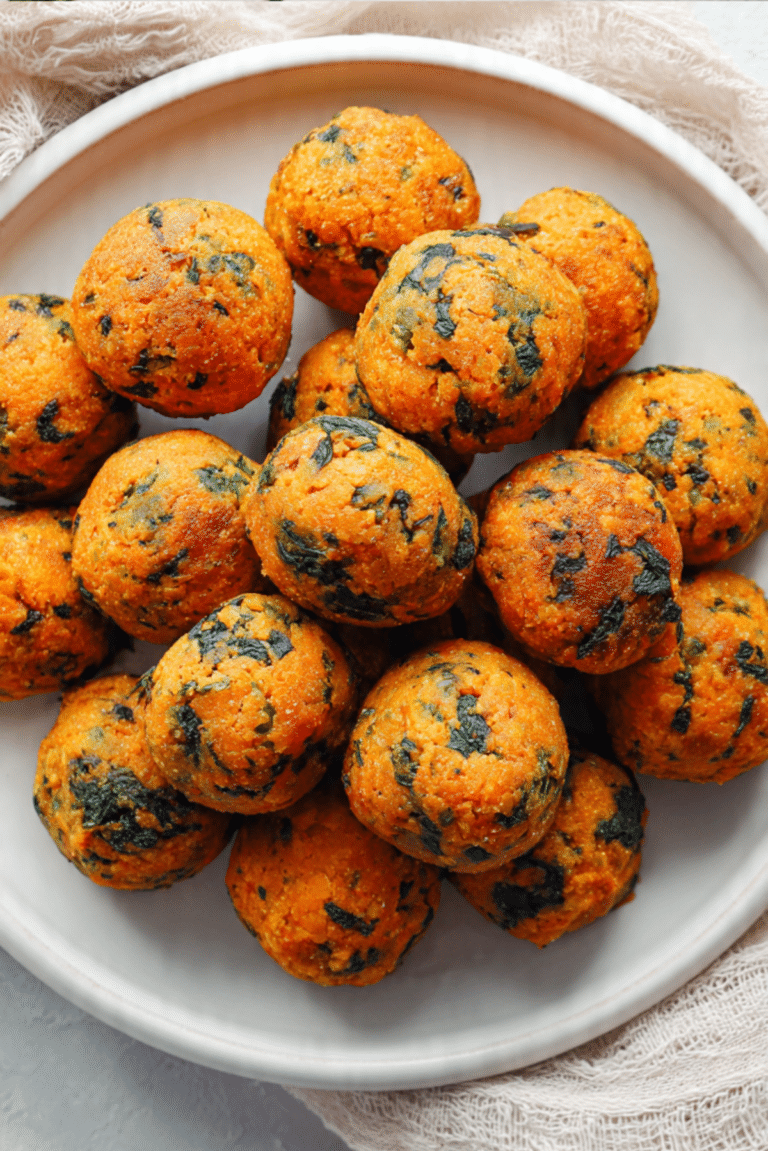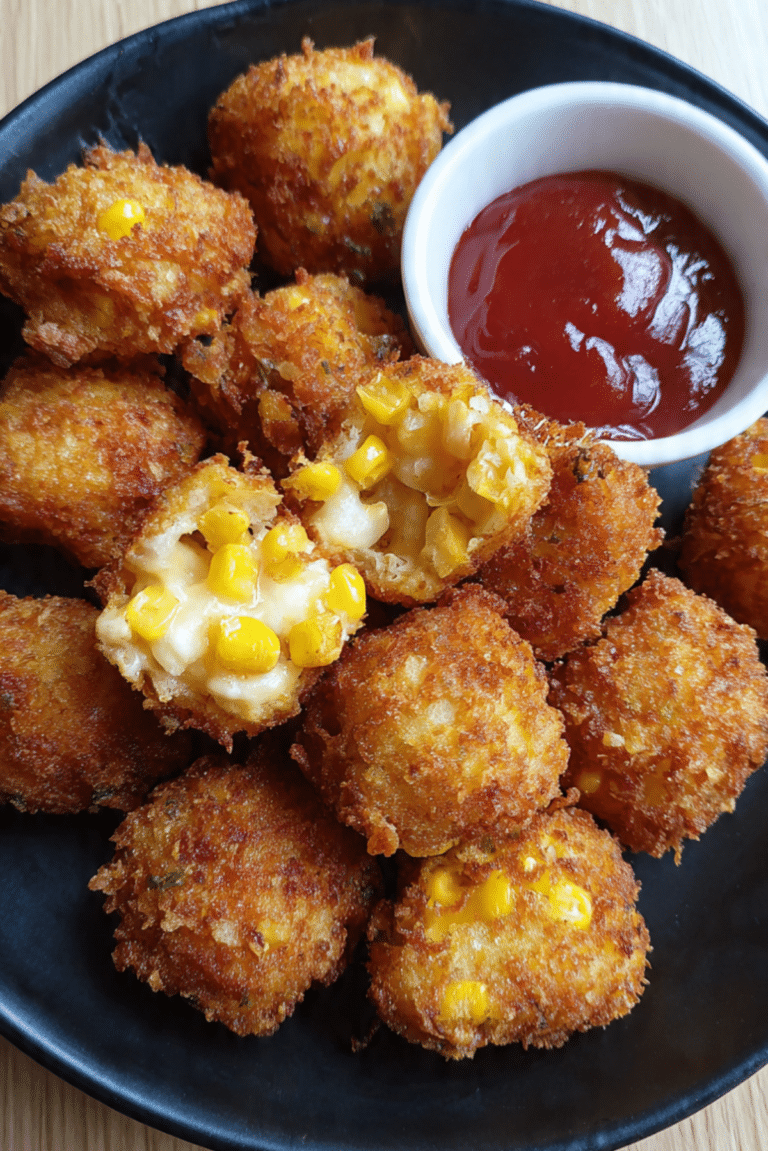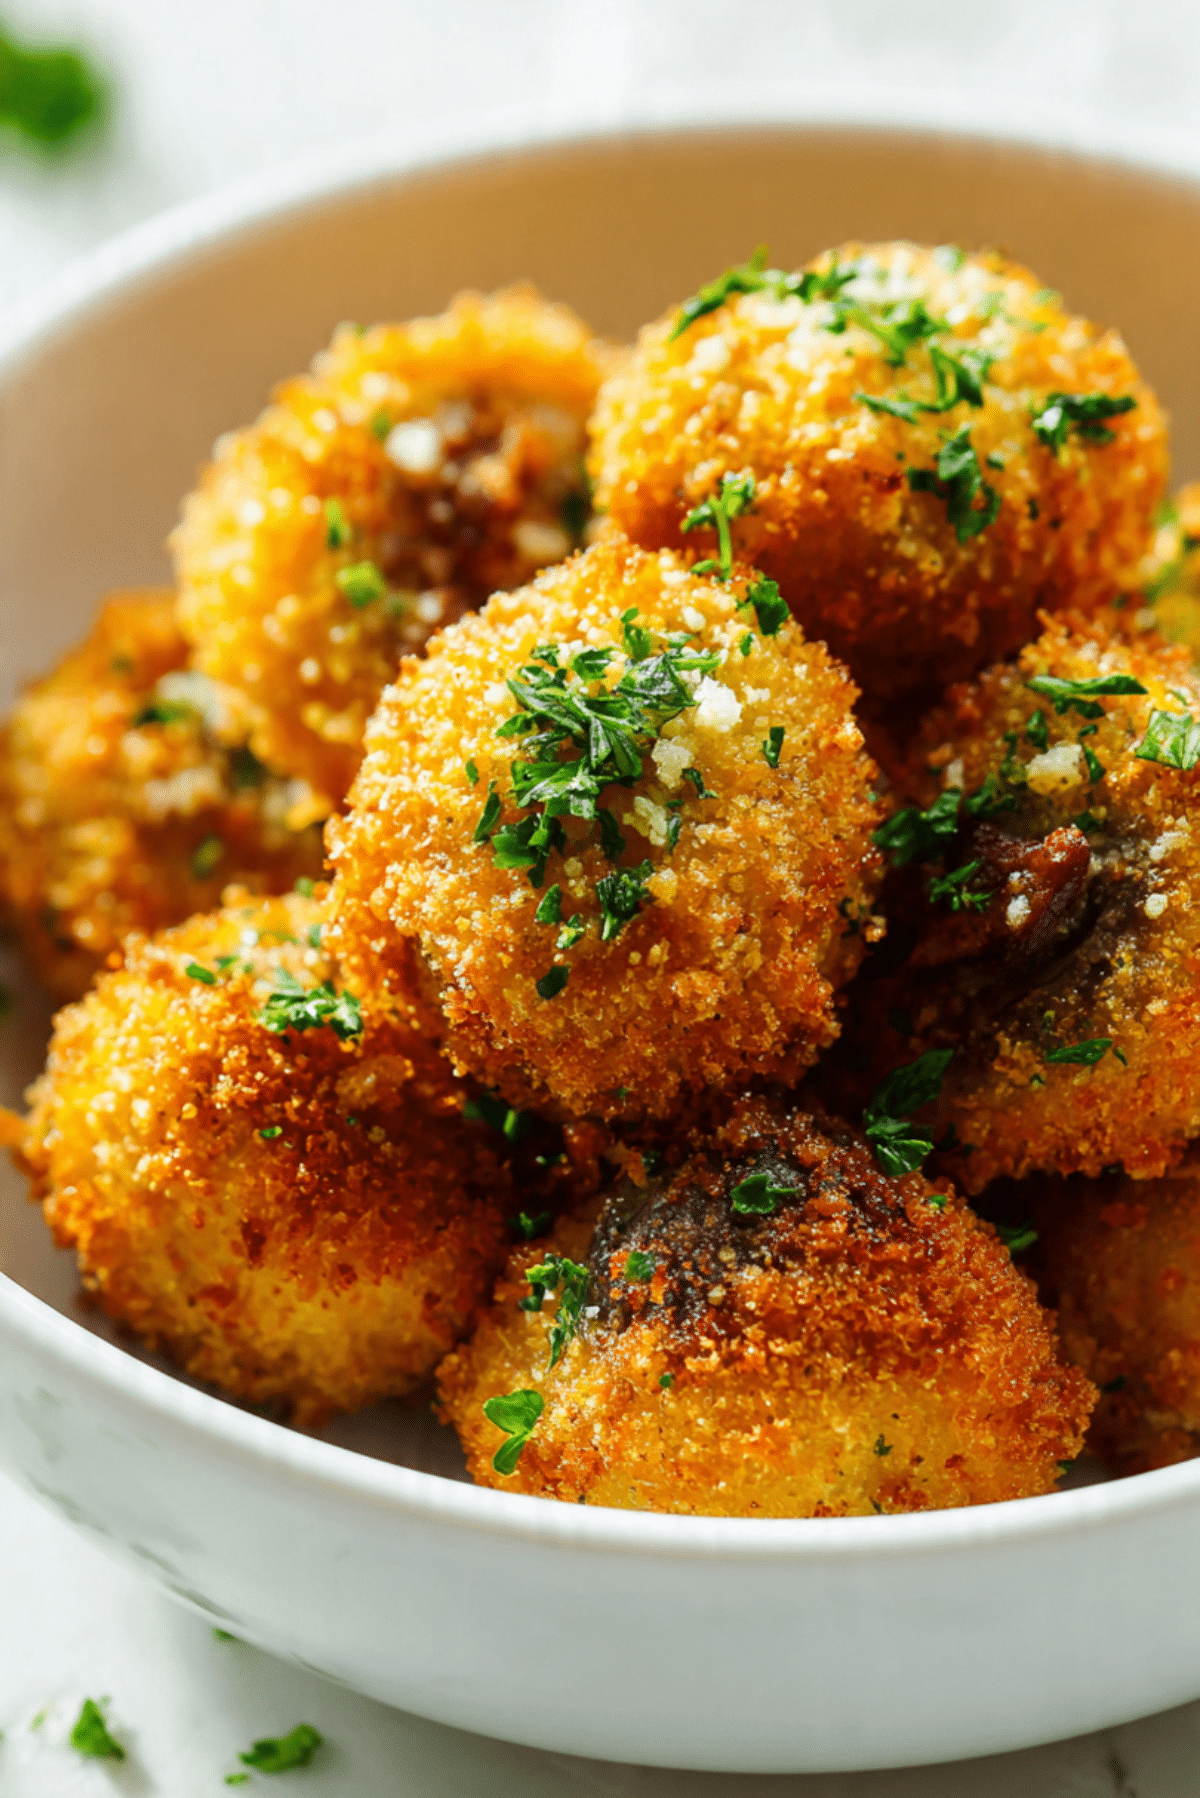
Crispy Garlic Mushroom Bites
There is something about a bowl of golden, crunchy mushrooms that instantly makes a table feel warmer. Crispy on the outside, tender and juicy on the inside, these little bites are packed with garlicky flavor and that satisfying crunch we all secretly crave. Trust me, you’re going to love this. Whether you are setting them out for friends or sneaking a few straight from the tray, they disappear fast and for very good reason.
Why These Little Bites Always Steal the Show
It starts with that first crunch. The crisp coating gives way to a soft, juicy mushroom center that almost melts in your mouth. The garlic is present but not overpowering, and the hint of herbs ties everything together beautifully. This one’s a total game-changer for anyone who thinks mushrooms are boring. They are anything but.
And now let’s dive a little deeper into where this comforting idea comes from.
A Little Backstory Behind This Comfort Classic
Breaded and fried vegetables have long been part of home cooking traditions around the world. From Italian fritti to classic pub snacks in Europe, cooks have always found ways to transform simple produce into something crave-worthy. Mushrooms, with their earthy flavor and meaty texture, naturally became a favorite for breading and crisping. Over time, garlic and herbs were added to enhance that savory depth, creating the irresistible combination we enjoy today.
Now that you know the story, let me tell you why this recipe is one you will come back to again and again.
Why This Recipe Works Every Single Time
Before we roll up our sleeves, here is why this one earns a permanent spot in your kitchen rotation.
Versatile: These bites work as an appetizer, a snack, or even a side dish alongside salads or grilled mains.
Budget-Friendly: Mushrooms and pantry staples like flour and breadcrumbs keep this affordable without sacrificing flavor.
Quick and Easy: From prep to plate in under 40 minutes, which makes it perfect for busy evenings.
Customizable: You can adjust the seasoning, add spice, or swap herbs to match your mood.
Crowd-Pleasing: Even self-proclaimed mushroom skeptics tend to reach for seconds.
Make-Ahead Friendly: You can bread them ahead of time and fry just before serving.
Great for Leftovers: They reheat beautifully in the oven or air fryer, keeping that crisp texture intact.
And now that you are convinced, let’s talk about how to make them truly exceptional.
Chef Secrets for Perfect Crispiness
Getting that golden crunch is easier than you think, especially if you follow a few insider tricks.
- Use dry mushrooms. Any moisture will prevent the coating from sticking properly.
- Season every layer, flour, egg, and breadcrumbs, so the flavor builds naturally.
- Press the breadcrumbs gently onto each mushroom to ensure full coverage.
- Fry in batches so the oil temperature stays consistent.
- Drain on a rack instead of paper towels to keep the bottoms crisp.
Next, let’s gather the tools that make the process smooth and stress free.
Kitchen Tools That Make It Easy
A few simple tools will help everything come together effortlessly.
Mixing Bowls: For setting up your breading station in an organized way.
Whisk: To blend the eggs smoothly and evenly.
Large Skillet or Deep Pan: For frying the mushrooms evenly.
Tongs or Slotted Spoon: To safely turn and remove the mushrooms from hot oil.
Wire Rack: To cool the bites while keeping them crispy.
With your tools ready, let’s take a closer look at the ingredients that bring all this flavor to life.
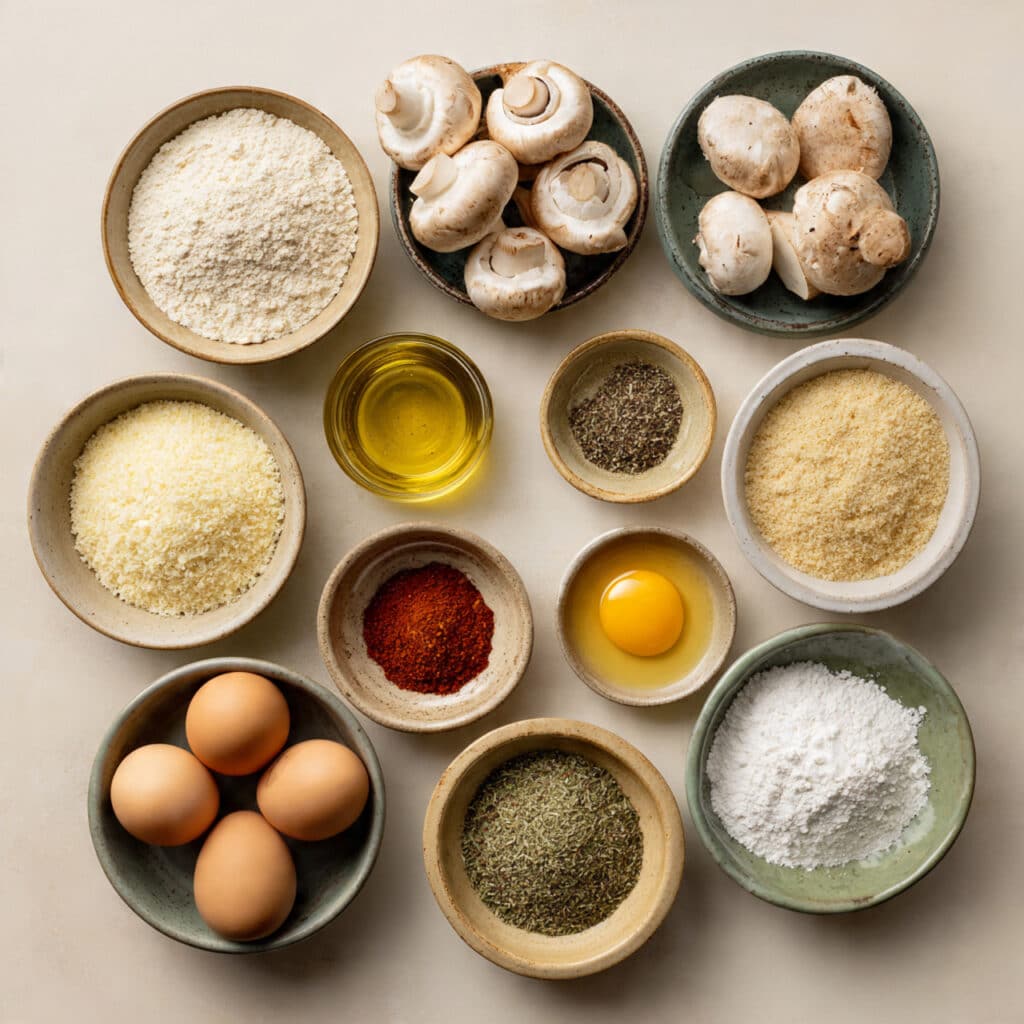
Ingredients You Will Need For This Crispy Delight
Each ingredient plays a small but important role in building flavor and texture.
- Button Mushrooms: 500 grams, cleaned and stems trimmed, these provide the juicy center.
- All Purpose Flour: 1 cup, creates the first dry layer for the coating.
- Eggs: 2 large, beaten, help the breadcrumbs adhere perfectly.
- Breadcrumbs: 1 1/2 cups, preferably panko for extra crunch.
- Garlic Powder: 1 teaspoon, adds deep savory flavor.
- Onion Powder: 1 teaspoon, enhances overall richness.
- Paprika: 1 teaspoon, brings mild warmth and color.
- Salt: 1 teaspoon, balances and enhances flavors.
- Black Pepper: 1/2 teaspoon, adds subtle heat.
- Dried Parsley: 1 tablespoon, for a light herbal note.
- Vegetable Oil: 2 cups for frying, ensures even crisping.
And if you want to tweak things slightly, here are some easy swaps.
Easy Ingredient Swaps If Needed
Sometimes you work with what you have, and that is perfectly fine.
Button Mushrooms: Cremini mushrooms for a deeper earthy flavor.
Breadcrumbs: Crushed cornflakes for an extra crunchy twist.
All Purpose Flour: Gluten free flour blend if needed.
Dried Parsley: Dried oregano or Italian seasoning.
Now let’s spotlight the true stars of this dish.
The Stars of the Show
Mushrooms: Their natural umami flavor intensifies as they cook, creating that savory bite.
Garlic Powder: It infuses every layer with warmth and depth, making each bite unforgettable.
Alright, apron on. Let’s get cooking.
Let’s Bring These to Life in the Kitchen
This is where the magic happens, and it is simpler than you might think.
- Preheat Your Equipment: Heat the vegetable oil in a deep skillet over medium heat until it reaches about 175 degrees Celsius.
- Combine Ingredients: In one bowl place the flour. In a second bowl whisk the eggs. In a third bowl mix breadcrumbs, garlic powder, onion powder, paprika, salt, black pepper, and dried parsley.
- Prepare Your Cooking Vessel: Ensure the oil is hot but not smoking, maintaining steady heat.
- Assemble the Dish: Coat each mushroom in flour, dip into the beaten eggs, then press into the seasoned breadcrumbs until fully covered.
- Cook to Perfection: Fry the mushrooms in batches for 3 to 4 minutes until golden brown and crispy.
- Finishing Touches: Transfer to a wire rack and sprinkle lightly with extra salt while hot.
- Serve and Enjoy: Serve warm with your favorite dipping sauce.
Now let’s talk about what makes every bite so satisfying.
The Perfect Balance of Crunch and Juiciness
The exterior turns beautifully golden and crisp, creating that irresistible crunch when you bite in. Inside, the mushroom stays tender and juicy, releasing earthy flavor that pairs perfectly with the garlicky coating. The herbs add freshness, and the paprika gives a subtle warmth that lingers just enough. Let me tell you, it’s worth every bite.
Helpful Tips for Even Better Results
A few extra pointers can take things to the next level.
- Keep the oil temperature steady for even browning.
- Do not overcrowd the pan, which can lower the oil temperature.
- Taste one batch and adjust salt if needed.
- Serve immediately for maximum crunch.
Common Mistakes and How to Avoid Them
It is easy to fix small issues before they happen.
- Skipping the flour step, which can cause the coating to slide off.
- Frying at low temperature, which makes them greasy instead of crisp.
- Using wet mushrooms, which prevents proper breading.
- Stacking them while hot, which traps steam and softens the crust.
Nutrition Snapshot You Should Know
Servings: 4
Calories per serving: 320
Note: These are approximate values.
Time Breakdown for Easy Planning
Prep Time: 20 minutes
Cook Time: 15 minutes
Total Time: 35 minutes
Planning Ahead and Storing the Goodness
You can bread the mushrooms up to 6 hours in advance and keep them refrigerated. Once cooked, store leftovers in an airtight container for up to 3 days. Reheat in a preheated oven at 180 degrees Celsius for 8 to 10 minutes to restore crispiness. Freezing is also possible after frying, just cool completely before freezing and reheat directly from frozen.
Serving Ideas That Make Them Shine
Serve them with garlic yogurt dip, spicy marinara, or a creamy ranch style sauce. They also pair beautifully with fresh salads or tucked into wraps for a crunchy addition.
Turn Leftovers Into Something New
Chop leftover bites and add them to salads for extra texture. Toss them into a grain bowl with quinoa and roasted vegetables. You can even layer them into a sandwich with lettuce and a tangy sauce.
Extra Little Touches for Big Flavor
Sprinkle freshly chopped parsley right before serving for a fresh pop. Add a pinch of chili flakes to the breadcrumb mixture if you like gentle heat. A squeeze of lemon right at the end brightens everything beautifully.
Make It Look Restaurant Worthy
Serve in a shallow bowl lined with parchment paper for a casual feel, or stack them high on a platter with a small dipping bowl in the center. The golden color against white dishware looks especially inviting.
Fun Variations to Experiment With
Try adding grated parmesan to the breadcrumbs for extra richness. Mix a bit of smoked paprika for deeper flavor. Use an air fryer at 200 degrees Celsius for about 12 minutes for a lighter version. Add a pinch of cayenne for a spicy twist.
FAQ’s
Q1: Can I bake them instead of frying?
Yes, bake at 200 degrees Celsius for about 20 minutes, flipping halfway through.
Q2: Can I use large mushrooms?
Yes, just adjust frying time slightly to ensure even cooking.
Q3: How do I keep them crispy?
Drain on a wire rack and avoid covering while hot.
Q4: Can I make them gluten free?
Yes, use gluten free flour and breadcrumbs.
Q5: What oil works best?
Neutral oils like vegetable or canola work perfectly.
Q6: Can I air fry them?
Yes, spray lightly with oil and cook until golden.
Q7: Do I need to remove the stems?
Trim them slightly for even shape, but full removal is optional.
Q8: Can I add fresh garlic?
You can, but finely mince it and mix into breadcrumbs.
Q9: Are they kid friendly?
Absolutely, especially with a mild dipping sauce.
Q10: Can I prepare them a day before?
You can bread them ahead, but fry just before serving for best texture.
Conclusion
There is something so satisfying about transforming simple mushrooms into crispy, golden bites of pure comfort. They are crunchy, savory, and packed with flavor in every mouthful. Whether you are hosting friends or treating yourself, this recipe delivers every single time. Give it a try, and I promise, you will be making them again very soon.
PrintCrispy Garlic Mushroom Bites

Golden and crunchy on the outside, tender and juicy on the inside, these Crispy Garlic Mushroom Bites are the perfect savory snack or appetizer. Packed with garlic, herbs, and a satisfying crisp coating, they are easy to make and impossible to stop eating.
Ingredients
- 500 grams button mushrooms, cleaned and stems trimmed
- 1 cup all purpose flour
- 2 large eggs, beaten
- 1 1/2 cups breadcrumbs, preferably panko
- 1 teaspoon garlic powder
- 1 teaspoon onion powder
- 1 teaspoon paprika
- 1 teaspoon salt
- 1/2 teaspoon black pepper
- 1 tablespoon dried parsley
- 2 cups vegetable oil for frying
Instructions
- Heat the vegetable oil in a deep skillet over medium heat until it reaches about 175 degrees Celsius.
- Place the flour in one bowl. In a second bowl whisk the eggs. In a third bowl combine the breadcrumbs, garlic powder, onion powder, paprika, salt, black pepper, and dried parsley.
- Coat each mushroom in flour, dip into the beaten eggs, then press into the seasoned breadcrumbs until fully covered.
- Fry the mushrooms in batches for 3 to 4 minutes until golden brown and crispy.
- Transfer to a wire rack and sprinkle lightly with extra salt while hot.
- Serve warm with your favorite dipping sauce.
Notes
- Keep the oil temperature steady for even browning and crisp texture.
- Do not overcrowd the pan to prevent soggy coating.
- Drain on a wire rack instead of paper towels to maintain crispiness.
- Reheat leftovers in the oven at 180 degrees Celsius for 8 to 10 minutes.