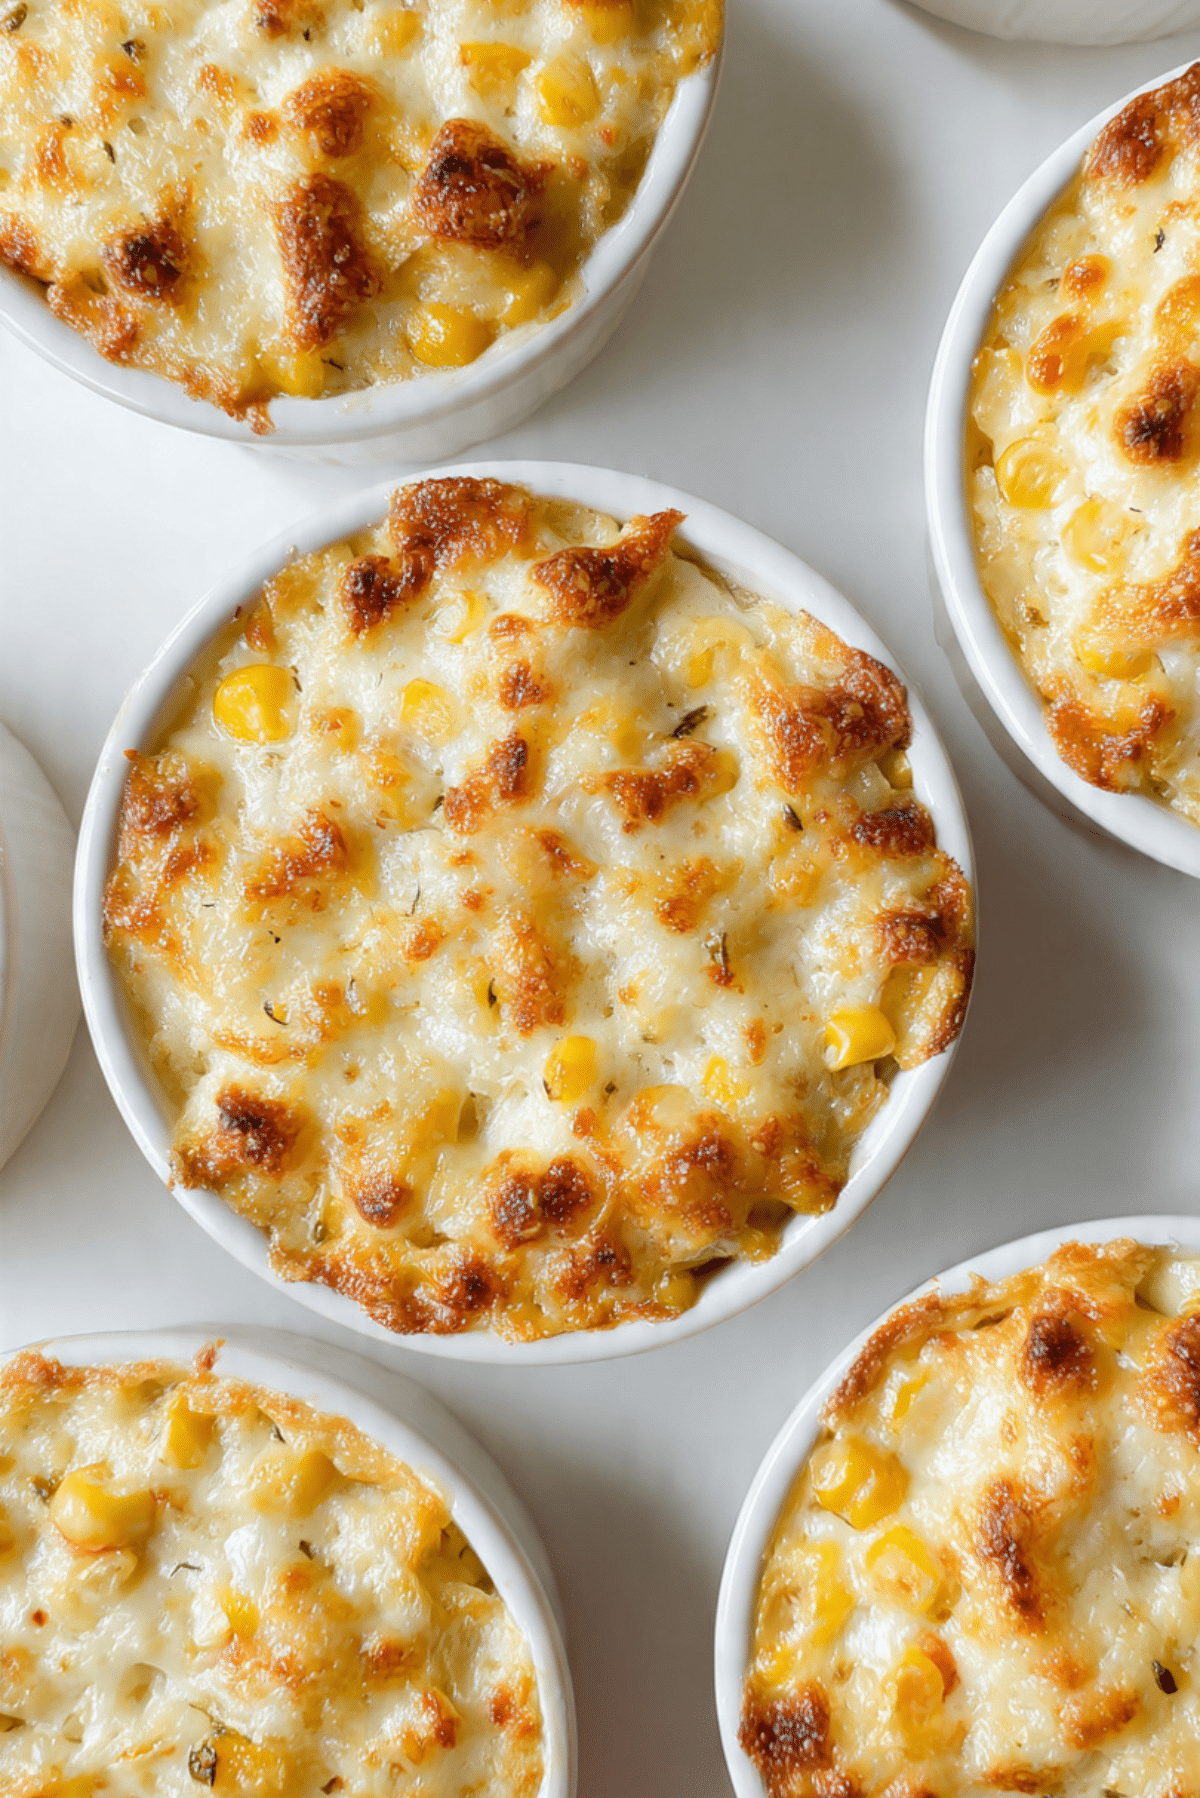
Corn Cheese Cups
The moment these cups come out of the oven, the smell alone tells you something cozy is about to happen. Warm, creamy, and dotted with sweet pops of corn, this dish feels like comfort food that did not try too hard. It is the kind of recipe you make once and then keep coming back to, especially on days when you want something quick but still deeply satisfying. Trust me, you’re going to love this.
Why Everyone Keeps Coming Back to This Dish
There is something almost magical about the way sweet corn and melted cheese come together. It feels familiar, yet exciting every single time. These little cups are rich without being heavy and simple without being boring, which makes them hard to resist whether you serve them as a snack or a side.
A Little Background and Fun Trivia
Corn and cheese have been paired together across many cultures, from street food stalls to home kitchens. This combination became especially popular as an easy oven baked treat because it uses pantry staples and delivers big flavor. Over time, it evolved into individual servings like these cups, making it easier to share, serve, and enjoy without fuss.
What Makes This Recipe So Dependable
This is where things really get good, because this recipe checks all the right boxes.
Versatile: These cups work as a snack, appetizer, or even a simple lunch when paired with a salad.
Budget-Friendly: Corn and cheese are affordable ingredients that stretch easily to feed a crowd.
Quick and Easy: Minimal prep and a short bake time mean you can have this ready fast.
Customizable: You can adjust the cheese blend or seasoning to suit your mood.
Crowd-Pleasing: Kids and adults both love the creamy texture and sweet flavor.
Make-Ahead Friendly: You can prep everything in advance and bake when needed.
Great for Leftovers: Reheated cups stay creamy and delicious the next day.
Pro Tips From the Kitchen
Before we dive into cooking, let me share a few insider tips that make a big difference.
- Use full fat cheese for the best melt and richest flavor.
- Drain the corn well so the cups stay creamy and not watery.
- Bake until lightly golden on top, which adds flavor and texture.
- Let them rest for a couple of minutes before serving so they set nicely.
Kitchen Tools You Will Need
You do not need anything fancy, just a few basics to make the process smooth.
Mixing Bowl: For combining all ingredients evenly.
Spoon or Spatula: To gently mix without crushing the corn.
Oven-Safe Cups or Ramekins: Individual portions help with even baking.
Baking Tray: Makes it easier to move the cups in and out of the oven.
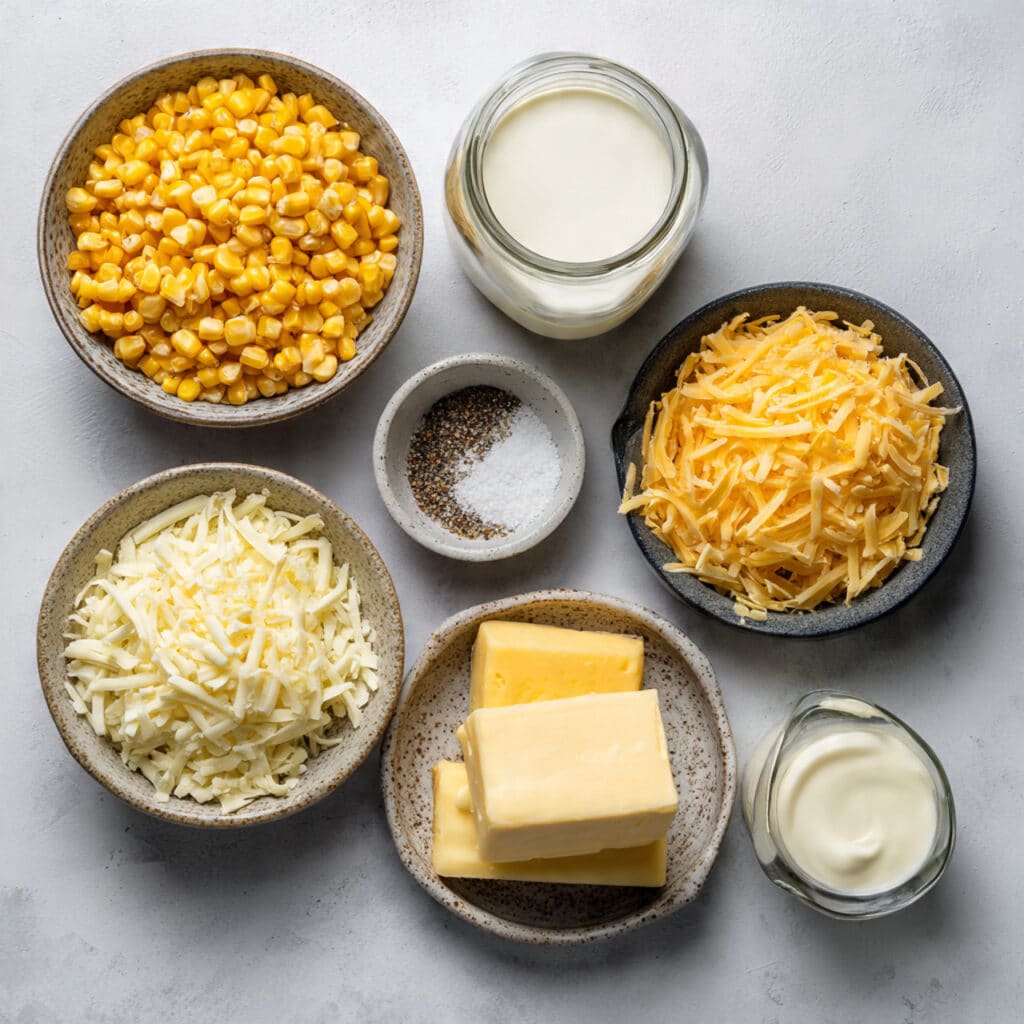
Ingredients You Will Need For Corn Cheese Cups
Everything comes together with just a handful of ingredients that balance each other beautifully.
- Sweet Corn Kernels: 1 1/2 cups, adds natural sweetness and texture.
- Mozzarella Cheese: 1 cup shredded, provides that irresistible stretch.
- Cheddar Cheese: 1/2 cup shredded, brings depth and sharpness.
- Heavy Cream: 1/2 cup, creates a rich and smooth base.
- Butter: 1 tablespoon melted, adds flavor and silkiness.
- Black Pepper: 1/4 teaspoon, gently balances the sweetness.
- Salt: 1/4 teaspoon, enhances all the flavors.
Easy Ingredient Swaps You Can Try
If you like to play around in the kitchen, these swaps work well.
Mozzarella Cheese: Use Monterey Jack for a similar melt.
Cheddar Cheese: Swap with Colby for a milder flavor.
Heavy Cream: Use cooking cream for a slightly lighter result.
Spotlight on Key Ingredients
Let us pause for a second and appreciate what really makes this work.
Sweet Corn Kernels: Their juicy bite contrasts beautifully with the creamy cheese.
Mozzarella Cheese: This is what gives you that comforting stretch and softness.
Let’s Start Cooking Together
Now that everything is ready, it is time to bring these cups to life.
- Preheat Your Equipment: Set your oven to 375°F so it is hot and ready.
- Combine Ingredients: In a mixing bowl, add corn, mozzarella, cheddar, cream, butter, salt, and pepper. Stir until well combined.
- Prepare Your Cooking Vessel: Lightly grease your oven-safe cups or ramekins.
- Assemble the Dish: Spoon the mixture evenly into each cup.
- Cook to Perfection: Place the cups on a baking tray and bake for 18 minutes until bubbly.
- Finishing Touches: Switch to broil for 2 minutes to lightly brown the tops.
- Serve and Enjoy: Let cool slightly, then enjoy warm and creamy.
How Texture and Flavor Come Together
As these bake, the cheese melts into the cream, wrapping each corn kernel in richness. The top becomes lightly golden while the inside stays soft and luscious. Every bite gives you sweetness, saltiness, and that comforting creamy pull. Let me tell you, it’s worth every bite.
Helpful Cooking Tips and Tricks
A few extra pointers to make things even better.
- Use freshly shredded cheese for smoother melting.
- Place cups evenly spaced for uniform heat.
- Do not overbake, or the cheese can tighten up.
What to Avoid for Best Results
Even simple recipes have a few pitfalls.
- Skipping the draining step for corn, which adds excess moisture.
- Using low fat cheese, which affects texture.
- Serving straight from the oven without resting, which can make them runny.
Nutrition Breakdown at a Glance
Servings: 4
Calories per serving: 260
Note: These are approximate values.
Preparation Time Overview
Prep Time: 10 minutes
Cook Time: 20 minutes
Total Time: 30 minutes
Make-Ahead and Storage Tips
You can assemble the cups a day ahead and refrigerate them covered. When ready, bake straight from the fridge, adding a couple of extra minutes. Leftovers store well in an airtight container for up to 3 days and reheat nicely in the oven.
Serving Ideas to Complete the Meal
Serve these cups alongside a fresh green salad or as a side for grilled vegetables. They also work beautifully on a snack table for gatherings.
Creative Leftover Transformations
Leftover cups can be scooped onto toast for a quick lunch or stirred into cooked rice for a creamy corn bowl.
Extra Tips for Best Flavor
Season lightly at first and adjust after baking if needed. A sprinkle of extra cheese on top before broiling adds a nice finish.
Make It a Real Showstopper
Serve in colorful ramekins and place them on a wooden board for contrast. The golden tops look especially inviting this way.
Fun Variations to Try
- Add finely chopped green onions for freshness.
- Mix in a pinch of paprika for warmth.
- Use a blend of cheeses for deeper flavor.
- Add a spoon of cream cheese for extra richness.
FAQ’s
1. Can I use frozen corn?
Yes, just thaw and drain it well before using.
2. Can this be made without an oven?
The oven gives the best texture, but a covered pan on low heat can work.
3. Are these cups spicy?
No, they are mild, but you can adjust seasoning if you like heat.
4. Can I double the recipe?
Absolutely, just use a larger tray and bake in batches if needed.
5. Do these reheat well?
Yes, they stay creamy when reheated gently.
6. Can I use only one type of cheese?
Yes, but a blend gives better flavor.
7. Are these good for kids?
Very much so, kids usually love the sweetness.
8. Can I freeze them?
They can be frozen, but texture is best when fresh.
9. Should I cover them while baking?
No, leaving them uncovered helps the top brown.
10. Can I serve them cold?
They are best warm, but still tasty at room temperature.
Conclusion
These Corn Cheese Cups are one of those recipes that quietly become a favorite. They are simple, comforting, and endlessly adaptable. Once you try them, you will understand why they disappear so fast. This one’s a total game-changer.
PrintCorn Cheese Cups
Creamy baked corn and cheese cups that are warm, comforting, and perfect as a quick snack or side dish.
Ingredients
- 1 1/2 cups sweet corn kernels
- 1 cup shredded mozzarella cheese
- 1/2 cup shredded cheddar cheese
- 1/2 cup heavy cream
- 1 tablespoon butter, melted
- 1/4 teaspoon black pepper
- 1/4 teaspoon salt
Instructions
- Preheat the oven to 375°F.
- In a mixing bowl, combine sweet corn, mozzarella cheese, cheddar cheese, heavy cream, melted butter, salt, and black pepper.
- Mix gently until all ingredients are evenly combined.
- Lightly grease oven-safe cups or ramekins.
- Spoon the mixture evenly into each cup.
- Place the cups on a baking tray and bake for 18 minutes until bubbly.
- Switch the oven to broil and cook for an additional 2 minutes until the tops are lightly golden.
- Remove from the oven, let rest briefly, then serve warm.
Notes
- Drain corn well to avoid excess moisture.
- Use freshly shredded cheese for the best melting texture.
- Let the cups rest for a few minutes before serving so they set properly.