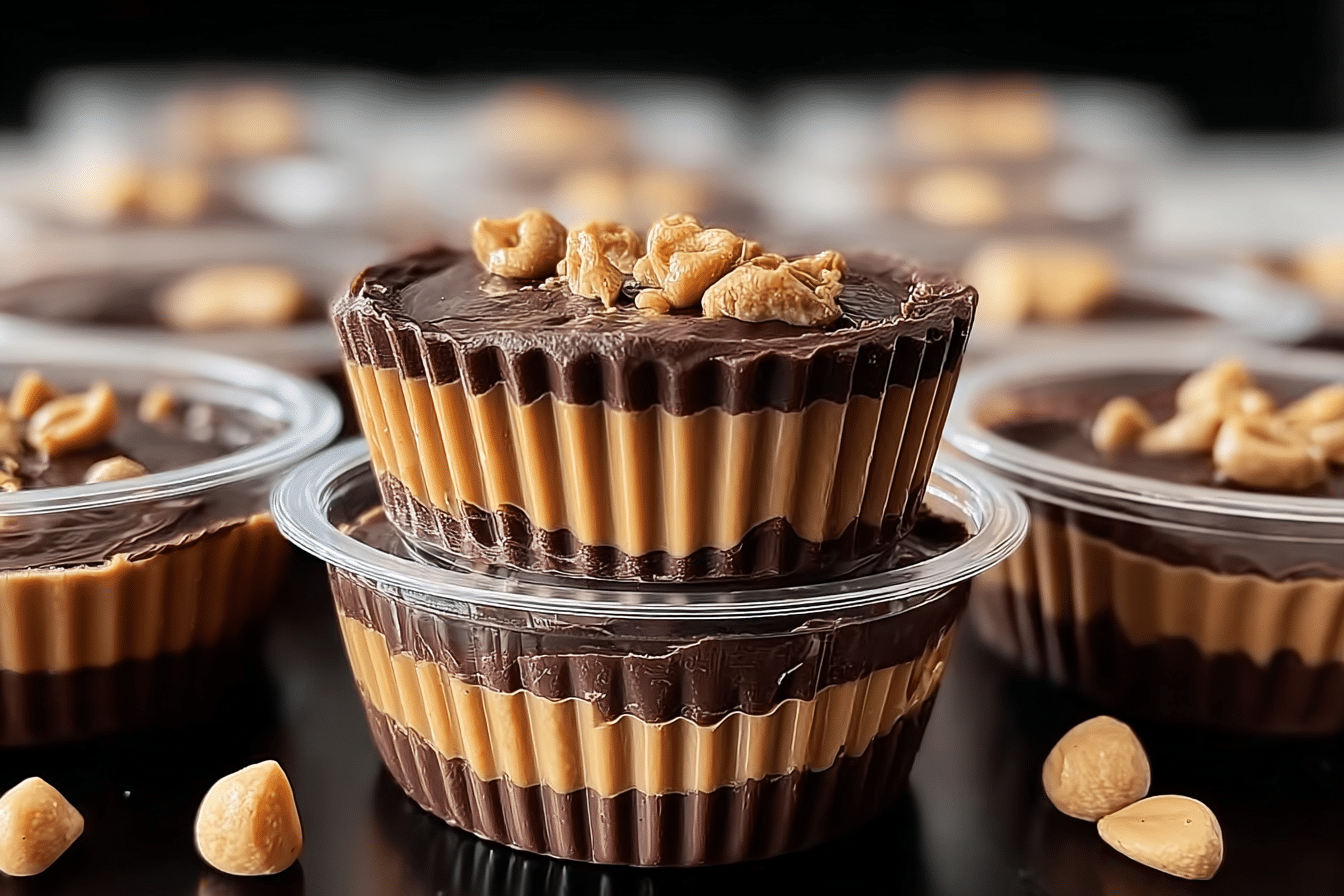
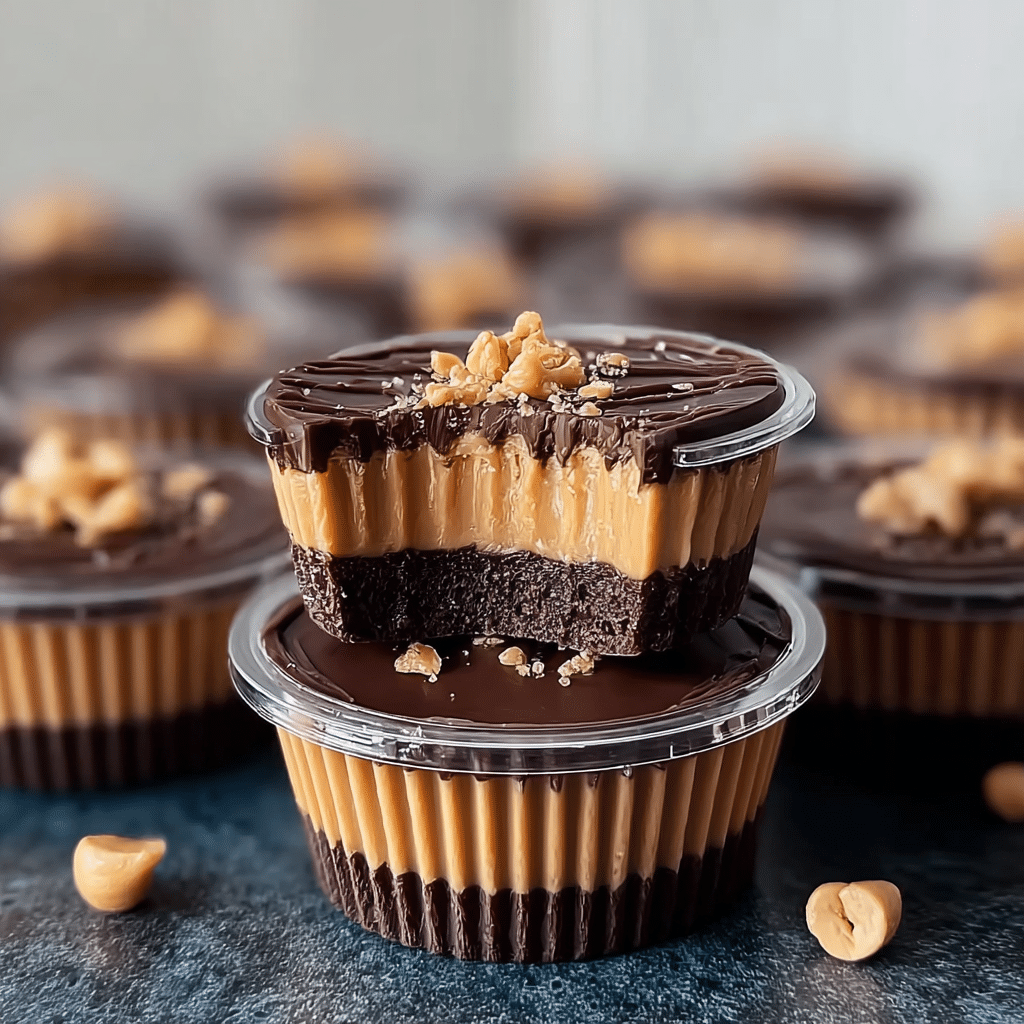
Chocolate Peanut Butter Dessert Cups
Chocolate and peanut butter are one of those timeless combinations that never fail to make people’s hearts flutter. In these Chocolate Peanut Butter Dessert Cups, creamy, rich peanut butter filling is nestled inside crisp chocolate shells, creating a treat that is as beautiful as it is indulgent. They’re perfect for special occasions, casual gatherings, or simply when you need a little homemade indulgence in your life. This recipe is not just about flavor—it’s about texture, presentation, and the joy of making something that feels fancy but is surprisingly easy to prepare.
Why You’ll Love This Recipe
These dessert cups are the definition of effortless elegance. The crisp snap of the chocolate shell paired with the smooth, creamy peanut butter filling is heavenly. They require no baking, which makes them perfect for warm days or when your oven is already busy. You can make them ahead of time, so they’re ideal for entertaining or gifting. Plus, they’re endlessly customizable—you can top them with nuts, drizzle them with caramel, or sprinkle them with flaky sea salt for a gourmet finish.
Ingredients
- Chocolate (milk, dark, or semi-sweet, depending on your preference)
- Creamy peanut butter
- Powdered sugar
- Softened butter
- Vanilla extract
- Optional toppings: crushed peanuts, chocolate drizzle, sea salt, or candy pieces
Instructions
- Prepare the Chocolate Shells: Melt your chosen chocolate until smooth. You can use a double boiler for gentle, even melting or microwave in short intervals, stirring often to prevent burning.
- Coat the Molds: Using silicone muffin cups or a cupcake pan lined with paper liners, spoon a small amount of melted chocolate into each cup. Tilt and swirl so the chocolate coats the bottom and sides evenly. Place the cups in the refrigerator or freezer for a few minutes to set.
- Make the Filling: In a mixing bowl, combine peanut butter, powdered sugar, softened butter, and vanilla extract. Beat until smooth and creamy. Taste and adjust sweetness if desired.
- Fill the Cups: Once the chocolate shells are firm, spoon the peanut butter filling into each cup, leaving a little space at the top for the final chocolate layer.
- Seal with Chocolate: Pour more melted chocolate over the filling to completely cover it. Gently tap the pan on the counter to remove any air bubbles and create a smooth finish.
- Chill and Set: Place the dessert cups back in the refrigerator until the chocolate is fully set.
- Unmold and Decorate: Carefully peel away the silicone or paper liner. Add any toppings you like—crushed peanuts for crunch, a drizzle of white chocolate for contrast, or a sprinkle of sea salt for a sweet-salty balance.
Serving Suggestions
These dessert cups are perfect for serving on a dessert platter alongside fresh berries or mini cookies. For a truly decadent experience, pair them with a scoop of vanilla ice cream and a drizzle of hot fudge. They also make wonderful edible gifts—just package them in a decorative box with parchment paper.
Tips for Success
- Quality matters: Use good-quality chocolate for the best flavor and texture.
- Peanut butter consistency: If your peanut butter is too runny, add a little extra powdered sugar to help the filling hold its shape.
- Even coating: For a professional look, apply two thin coats of chocolate rather than one thick one. Chill between coats for a sturdier shell.
- Storage: Keep these in an airtight container in the fridge for up to a week. They can also be frozen for longer storage—just let them thaw slightly before serving.
Frequently Asked Questions
1. Can I use crunchy peanut butter instead of creamy?
Yes, crunchy peanut butter adds a nice texture, though the filling will be less smooth.
2. Can I make these dairy-free?
Absolutely—use dairy-free chocolate and a plant-based butter substitute.
3. How can I prevent my chocolate from cracking?
Make sure the chocolate layers are not too thick and allow them to set gradually in the fridge rather than the freezer.
4. Can I use almond or cashew butter?
Yes, other nut butters work beautifully in this recipe. Just be sure to adjust the sweetness to your taste.
5. Can I add flavoring to the filling?
You can add a touch of cinnamon, espresso powder, or even a splash of bourbon for a twist.
6. Do I have to temper the chocolate?
Tempering gives a glossy finish and a crisp snap, but it’s not strictly necessary if you’re storing the cups in the fridge.
7. Can I use candy molds instead of muffin cups?
Yes, candy molds work great for making smaller, bite-sized versions.
8. How long do these take to set?
Usually about 15–20 minutes in the fridge per layer.
9. Can I make these sugar-free?
Yes, use sugar-free chocolate and a sugar substitute like powdered erythritol in the filling.
10. How far in advance can I make them?
They can be made up to a week in advance and stored in the fridge, making them perfect for party prep.
Conclusion
Chocolate Peanut Butter Dessert Cups are a celebration of everything we love about homemade sweets: rich flavor, pleasing textures, and a touch of creativity. They look beautiful, taste incredible, and come together with minimal effort. Whether you serve them at a dinner party, package them as thoughtful gifts, or simply keep a stash in your fridge for those moments when only chocolate will do, they’re guaranteed to delight anyone lucky enough to have one.
PrintChocolate Peanut Butter Dessert Cups
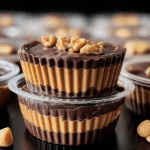
Chocolate Peanut Butter Dessert Cups are a rich and indulgent treat featuring creamy peanut butter filling encased in a smooth chocolate shell, topped with a sprinkle of sea salt for the perfect sweet-and-salty bite.
- Prep Time: 20 minutes
- Cook Time: 0 minutes
- Total Time: 50 minutes (including chilling)
- Yield: 12 cups
- Category: Dessert
- Method: No-Bake
- Cuisine: American
- Diet: Vegetarian
Ingredients
-
- Chocolate (milk, dark, or semi-sweet, depending on your preference)
- Creamy peanut butter
- Powdered sugar
- Softened butter
- Vanilla extract
- Optional toppings: crushed peanuts, chocolate drizzle, sea salt, or candy pieces
Instructions
-
- Prepare the Chocolate Shells: Melt your chosen chocolate until smooth. You can use a double boiler for gentle, even melting or microwave in short intervals, stirring often to prevent burning.
- Coat the Molds: Using silicone muffin cups or a cupcake pan lined with paper liners, spoon a small amount of melted chocolate into each cup. Tilt and swirl so the chocolate coats the bottom and sides evenly. Place the cups in the refrigerator or freezer for a few minutes to set.
- Make the Filling: In a mixing bowl, combine peanut butter, powdered sugar, softened butter, and vanilla extract. Beat until smooth and creamy. Taste and adjust sweetness if desired.
- Fill the Cups: Once the chocolate shells are firm, spoon the peanut butter filling into each cup, leaving a little space at the top for the final chocolate layer.
- Seal with Chocolate: Pour more melted chocolate over the filling to completely cover it. Gently tap the pan on the counter to remove any air bubbles and create a smooth finish.
- Chill and Set: Place the dessert cups back in the refrigerator until the chocolate is fully set.
- Unmold and Decorate: Carefully peel away the silicone or paper liner. Add any toppings you like—crushed peanuts for crunch, a drizzle of white chocolate for contrast, or a sprinkle of sea salt for a sweet-salty balance.
Notes
- Use high-quality chocolate for a smoother, richer flavor.
- You can swap creamy peanut butter for crunchy if you want added texture.
- Store in the refrigerator for up to 1 week or freeze for longer storage.
Nutrition
- Serving Size: 1 cup
- Calories: 220
- Sugar: 18g
- Sodium: 90mg
- Fat: 14g
- Saturated Fat: 7g
- Unsaturated Fat: 6g
- Trans Fat: 0g
- Carbohydrates: 20g
- Fiber: 2g
- Protein: 5g
- Cholesterol: 5mg