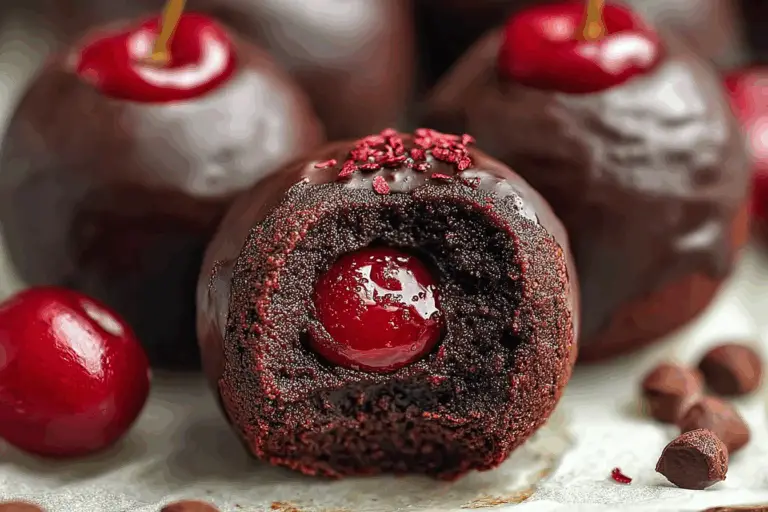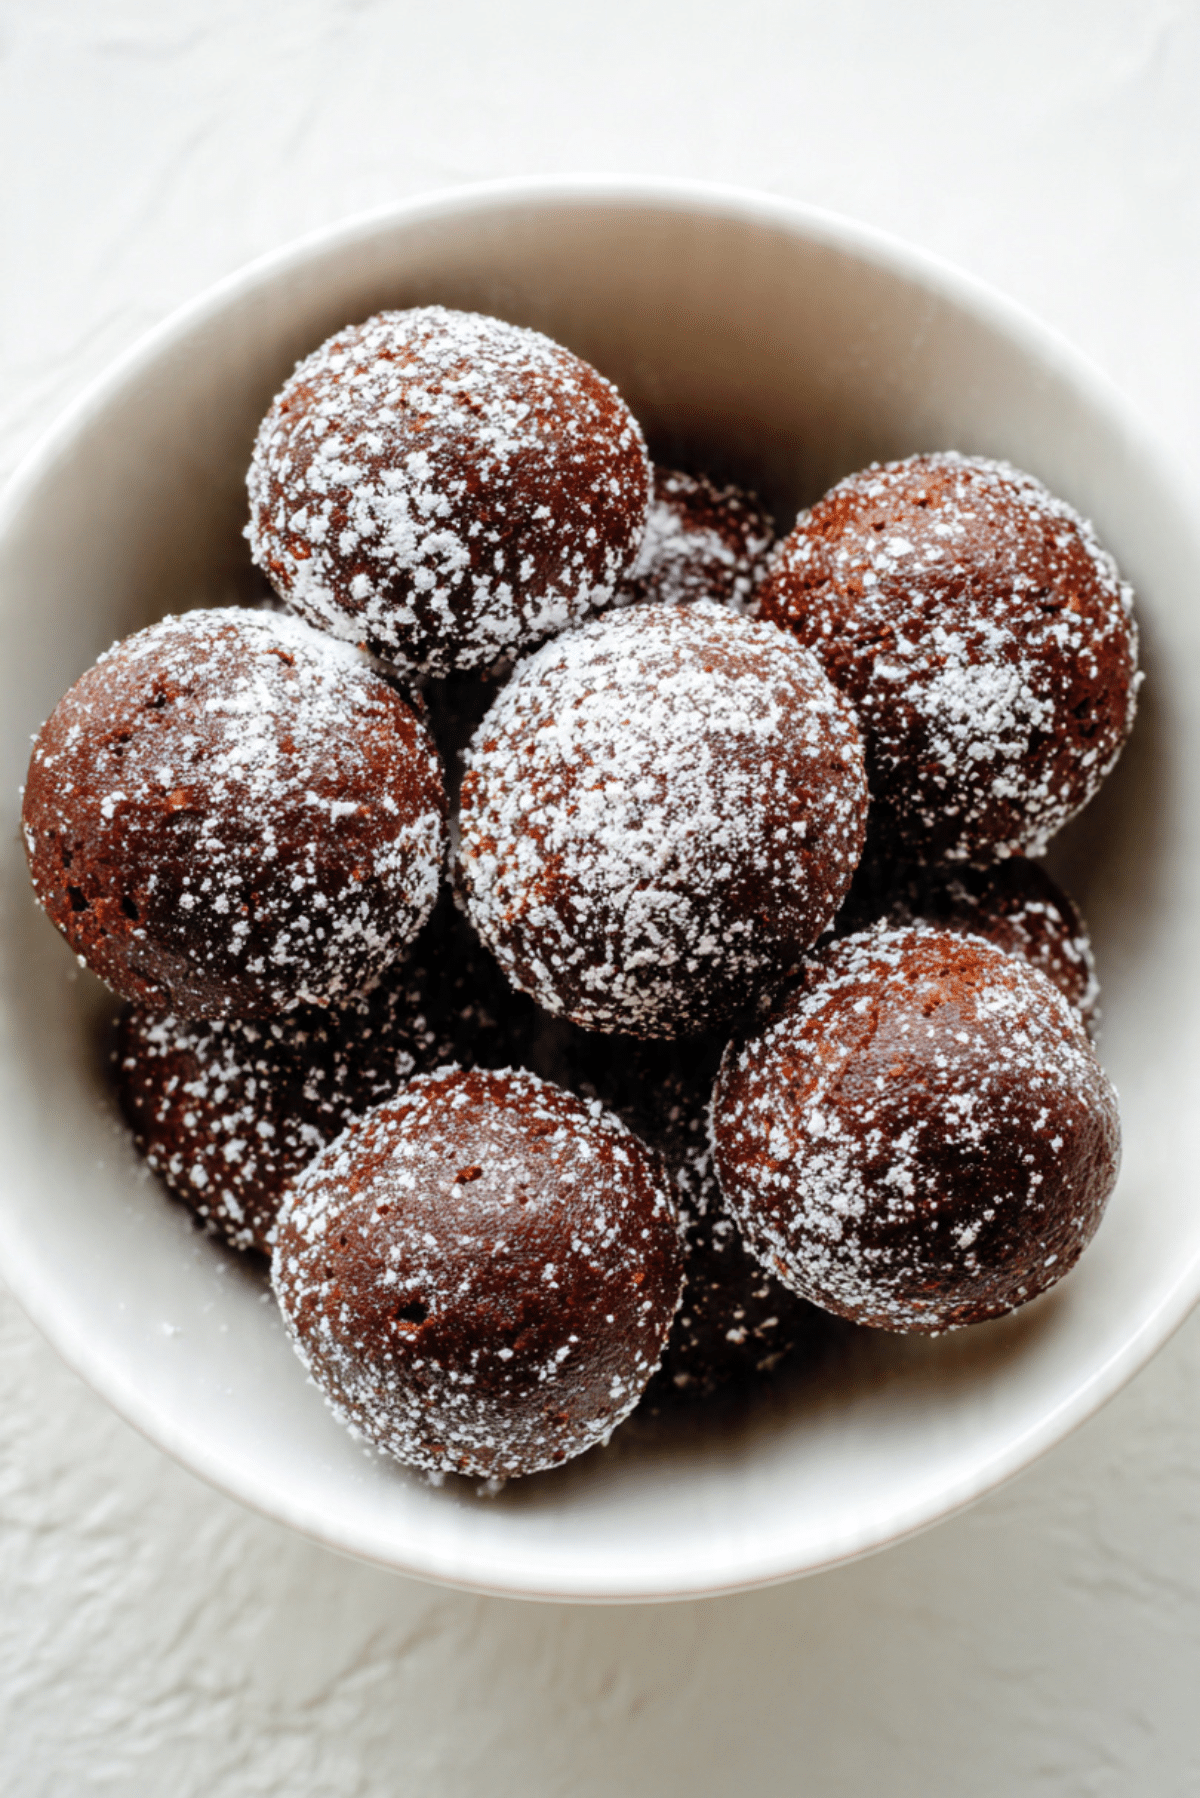
Chocolate Lava Donut Holes
There is something almost magical about biting into a soft chocolate donut hole and finding a warm, molten center waiting inside. That first moment when the tender cake gives way to silky chocolate is pure comfort. These little treats are rich, slightly crisp on the outside, and irresistibly gooey in the middle. Trust me, you’re going to love this. They look simple, almost innocent, but one bite and you realize they are anything but ordinary.
Why These Little Chocolate Bites Feel So Special
Some desserts are meant to impress a crowd, and others are meant to make you close your eyes and savor the moment. These donut holes do both. They are small enough to pop into your mouth, yet bold enough in flavor to feel indulgent. The powdered sugar dusting adds just the right hint of sweetness, while the deep chocolate flavor wraps everything together.
And now, let’s dive a little deeper into where this idea of molten chocolate goodness began.
A Sweet Nod to Lava Cakes and Classic Donuts
The inspiration behind these donut holes comes from two beloved treats. On one side, you have the famous molten lava cake, known for its rich center that flows like silk. On the other, you have classic donut holes, those bite-sized bakery favorites that are easy to share.
By combining the soft crumb of a cake donut with the dramatic center of a lava dessert, you get something playful yet elegant. It is a modern twist that feels familiar and exciting at the same time.
Why You Can Count on This Recipe Every Time
Before we step into the kitchen, let me tell you why this one is a total game-changer.
Versatile: These little bites work as a party dessert, a cozy weekend treat, or even a sweet addition to a brunch table.
Budget-Friendly: The ingredients are simple pantry staples, nothing fancy or hard to find.
Quick and Easy: From mixing bowl to table in about 30 minutes, which makes them perfect for sudden chocolate cravings.
Customizable: You can switch up the filling or add flavor extracts to make them your own.
Crowd-Pleasing: Chocolate lovers of all ages fall for that gooey center.
Make-Ahead Friendly: The batter can be prepped ahead and baked fresh when needed.
Great for Leftovers: If you somehow have any left, they reheat beautifully for another molten moment.
Insider Tips for Perfect Lava Centers
Getting that soft, flowing center is easier than it sounds, especially if you keep a few things in mind.
- Do not overmix the batter, which can make the texture dense instead of tender.
- Use good quality chocolate for the filling, since it melts smoother and tastes richer.
- Slightly underbake the centers so they stay molten.
- Let them rest for a couple of minutes before serving, which helps the structure set while keeping the middle soft.
Kitchen Tools That Make It Effortless
You do not need anything complicated, just a few basics.
Mixing Bowls: For combining dry and wet ingredients separately.
Whisk: Helps create a smooth, lump-free batter.
Mini Muffin Pan: Gives the perfect donut hole shape.
Small Cookie Scoop: Makes portioning even and neat.
Cooling Rack: Allows air to circulate so the bottoms do not get soggy.
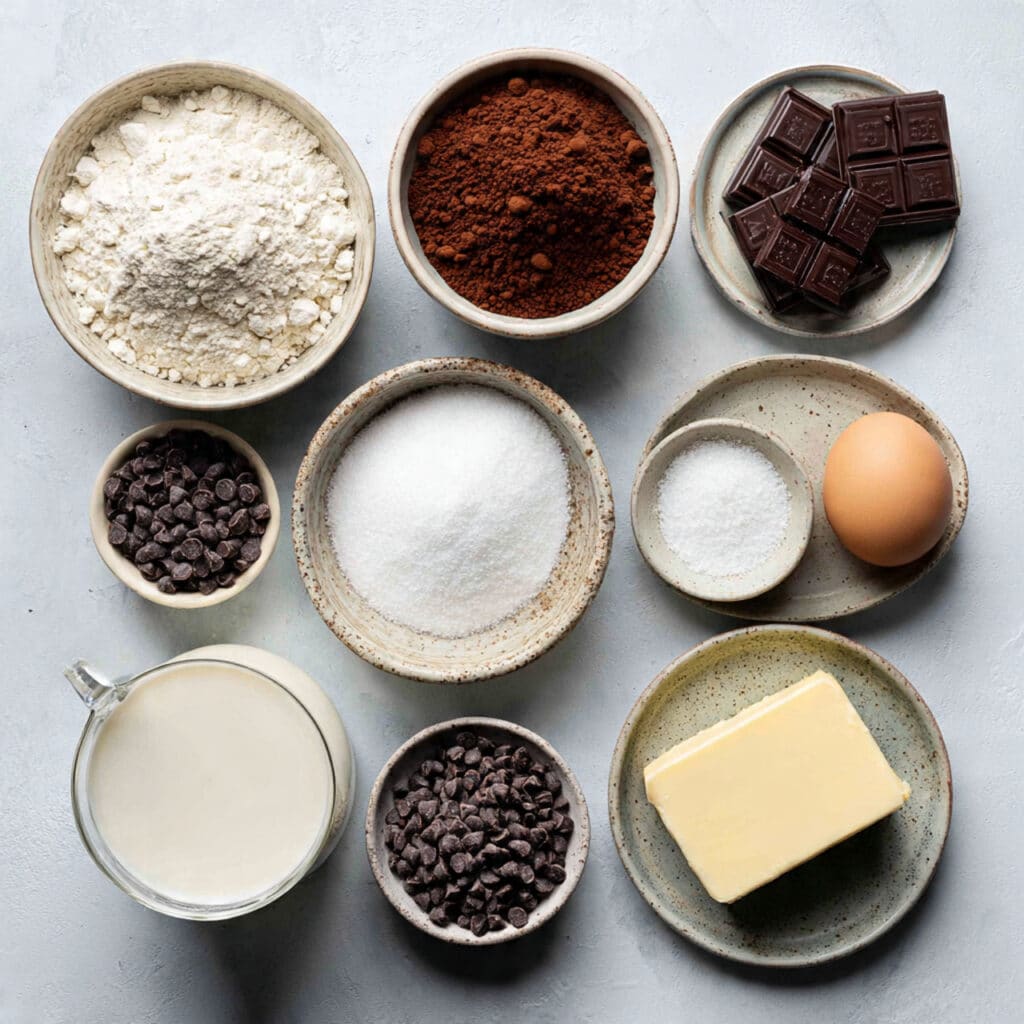
Ingredients That Bring It All Together
The magic starts with simple ingredients that work in harmony.
- All-Purpose Flour: 1 cup, provides structure and a tender crumb.
- Unsweetened Cocoa Powder: 1/4 cup, deepens the chocolate flavor.
- Granulated Sugar: 1/2 cup, sweetens and keeps the texture soft.
- Baking Powder: 1 teaspoon, helps the donut holes rise.
- Salt: 1/4 teaspoon, balances the sweetness.
- Whole Milk: 1/2 cup, adds moisture and richness.
- Large Egg: 1, binds everything together.
- Unsalted Butter, melted: 2 tablespoons, adds flavor and tenderness.
- Semi-Sweet Chocolate Chips: 1/2 cup, used for the molten center.
- Powdered Sugar: 2 tablespoons, for dusting on top.
Easy Swaps If You Need Them
Sometimes you work with what you have, and that is perfectly fine.
Whole Milk: Almond milk or oat milk can be used instead.
Unsalted Butter: Melted coconut oil works well.
Semi-Sweet Chocolate Chips: Dark chocolate chunks are a richer alternative.
Granulated Sugar: Coconut sugar can add a slight caramel note.
The Star Ingredients That Make the Magic
Semi-Sweet Chocolate Chips: This is where the molten magic happens. When baked just right, they melt into a smooth, flowing center that makes every bite unforgettable.
Unsweetened Cocoa Powder: It gives depth and richness, creating that bold chocolate flavor that feels luxurious.
Let’s Get Baking Together
Now comes the fun part. Here are the steps you are going to follow.
- Preheat Your Equipment: Preheat your oven to 350 degrees F and lightly grease a mini muffin pan.
- Combine Ingredients: In one bowl, whisk together the flour, cocoa powder, sugar, baking powder, and salt. In another bowl, whisk the milk, egg, and melted butter until smooth. Gradually mix the wet ingredients into the dry until just combined.
- Prepare Your Cooking Vessel: Spoon a small amount of batter into each mini muffin cavity, filling them halfway.
- Assemble the Dish: Place a few chocolate chips in the center of each, then cover with a bit more batter until about three quarters full.
- Cook to Perfection: Bake for 8 to 10 minutes, just until the edges are set but the centers remain soft.
- Finishing Touches: Let them cool for 2 to 3 minutes, then gently remove and dust with powdered sugar.
- Serve and Enjoy: Serve warm so the centers stay gooey and irresistible.
A Texture and Flavor Experience You Will Not Forget
The outside is soft with a slight cake-like crumb, while the inside stays rich and molten. The cocoa brings a deep chocolate tone, and the melted center adds a creamy contrast. That light snowfall of powdered sugar gives a gentle sweetness that ties it all together. Let me tell you, it’s worth every bite.
Smart Baking Tips for Even Better Results
A few extra tips can make all the difference.
- Use room temperature ingredients so the batter blends smoothly.
- Do not overbake, since even one extra minute can firm up the center.
- Serve immediately for the best molten texture.
Common Mistakes and How to Avoid Them
Even simple recipes have small pitfalls.
- Overfilling the pan, which can cause overflow. Fill only three quarters full.
- Skipping the greasing step, which makes removal tricky.
- Baking too long, which removes the lava effect. Keep a close eye at the 8 minute mark.
Nutrition Snapshot
Servings: 12 donut holes
Calories per serving: 120
Note: These are approximate values.
Time Breakdown for Busy Days
Prep Time: 15 minutes
Cook Time: 10 minutes
Total Time: 25 minutes
Make-Ahead and Storage Guide
You can prepare the batter a few hours ahead and keep it covered in the refrigerator. Bake just before serving for that fresh, molten center. Store leftovers in an airtight container at room temperature for up to 2 days. Reheat in the microwave for about 10 seconds to revive the gooey middle. Freezing is also possible, just thaw and warm gently before serving.
Serving Ideas That Take Them Over the Top
Pair these with a scoop of vanilla ice cream for a hot and cold contrast. Drizzle with chocolate sauce or serve alongside fresh berries for a bright touch. They also shine next to a cup of coffee or warm milk.
Fun Ways to Reinvent the Extras
If you have leftovers, crumble them over ice cream for a chocolate topping. You can also slice them in half and layer into a quick dessert parfait with whipped cream and fruit.
Extra Little Tricks for Big Flavor
Add a drop of vanilla extract to the batter for warmth. Sprinkle a tiny pinch of sea salt on top for a sweet and salty twist. Use high quality cocoa for a deeper taste.
Turn Them Into a Showstopper
Arrange them on a white platter and dust with powdered sugar just before serving so they look freshly made. A small bowl of melted chocolate on the side for dipping adds a dramatic touch.
Flavor Twists to Try Next Time
- Add a spoonful of hazelnut spread in the center instead of chocolate chips.
- Mix in a tablespoon of instant espresso powder for a mocha vibe.
- Stir in mini white chocolate chips for contrast.
- Add a pinch of cinnamon for warmth.
FAQ’s
Q1: Can I make them without cocoa powder?
Yes, but they will lose their deep chocolate flavor. You could replace it with extra flour and create a vanilla version instead.
Q2: How do I keep the center gooey?
Bake just until the edges are set and serve warm. Slight underbaking is key.
Q3: Can I fry instead of bake?
This version is designed for baking. Frying would require a different dough consistency.
Q4: Can I use dark chocolate?
Absolutely, it will create a richer and slightly less sweet center.
Q5: Are they freezer friendly?
Yes, freeze in an airtight container and reheat gently before serving.
Q6: Can I double the batch?
Yes, simply double each ingredient and bake in batches.
Q7: Why did my centers not melt?
They may have been overbaked or the chocolate pieces were too small.
Q8: Can I make them gluten free?
You can try a one to one gluten free flour blend.
Q9: Do they need refrigeration?
They can stay at room temperature for up to two days in a sealed container.
Q10: What is the best way to serve them?
Warm, freshly dusted with powdered sugar, and maybe with a scoop of ice cream.
Conclusion
There is something deeply satisfying about creating a dessert that surprises people with its gooey center. These chocolate lava donut holes are simple, comforting, and just indulgent enough to feel special. This one’s a total game-changer for chocolate cravings. Give them a try, serve them warm, and watch how quickly they disappear.
PrintChocolate Lava Donut Holes

Soft and rich chocolate donut holes with a gooey molten center, baked to perfection and lightly dusted with powdered sugar. These bite-sized treats are quick to make and deliver an indulgent chocolate experience in every warm, tender bite.
Ingredients
- 1 cup all-purpose flour
- 1/4 cup unsweetened cocoa powder
- 1/2 cup granulated sugar
- 1 teaspoon baking powder
- 1/4 teaspoon salt
- 1/2 cup whole milk
- 1 large egg
- 2 tablespoons unsalted butter, melted
- 1/2 cup semi-sweet chocolate chips
- 2 tablespoons powdered sugar
Instructions
- Preheat oven to 350 degrees F and lightly grease a mini muffin pan.
- In a bowl, whisk together flour, cocoa powder, sugar, baking powder, and salt.
- In a separate bowl, whisk milk, egg, and melted butter until smooth.
- Gradually combine wet ingredients into dry ingredients and mix until just combined.
- Spoon batter into each mini muffin cavity, filling halfway.
- Add a few chocolate chips to the center of each portion.
- Cover with additional batter until each cavity is about three quarters full.
- Bake for 8 to 10 minutes, until edges are set but centers remain soft.
- Cool for 2 to 3 minutes before removing from the pan.
- Dust with powdered sugar and serve warm.
Notes
- Do not overbake to maintain the molten center.
- Serve warm for the best gooey texture.
- Use high-quality chocolate for a smoother filling.
- Reheat leftovers in the microwave for about 10 seconds to restore the soft center.