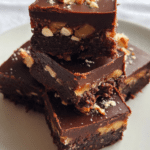
Chocolate Date Squares
There’s something deeply comforting about the blend of rich chocolate and the natural sweetness of dates. These Chocolate Date Squares aren’t just a dessert, they’re a bite into warmth, nostalgia, and pure indulgence. With each soft, chewy layer laced with cocoa and crunchy nuts, topped with a smooth chocolate glaze, it’s hard not to go back for seconds.
Behind the Recipe
This recipe came to life on one of those days where you just need something cozy. I was staring at a bag of dates and some dark chocolate, thinking how to create something that felt both rustic and satisfying. The idea of combining the earthiness of dates with chocolate’s richness hit me, and suddenly, my kitchen smelled like a dream. These bars became a regular go-to, perfect for sharing or sneaking one with your afternoon tea.
Recipe Origin or Trivia
Chocolate and date combinations have long been cherished in Middle Eastern and Mediterranean cuisine, where dates are a staple. In Western baking, date squares became popular during the 1930s as a wholesome treat, often sweetened with fruit instead of refined sugars. Adding chocolate to the mix? That’s the modern twist we didn’t know we needed.
Why You’ll Love Chocolate Date Squares
These bars are more than just a sweet treat. Here’s why you’re going to fall for them:
Versatile: Perfect as a snack, dessert, or even breakfast with coffee.
Budget-Friendly: Uses pantry staples and natural sweetness from dates.
Quick and Easy: Minimal prep, maximum flavor payoff.
Customizable: Add nuts, coconut, or a sprinkle of sea salt on top.
Crowd-Pleasing: A hit at potlucks, lunchboxes, and holiday spreads.
Make-Ahead Friendly: Make a batch and store for the week.
Great for Leftovers: Stays fresh and delicious for days.
Chef’s Pro Tips for Perfect Results
Want that wow factor in every square? Keep these in mind:
- Use Medjool Dates: They’re softer and sweeter, perfect for the filling.
- Chill Before Cutting: This helps the layers set and gives clean slices.
- Don’t Overbake: The base should stay tender, not crispy.
- Line the Pan: Parchment paper makes removing and slicing a breeze.
- Double the Chocolate Topping: If you’re a real chocolate lover, trust me.
Kitchen Tools You’ll Need
No fancy gadgets needed, just the essentials:
Mixing Bowls: For stirring the layers and ingredients together.
Food Processor: Helps puree the date filling until smooth.
Saucepan: For melting the chocolate topping gently.
8×8 Baking Dish: The ideal size for perfect square thickness.
Spatula: For smoothing and spreading layers evenly.
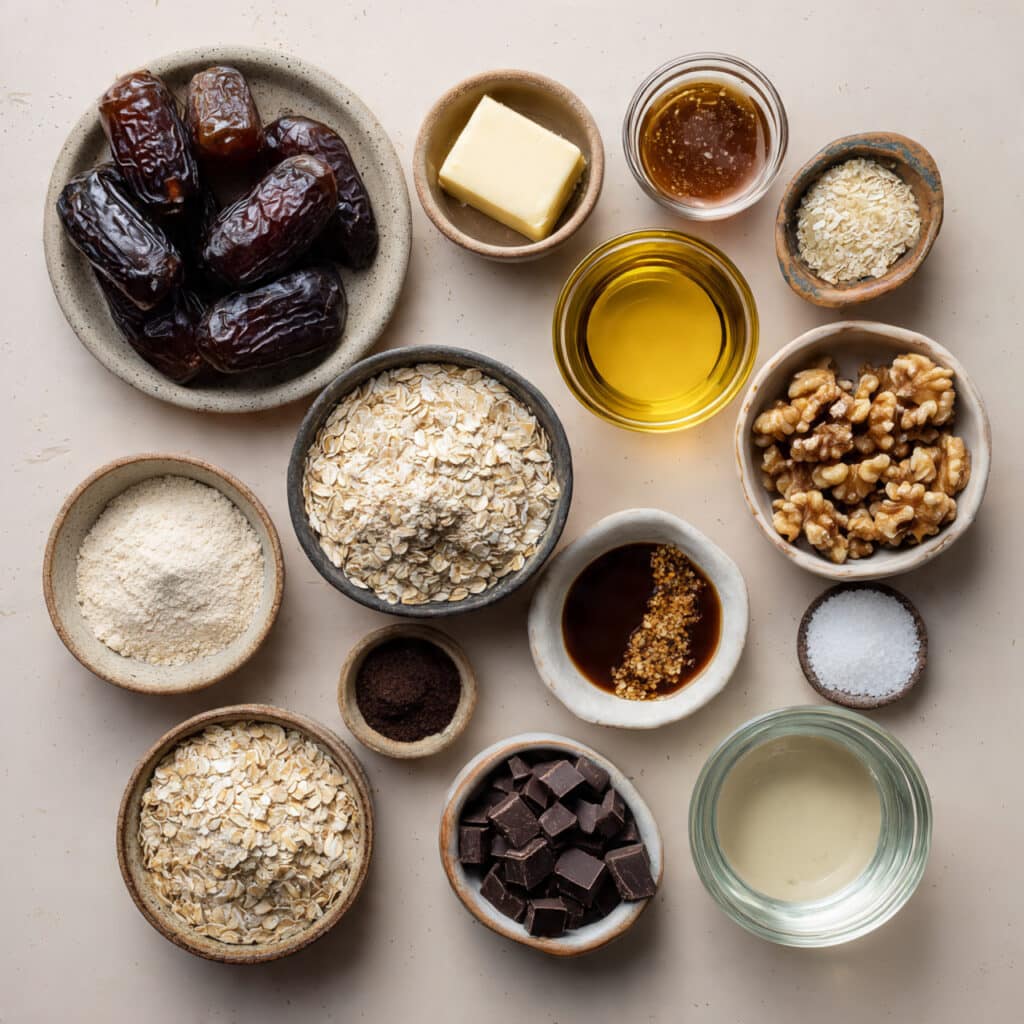
Ingredients in Chocolate Date Squares
Each ingredient has a role in building flavor and texture, like a well-rehearsed band coming together for a sweet symphony.
- Pitted Medjool Dates: 2 cups. Provide natural sweetness and a chewy texture.
- Boiling Water: 1 cup. Softens the dates for easier blending.
- Butter: 1/2 cup, unsalted. Adds richness and binds the crust.
- Brown Sugar: 1/2 cup. Gives the base a caramel-like depth.
- Vanilla Extract: 1 teaspoon. Enhances all the other flavors.
- All-Purpose Flour: 1 cup. Forms the sturdy base of the squares.
- Rolled Oats: 1 cup. Adds heartiness and chew to the base.
- Baking Soda: 1/2 teaspoon. Gives the crust a bit of lift.
- Salt: 1/4 teaspoon. Balances sweetness and intensifies flavor.
- Chopped Walnuts: 1/2 cup. For crunch and a nutty contrast.
- Dark Chocolate Chips: 1 cup. For that rich, melty topping.
- Coconut Oil: 1 tablespoon. Helps the chocolate topping set with shine.
Ingredient Substitutions
Let’s say you’re out of something. No problem.
Butter: Use coconut oil for a dairy-free option.
Brown Sugar: Swap with coconut sugar or maple syrup.
All-Purpose Flour: Try almond or oat flour for gluten-free.
Walnuts: Use pecans, almonds, or skip them entirely.
Dark Chocolate Chips: Semi-sweet or milk chocolate also works.
Ingredient Spotlight
Medjool Dates: These dates are naturally soft, caramel-like, and packed with fiber and nutrients, making them ideal for a no-refined-sugar dessert.
Dark Chocolate Chips: Choosing a high-quality dark chocolate ensures the topping is not overly sweet and adds that deep, rich flavor that complements the dates beautifully.
Instructions for Making Chocolate Date Squares
Making these bars feels like a cozy weekend project. Let’s dive into the steps together.
- Preheat Your Equipment:
Preheat your oven to 350°F (175°C) and line an 8×8 baking dish with parchment paper. - Combine Ingredients:
In a bowl, cream together the butter and brown sugar. Add vanilla, then stir in flour, oats, baking soda, and salt until combined. - Prepare Your Cooking Vessel:
Press about two-thirds of the oat mixture into the bottom of your lined pan. Set the remaining third aside for topping. - Assemble the Dish:
In a saucepan, simmer chopped dates with boiling water until soft. Puree into a smooth paste. Spread this evenly over the crust. Sprinkle walnuts on top, followed by the remaining oat mixture. - Cook to Perfection:
Bake for 25 to 30 minutes or until golden brown on top. Let it cool completely. - Finishing Touches:
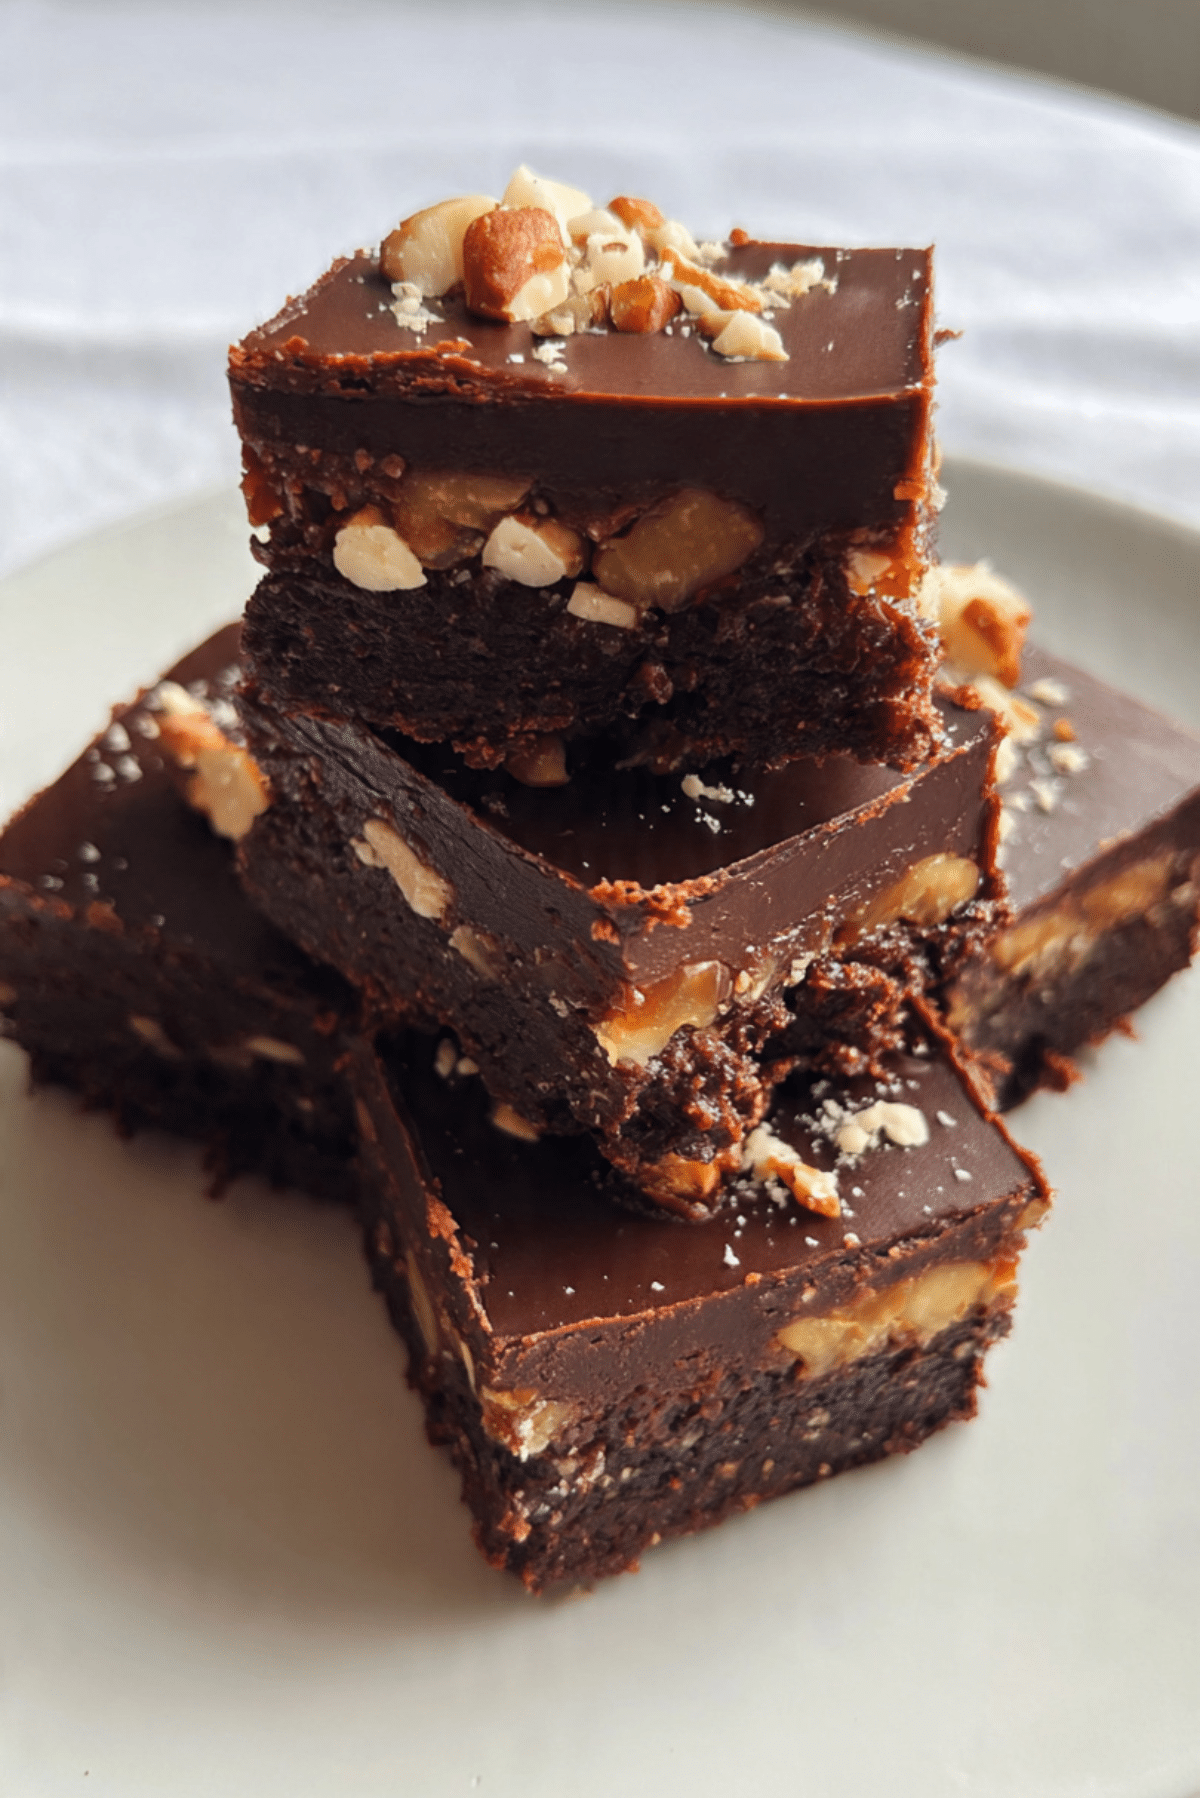
Melt chocolate chips with coconut oil and spread over the cooled bars. Refrigerate until the chocolate sets. - Serve and Enjoy:
Once chilled and firm, slice into squares. Serve with a coffee or as an anytime snack.
Texture & Flavor Secrets
What makes these bars sing is the texture layering. The base is hearty and slightly crumbly, the date center is luscious and jammy, and the chocolate topping is velvety smooth with just the right snap when chilled. Every bite is a rich, satisfying contrast.
Cooking Tips & Tricks
These little tricks make a big difference:
- Use room temperature butter for better mixing.
- Wet your spatula when spreading the date layer to prevent sticking.
- For ultra-clean slices, dip your knife in warm water before each cut.
What to Avoid
These pitfalls are easy to dodge with the right approach:
- Overbaking: Can dry out the base and make it too crumbly.
- Rushing the chill time: The chocolate needs to set fully for clean cuts.
- Not pureeing dates enough: A smooth filling is key for best texture.
Nutrition Facts
Servings: 16
Calories per serving: 220
Note: These are approximate values.
Preparation Time
Prep Time: 20 minutes
Cook Time: 30 minutes
Total Time: 50 minutes
Make-Ahead and Storage Tips
These squares are perfect for making ahead. You can prepare and refrigerate them for up to a week or freeze for a month. Just store them in an airtight container with parchment between layers to prevent sticking. Let them thaw at room temperature before serving.
How to Serve Chocolate Date Squares
Serve them slightly chilled for clean cuts or let them warm up a bit for a softer texture. Pair with a cappuccino, pack in lunchboxes, or crumble one over vanilla ice cream for a decadent twist.
Creative Leftover Transformations
Leftovers? Here’s how to make them exciting:
- Crumble into yogurt with berries for a dessert parfait.
- Chop and mix into muffin batter.
- Blend into a milkshake with vanilla ice cream and almond milk.
Additional Tips
- Add a pinch of cinnamon or cardamom to the date filling for extra warmth.
- Toast the oats beforehand for a nuttier flavor.
- Sprinkle flaky sea salt over the chocolate topping for contrast.
Make It a Showstopper
Want to impress guests? Cut the squares evenly and serve on a rustic wooden board lined with parchment. Garnish with a dusting of cocoa powder or a drizzle of extra melted chocolate. It’ll look like it came straight from a boutique bakery.
Variations to Try
- Peanut Butter Swirl: Add dollops of peanut butter on top before the final chocolate layer.
- Coconut Crunch: Mix shredded coconut into the oat base.
- Mocha Version: Add instant coffee to the chocolate topping.
- No-Nut Version: Skip the nuts and add more oats for a crunch.
- Orange Zest Twist: Add orange zest to the date layer for brightness.
FAQ’s
Q1: Can I make these vegan?
A1: Yes, swap butter for coconut oil and use dairy-free chocolate chips.
Q2: Do I have to use Medjool dates?
A2: They’re best for texture, but you can soak and use other dates if needed.
Q3: How do I store leftovers?
A3: Store in an airtight container in the fridge for up to a week.
Q4: Can I freeze chocolate date squares?
A4: Absolutely. Freeze in layers with parchment paper between.
Q5: Can I make this gluten-free?
A5: Yes, use certified gluten-free oats and a gluten-free flour blend.
Q6: Is there a no-bake version?
A6: This recipe is baked, but you can adapt the base to be raw with dates and nuts.
Q7: Can I reduce the sugar?
A7: Yes, dates provide sweetness so feel free to reduce or skip the brown sugar.
Q8: What type of chocolate should I use?
A8: Dark chocolate chips are ideal, but semi-sweet works too.
Q9: How long should I chill them?
A9: At least 1 hour to let the chocolate set fully.
Q10: Are these kid-friendly?
A10: Definitely. They’re naturally sweet and packed with fiber and energy.
Conclusion
These Chocolate Date Squares bring together rich chocolate, chewy dates, and hearty oats in the most irresistible way. Whether you’re making them for guests or just to treat yourself, they hit all the right notes. Trust me, it’s worth every bite.
PrintChocolate Date Squares
Chewy, rich, and naturally sweet, these Chocolate Date Squares are layered with oats, a luscious date filling, crunchy walnuts, and topped with a smooth dark chocolate glaze. A comforting treat that’s easy to make and even easier to love.
Ingredients
- 2 cups pitted Medjool dates
- 1 cup boiling water
- 1/2 cup unsalted butter
- 1/2 cup brown sugar
- 1 teaspoon vanilla extract
- 1 cup all-purpose flour
- 1 cup rolled oats
- 1/2 teaspoon baking soda
- 1/4 teaspoon salt
- 1/2 cup chopped walnuts
- 1 cup dark chocolate chips
- 1 tablespoon coconut oil
Instructions
- Preheat oven to 350°F (175°C) and line an 8×8 baking dish with parchment paper.
- In a bowl, cream butter and brown sugar together. Add vanilla, flour, oats, baking soda, and salt. Mix until combined.
- Press two-thirds of the mixture into the prepared pan. Reserve the rest for topping.
- In a saucepan, simmer dates with boiling water until soft. Blend into a smooth paste and spread over the crust.
- Sprinkle walnuts and remaining oat mixture on top.
- Bake for 25–30 minutes until golden. Let cool completely.
- Melt chocolate chips and coconut oil. Spread over cooled bars.
- Refrigerate until chocolate sets, then slice and serve.
Notes
- For clean slices, chill thoroughly and use a warm knife.
- Swap nuts or omit for a nut-free version.
- Add a sprinkle of sea salt over the chocolate for extra flavor.