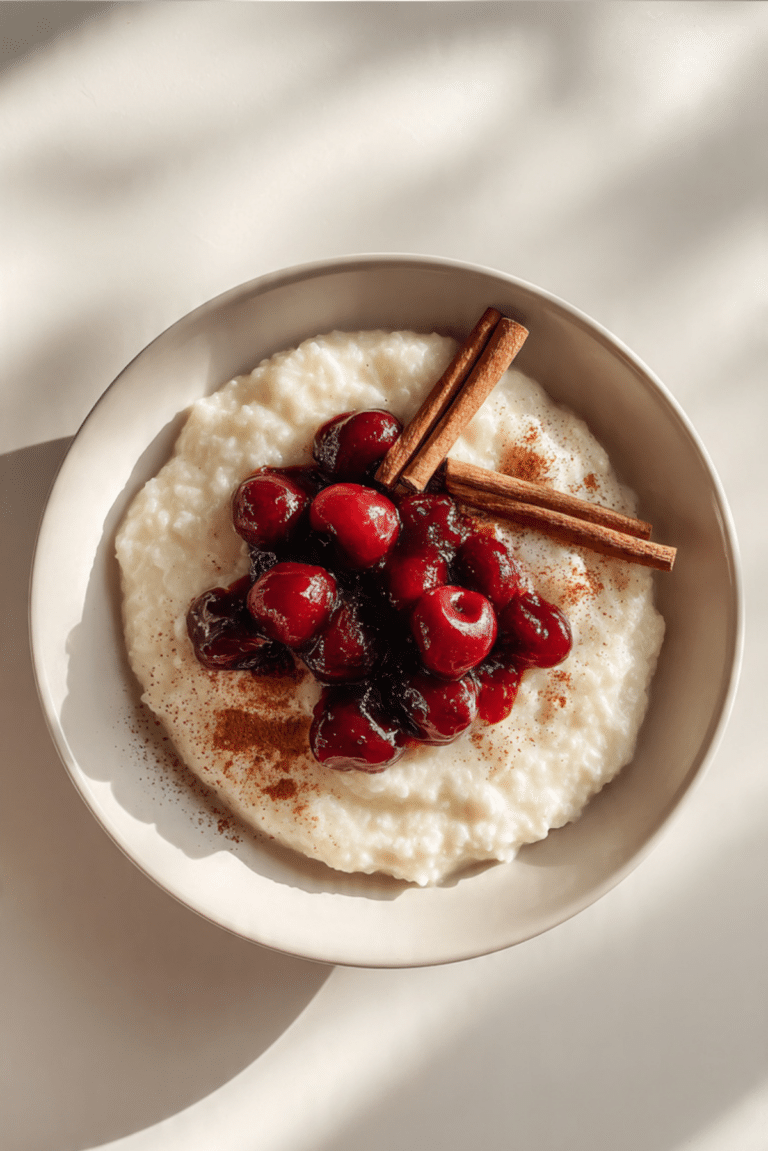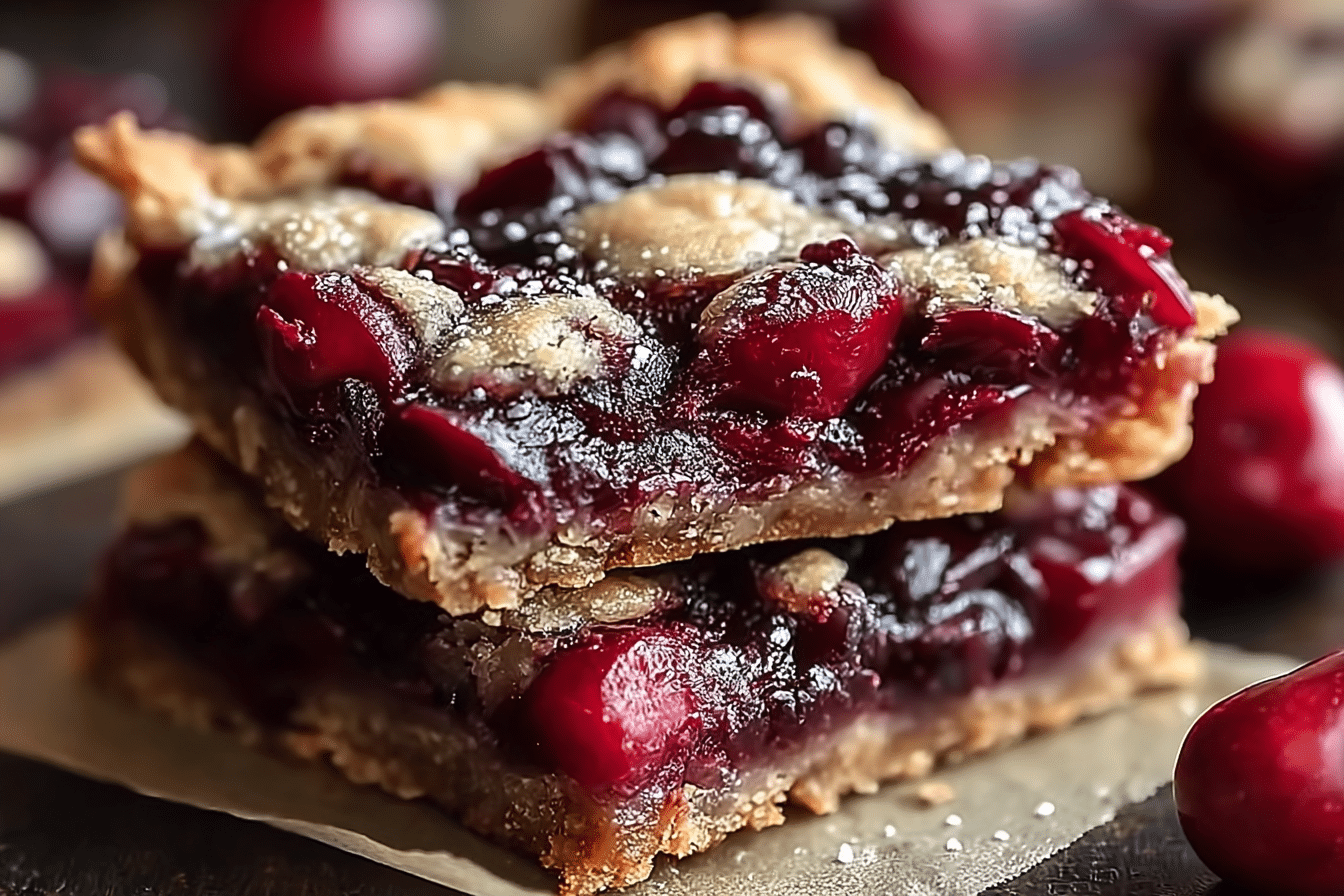
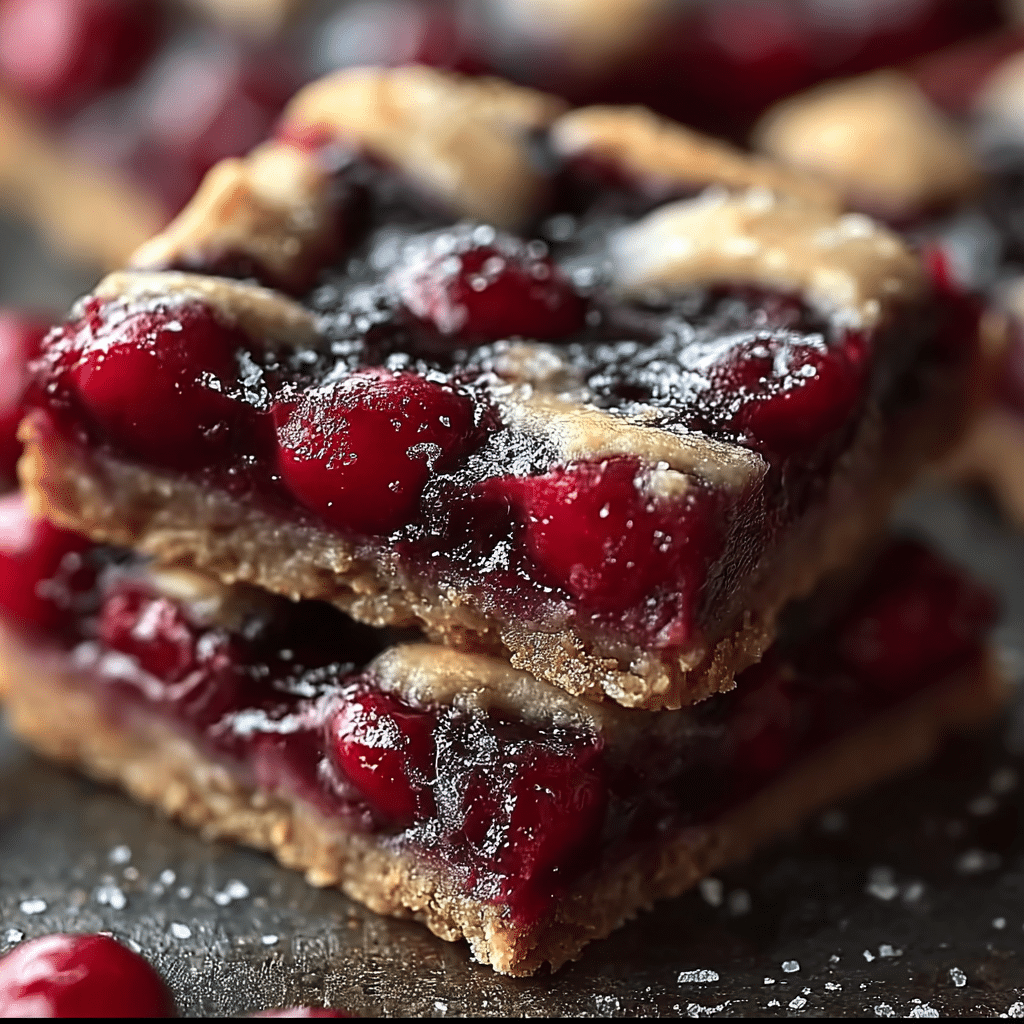
Cherry Pie Bars Recipe
There’s something magical about a dessert that combines the nostalgia of homemade cherry pie with the convenience of a bar you can hold in your hand. These Cherry Pie Bars are buttery, fruity, and melt-in-your-mouth delicious, perfect for summer gatherings or cozy winter afternoons when you crave a sweet burst of cherry goodness. With every bite, you’ll get a soft, golden crust, a sweet-tart cherry filling, and just the right amount of crumble on top. Trust me, you’re going to love this.
Behind the Recipe
This recipe was born out of a love for two classics: pie and bar cookies. Instead of rolling out crust and carefully crimping edges, these bars let you enjoy the comfort of cherry pie without all the fuss. I first made them for a family picnic, and the ease of cutting them into neat squares made them an instant crowd favorite. Each square felt like a little treasure, carrying that homemade touch but with all the ease of a simple bar recipe.
Recipe Origin or Trivia
Cherry desserts have deep roots across cultures. In America, cherry pie has long been tied to summer holidays and backyard gatherings, often linked with the Fourth of July. Meanwhile, in Europe, cherries appear in tarts, cakes, and festive breads. Turning them into pie bars is a modern twist, blending classic fruit desserts with the trend of easy-to-share bar cookies. It’s a fusion of tradition and practicality.
Why You’ll Love Cherry Pie Bars
There are so many reasons to fall in love with this recipe, and here’s why it deserves a permanent spot in your baking lineup:
Versatile: Serve them as a casual snack, a potluck star, or even plated with a scoop of vanilla ice cream for a fancy dessert.
Budget-Friendly: Uses simple pantry staples and canned cherry pie filling, making it affordable.
Quick and Easy: No rolling pins, no elaborate steps, just layer, bake, and enjoy.
Customizable: Swap out the cherry filling for blueberry, apple, or raspberry to mix things up.
Crowd-Pleasing: Perfectly portioned squares make serving effortless and ensure everyone gets a taste.
Make-Ahead Friendly: They taste even better the next day, giving flavors time to settle.
Great for Leftovers: Store them in the fridge and enjoy with coffee or tea for a sweet pick-me-up.
PrintCherry Pie Bars Recipe
Buttery, tender cookie bars layered with sweet-tart cherry pie filling and finished with a silky vanilla glaze. An easy, shareable twist on classic cherry pie.
- Prep Time: 15 minutes
- Cook Time: 35 minutes
- Total Time: 50 minutes
- Yield: 24 bars
- Category: Dessert
- Method: Baking
- Cuisine: American
- Diet: Vegetarian
Ingredients
- Unsalted Butter: 1 cup, softened, creates a rich and tender base and topping
- Granulated Sugar: 1 1/2 cups, sweetens and helps aerate the batter
- Eggs: 4 large, bind the batter and add richness
- Vanilla Extract: 1 teaspoon, adds warm aromatic depth
- All-Purpose Flour: 3 cups, builds structure for the bars
- Salt: 1/2 teaspoon, balances sweetness and enhances flavor
- Cherry Pie Filling: 2 cans, 21 ounces each, provides juicy sweet-tart fruit layer
- Powdered Sugar: 1 cup, for a smooth drizzle glaze
- Milk: 2 to 3 tablespoons, thins the glaze to drizzle consistency
Instructions
- Preheat Your Equipment: Heat oven to 350°F (175°C). Line a 9×13 inch baking pan with parchment paper, leaving overhang for easy lifting.
- Combine Ingredients: Beat butter and granulated sugar until light and fluffy. Add eggs one at a time, mixing well after each, then mix in vanilla. Whisk flour with salt, then mix into the batter just until combined.
- Prepare Your Cooking Vessel: Spread about two thirds of the batter evenly into the lined pan, smoothing the surface.
- Assemble the Dish: Spoon cherry pie filling evenly over the base. Dollop remaining batter over the cherries in rustic spoonfuls.
- Cook to Perfection: Bake 30 to 35 minutes until edges are lightly golden and center is set.
- Finishing Touches: Whisk powdered sugar with 2 to 3 tablespoons milk until smooth, then drizzle over cooled bars.
- Serve and Enjoy: Cool completely, lift out, slice into 24 squares, and enjoy.
Notes
- Clean Slices: Chill 20 to 30 minutes before cutting for neat edges.
- Crunch Option: Add a light sprinkle of sliced almonds before baking for texture.
- Flavor Boost: A drop of almond extract in the glaze pairs beautifully with cherries.
- Storage: Keep covered at room temperature up to 2 days, refrigerate up to 5 days, or freeze up to 2 months.
Nutrition
- Serving Size: 1 bar
- Calories: 210
- Sugar: 18 g
- Sodium: 110 mg
- Fat: 8 g
- Saturated Fat: 5 g
- Unsaturated Fat: 3 g
- Trans Fat: 0 g
- Carbohydrates: 32 g
- Fiber: 1 g
- Protein: 2 g
- Cholesterol: 35 mg
Chef’s Pro Tips for Perfect Results
Before we dive into the kitchen, let me share some insider tricks:
- Use cold butter when making the crust, it gives you that perfect crumbly texture.
- Line your baking pan with parchment paper so the bars lift out easily without sticking.
- Don’t overbake, the bars will firm up as they cool, so take them out once the edges are lightly golden.
- Let them cool completely before cutting to get neat, bakery-style squares.
Kitchen Tools You’ll Need
Before you start, make sure you’ve got these tools ready:
Mixing Bowls: For preparing the crust and crumble mixture.
Hand Mixer or Stand Mixer: To cream the butter and sugar smoothly.
9×13 Inch Baking Pan: The perfect size for a batch that serves a crowd.
Parchment Paper: For easy lifting and mess-free slicing.
Spatula: To spread the filling and even out layers.
Ingredients in Cherry Pie Bars
To create these bars, you’ll need a simple mix of pantry staples and a fruity filling. Here’s the lineup:
- Unsalted Butter: 1 cup (softened). Creates a rich and tender crust.
- Granulated Sugar: 1 ½ cups. Adds sweetness and balances the tartness of cherries.
- Eggs: 4 large. Bind the batter and add richness.
- Vanilla Extract: 1 teaspoon. Enhances flavor with warm, aromatic notes.
- All-Purpose Flour: 3 cups. Forms the base and structure for the crust and topping.
- Salt: ½ teaspoon. Brings out flavors and prevents blandness.
- Cherry Pie Filling: 2 cans (21 ounces each). The star of the show, sweet and tangy cherries.
- Powdered Sugar: 1 cup. Used for a light glaze.
- Milk: 2–3 tablespoons. Thins the glaze to drizzle consistency.
Ingredient Substitutions
Sometimes you may not have everything on hand, so here’s how to swap smartly:
Butter: Margarine can be used, though flavor may differ.
Cherry Pie Filling: Blueberry, apple, or strawberry filling works beautifully.
All-Purpose Flour: Gluten-free baking flour blend for a celiac-friendly option.
Milk: Use almond or oat milk for a dairy-free glaze.
Ingredient Spotlight
Cherry Pie Filling: This ingredient brings brightness, color, and juicy bursts of fruit flavor that make these bars irresistible.
Vanilla Extract: A small spoonful adds depth, tying together the buttery crust and sweet filling.
Instructions for Making Cherry Pie Bars
Now that we’ve gathered everything, it’s time to bring these bars to life. Follow these steps:
- Preheat Your Equipment: Preheat your oven to 350°F (175°C) and line a 9×13 inch pan with parchment paper.
- Combine Ingredients: In a large bowl, cream together butter and sugar until fluffy. Add eggs one at a time, beating well after each. Mix in vanilla.
- Prepare Your Cooking Vessel: Spread two-thirds of the batter into the prepared baking pan, smoothing it evenly.
- Assemble the Dish: Spoon cherry pie filling evenly over the batter, spreading gently. Drop spoonfuls of remaining batter over the cherries.
- Cook to Perfection: Bake for 30–35 minutes, or until edges are lightly golden and the center is set.
- Finishing Touches: In a small bowl, whisk powdered sugar with milk to form a smooth glaze. Drizzle over cooled bars.
- Serve and Enjoy: Slice into squares and enjoy the sweet, buttery, and fruity goodness.
Texture & Flavor Secrets
What makes these bars so special is the contrast in every bite. The base is soft yet sturdy, the cherry filling bursts with juicy sweetness, and the crumbly topping adds just the right touch of golden crispness. Add the glaze and you get a silky finish that ties everything together. Each bite is a balance of buttery richness and fruity brightness.
Cooking Tips & Tricks
Here are a few extra tricks to ensure success every time:
- Chill the bars before cutting if you want super-clean slices.
- Add a sprinkle of sliced almonds on top before baking for crunch.
- Warm them slightly before serving to bring out the fruity aroma.
What to Avoid
Here’s what you want to steer clear of:
- Overmixing the batter, which makes the crust tough instead of tender.
- Using warm butter, which prevents the right crumbly texture.
- Cutting before cooling, which causes the filling to ooze and bars to fall apart.
Nutrition Facts
Servings: 24 bars
Calories per serving: 210
Note: These are approximate values.
Preparation Time
Prep Time: 15 minutes
Cook Time: 35 minutes
Total Time: 50 minutes
Make-Ahead and Storage Tips
These bars are perfect for preparing in advance. You can bake them the day before, let them cool, and keep them covered at room temperature overnight. For longer storage, refrigerate for up to 5 days or freeze for up to 2 months. Simply thaw and warm slightly before serving to revive that fresh-baked taste.
How to Serve Cherry Pie Bars
Serve these bars just as they are for a casual treat, or dress them up with a scoop of vanilla ice cream or a dollop of whipped cream. A sprinkle of powdered sugar makes them look elegant on a dessert tray, while serving them with hot coffee makes for the perfect afternoon indulgence.
Creative Leftover Transformations
If you happen to have leftovers, here are some fun ways to use them:
- Crumble bars over yogurt for a fruity parfait.
- Layer pieces with whipped cream in a glass for a quick trifle.
- Reheat and serve warm with a scoop of ice cream for a dessert encore.
Additional Tips
For an extra flavor boost, try adding a dash of almond extract to the glaze. It pairs beautifully with cherries. Also, don’t forget to let your bars rest fully before cutting; this ensures the neatest presentation and best texture.
Make It a Showstopper
Presentation matters! Drizzle the glaze in a zigzag pattern for a bakery-style finish, or dust lightly with powdered sugar for a snowy touch. Garnish with a few fresh cherries on the serving plate for a pop of color.
Variations to Try
- Blueberry Pie Bars: Swap cherry filling for blueberry pie filling.
- Lemon Glazed Bars: Add lemon juice to the glaze for a tangy twist.
- Nutty Bars: Sprinkle chopped pecans or almonds over the filling before baking.
- Chocolate Drizzle Bars: Replace the glaze with melted dark chocolate drizzles.
- Mixed Berry Bars: Combine cherry with raspberry or strawberry filling for a burst of flavors.
FAQ’s
Q1: Can I use fresh cherries instead of canned pie filling?
Yes, but you’ll need to cook them down with sugar and cornstarch to create a pie-like filling.
Q2: Do these bars freeze well?
Absolutely, just wrap tightly and freeze for up to 2 months.
Q3: Can I make them gluten-free?
Yes, use a 1:1 gluten-free flour blend.
Q4: What if I don’t have powdered sugar for the glaze?
You can make your own by blending granulated sugar until fine.
Q5: Can I cut the recipe in half?
Yes, bake in an 8×8 pan and reduce baking time slightly.
Q6: Should I refrigerate these bars?
They can stay at room temperature for 2 days, but refrigeration extends freshness.
Q7: Can I use margarine instead of butter?
Yes, but butter gives the best flavor.
Q8: Can I skip the glaze?
Of course, but the glaze adds a lovely sweetness and finish.
Q9: How do I know when they’re done baking?
The edges should be golden and the center set, but not overbaked.
Q10: Can I use other extracts?
Yes, almond or lemon extract can add wonderful new flavors.
Conclusion
Cherry Pie Bars bring together everything we love about homemade desserts, but with simplicity and charm that make them perfect for everyday indulgence or special occasions. With their buttery crust, sweet-tart filling, and delightful glaze, they’re a dessert you’ll come back to again and again. So preheat that oven, grab your cherries, and let these bars become the star of your dessert table.