Caramel Milk Pudding
There is something quietly magical about a dessert that looks so simple yet feels so luxurious. Caramel Milk Pudding is one of those treats that brings you back to childhood kitchens, where the scent of warm milk and melting sugar filled the air. The first spoonful is pure comfort, silky custard melting gently on your tongue, followed by that rich, slightly bittersweet caramel that lingers just long enough to make you crave another bite. Trust me, you are going to love this.
A Silky Dessert That Feels Like a Hug in a Spoon
Some desserts shout for attention, but this one whispers. Its glossy caramel top catches the light, while the creamy base holds everything together in the most delicate way. The contrast between the golden caramel and the pale custard underneath is simply beautiful. Let me tell you, it is worth every bite.
And now that you can almost taste it, let’s take a little journey into where this comforting classic comes from.
A Sweet Tradition Passed Through Generations
Milk-based puddings have been loved across many cultures for centuries. From European custards to Middle Eastern milk desserts, the idea of gently cooking milk and eggs into something smooth and tender has always felt special.
Caramel-topped versions became especially popular because they add that dramatic moment when the spoon breaks through the glossy top. It is simple pantry magic, sugar transformed into something deep and golden. This one is a total game-changer when you want something elegant without complicated steps.
Why This Recipe Always Works
Before we step into the kitchen, let me share why this dessert deserves a permanent spot in your rotation.
Versatile: It fits beautifully after a casual family dinner or a festive gathering. Dress it up with fruit or keep it simple.
Budget-Friendly: Made with basic pantry staples like milk, sugar, and eggs, it does not require anything fancy.
Quick and Easy: The steps are straightforward and beginner friendly.
Customizable: You can infuse it with vanilla, citrus zest, or even a touch of cinnamon.
Crowd-Pleasing: That silky texture and caramel finish win over both kids and adults.
Make-Ahead Friendly: It needs chilling time, which means you can prepare it in advance.
Great for Leftovers: It holds its texture beautifully in the fridge for a couple of days.
And now, let’s talk about a few insider tricks before we gather our tools.
Chef Secrets for the Silkiest Texture
A smooth pudding depends on small details.
- Use room temperature eggs so they blend seamlessly into the milk.
- Cook the caramel slowly and patiently, watching the color carefully.
- Strain the custard mixture before baking to remove bubbles.
- Bake in a water bath to ensure gentle, even cooking.
With these tips in mind, let’s look at what you will need in your kitchen.
Kitchen Essentials for Perfect Results
Having the right tools makes everything feel easier.
Medium Saucepan: For melting sugar into caramel evenly.
Mixing Bowl: To whisk the custard mixture smoothly.
Whisk: Ensures the eggs and milk combine without lumps.
Fine Mesh Strainer: Helps create a silky texture.
Rectangular Glass Baking Dish: About 9 by 13 inches for even baking.
Large Baking Pan: To hold the water bath.
Now that everything is ready, let’s gather the ingredients that bring this dessert to life.
Ingredients You Will Need For This Silky Delight
Each ingredient plays a simple but important role in creating that smooth, creamy texture and rich caramel flavor.
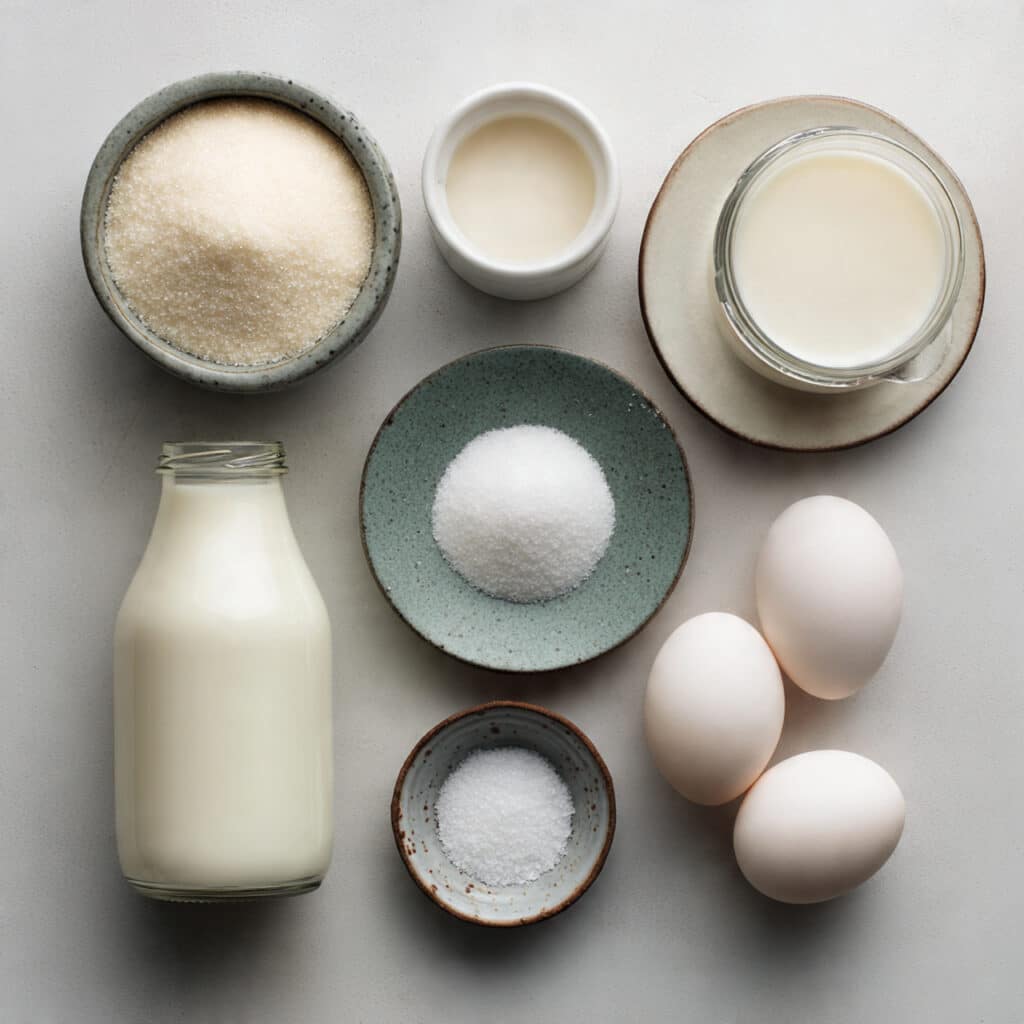
- Granulated Sugar: 1 cup, divided. Half for the caramel and half for sweetening the custard.
- Whole Milk: 4 cups, provides the creamy base.
- Large Eggs: 4, help set the custard gently.
- Vanilla Extract: 1 teaspoon, adds warmth and aroma.
- Salt: 1 pinch, enhances the sweetness and balances flavors.
And if you need flexibility, do not worry, there are options.
Easy Ingredient Swaps If Needed
Sometimes you work with what you have, and that is perfectly fine.
Whole Milk: You can use 2 percent milk, though the texture will be slightly lighter.
Granulated Sugar: Light brown sugar can add a subtle caramel depth.
Vanilla Extract: Try vanilla bean paste for a more intense flavor.
Now let’s spotlight the stars of this dessert.
The Two Ingredients That Make the Magic Happen
Granulated Sugar: When melted, it transforms into golden caramel with deep, almost nutty notes that contrast beautifully with the creamy base.
Whole Milk: It gives the pudding its smooth body and delicate flavor, allowing the caramel to shine without overpowering.
And now, let’s dive into the cooking process.
Let’s Bring This Dessert to Life
The kitchen is about to smell incredible.
- Preheat Your Equipment: Preheat your oven to 325 degrees Fahrenheit and place a kettle of water on to heat for the water bath.
- Combine Ingredients: In a bowl, whisk together the eggs, half cup sugar, milk, vanilla extract, and salt until smooth. Avoid whipping in too much air.
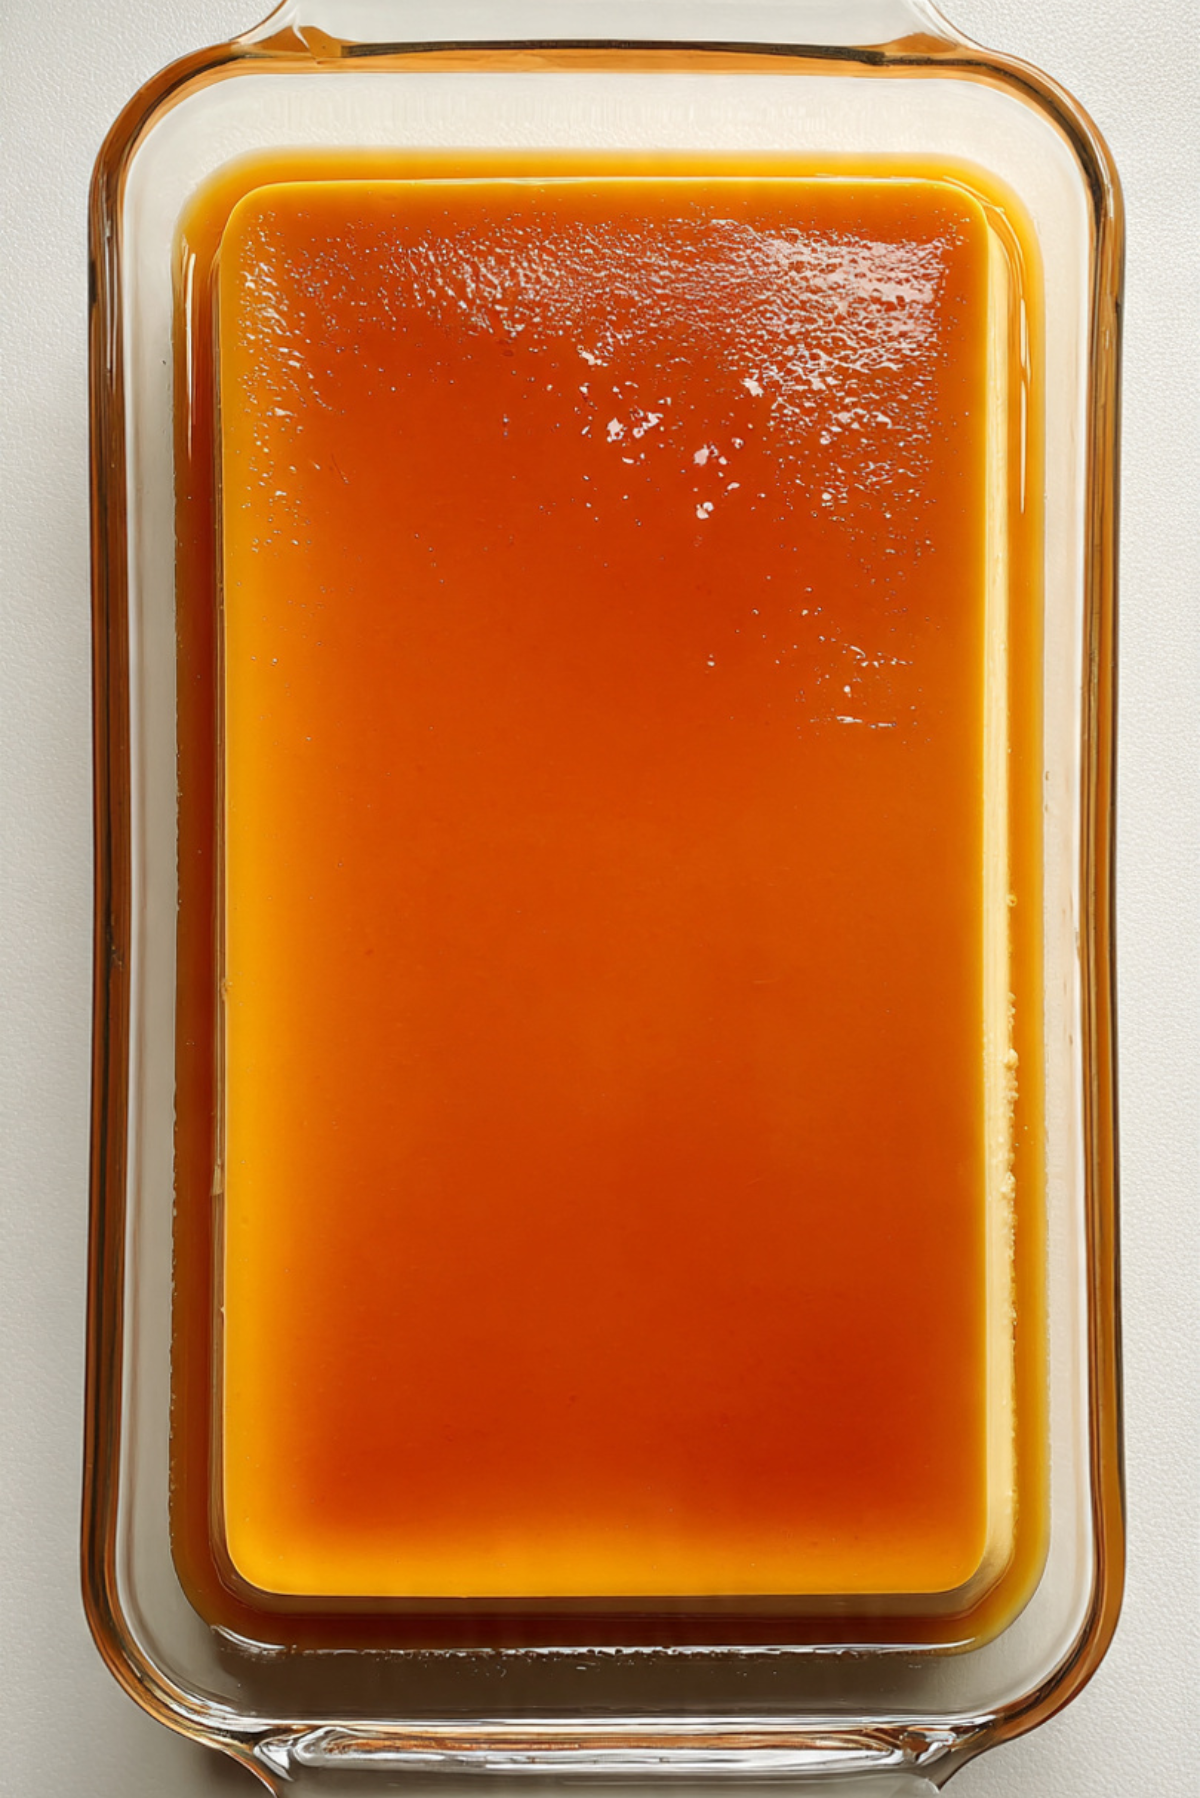
- Prepare Your Cooking Vessel: In a saucepan over medium heat, melt the remaining half cup sugar until it turns a deep golden amber. Carefully pour the caramel into the baking dish, tilting gently to coat the bottom evenly.
- Assemble the Dish: Strain the milk mixture into the caramel-lined dish to ensure a silky finish.
- Cook to Perfection: Place the dish inside a larger baking pan. Pour hot water around it until it reaches halfway up the sides. Bake for 45 minutes or until the center is just set but still slightly jiggly.
- Finishing Touches: Remove from the water bath and let it cool to room temperature, then refrigerate for at least 2 hours to fully set.
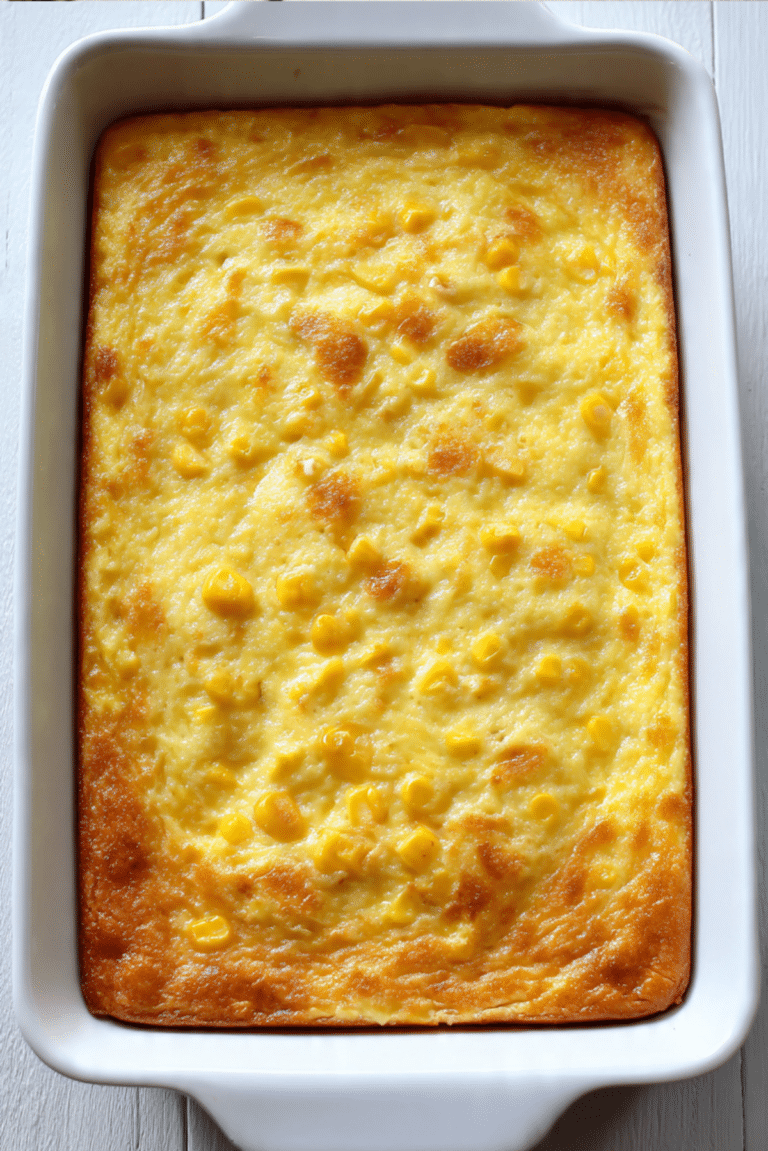
- Serve and Enjoy: Slice and serve chilled, spooning extra caramel sauce over each portion.
The Magic of Texture and Flavor
As it bakes gently in the water bath, the custard transforms into a smooth, tender layer that feels almost cloudlike. The caramel melts slightly into the pudding, creating that glossy topping that seeps down the sides when sliced. You get creamy sweetness first, followed by the slightly bitter depth of caramel. It is that balance that keeps every bite interesting.
Helpful Tips for Foolproof Results
A few extra reminders never hurt.
- Let the caramel reach a rich amber color, but do not let it burn.
- Always use a water bath for even cooking.
- Chill thoroughly before slicing for clean edges.
Common Mistakes and How to Avoid Them
Even simple desserts have their little traps.
- Overbaking can make the texture rubbery, remove it while slightly jiggly in the center.
- Skipping the strainer may result in bubbles on top.
- Pouring custard too quickly over caramel can cause uneven layers.
Nutritional Snapshot Per Serving
Servings: 8
Calories per serving: 220
Note: These are approximate values.
Time Breakdown for Planning
Prep Time: 15 minutes
Cook Time: 45 minutes
Total Time: 1 hour
Make-Ahead and Storage Tips
This dessert actually improves after resting in the fridge. You can prepare it a day in advance and keep it tightly covered. Store in the refrigerator for up to 3 days. It is not ideal for freezing, as the texture may change. Serve chilled straight from the fridge.
Serving Ideas to Elevate the Experience
Pair it with fresh berries for brightness. A light dusting of cocoa powder adds elegance. You can also serve it with a small cup of coffee for a truly comforting ending to any meal.
Creative Leftover Transformations
If you somehow have leftovers, try layering cubes with whipped cream and fruit for a quick trifle. You can also blend a portion into a milkshake for a creamy caramel treat.
Extra Tips for Success
Always taste your caramel carefully once cooled to ensure it has that perfect balance of sweet and slightly bitter. Keep your oven temperature steady and avoid opening the door frequently.
Make It Look Absolutely Stunning
Run a knife along the edges before slicing for clean portions. Serve on white plates to highlight the golden caramel. A few fresh mint leaves can add a gentle pop of color.
Fun Variations to Explore
Add a teaspoon of lemon zest for brightness.
Infuse the milk with a cinnamon stick before mixing.
Swirl in a tablespoon of instant coffee for a mocha twist.
Top with toasted coconut for texture.
FAQ’s
Q1: Can I make it without a water bath?
Yes, but the texture may be less smooth. The water bath helps cook it gently.
Q2: How do I know when it is done?
The center should jiggle slightly but not look liquid.
Q3: Can I reduce the sugar?
You can reduce it slightly, but it will affect sweetness and caramel depth.
Q4: Why is my caramel bitter?
It likely cooked too long. Remove it once it reaches a deep amber color.
Q5: Can I use low fat milk?
Yes, but the pudding will be less creamy.
Q6: How long does it need to chill?
At least 2 hours for proper setting.
Q7: Can I add fruit inside?
It is best served plain, with fruit on the side.
Q8: What dish size works best?
A 9 by 13 inch rectangular dish ensures even cooking.
Q9: Is it served warm or cold?
Traditionally chilled.
Q10: Can I double the recipe?
Yes, just adjust baking time slightly and use a larger dish.
Conclusion
Caramel Milk Pudding proves that simple ingredients can create something truly special. With its silky custard and glossy caramel top, it feels elegant yet comforting at the same time. Give it a try, take that first spoonful, and let the smooth sweetness remind you why homemade desserts always win. Trust me, this one will quickly become a favorite in your kitchen.
PrintCaramel Milk Pudding
A silky smooth caramel milk pudding topped with a glossy golden caramel layer. Creamy, comforting, and made with simple pantry ingredients, this chilled dessert is perfect for family dinners or special occasions.
Ingredients
- 1 cup granulated sugar, divided
- 4 cups whole milk
- 4 large eggs
- 1 teaspoon vanilla extract
- 1 pinch salt
Instructions
- Preheat oven to 325 degrees Fahrenheit and heat water for a water bath.
- In a mixing bowl, whisk together eggs, 1/2 cup sugar, whole milk, vanilla extract, and salt until smooth without incorporating too much air.
- In a medium saucepan over medium heat, melt the remaining 1/2 cup sugar until it turns deep golden amber. Immediately pour caramel into a 9 by 13 inch rectangular glass baking dish and tilt to coat the bottom evenly.
- Strain the custard mixture through a fine mesh strainer into the caramel-lined baking dish.
- Place the dish inside a larger baking pan. Pour hot water around it until it reaches halfway up the sides.
- Bake for 45 minutes or until the center is just set and slightly jiggly.
- Remove from the water bath, cool to room temperature, then refrigerate for at least 2 hours before slicing and serving chilled.
Notes
- Straining the custard ensures an extra silky texture.
- Do not overbake, the center should still jiggle slightly when removed from the oven.
- Allow full chilling time for clean slices and best texture.
- Caramel should be deep amber but not dark brown to avoid bitterness.