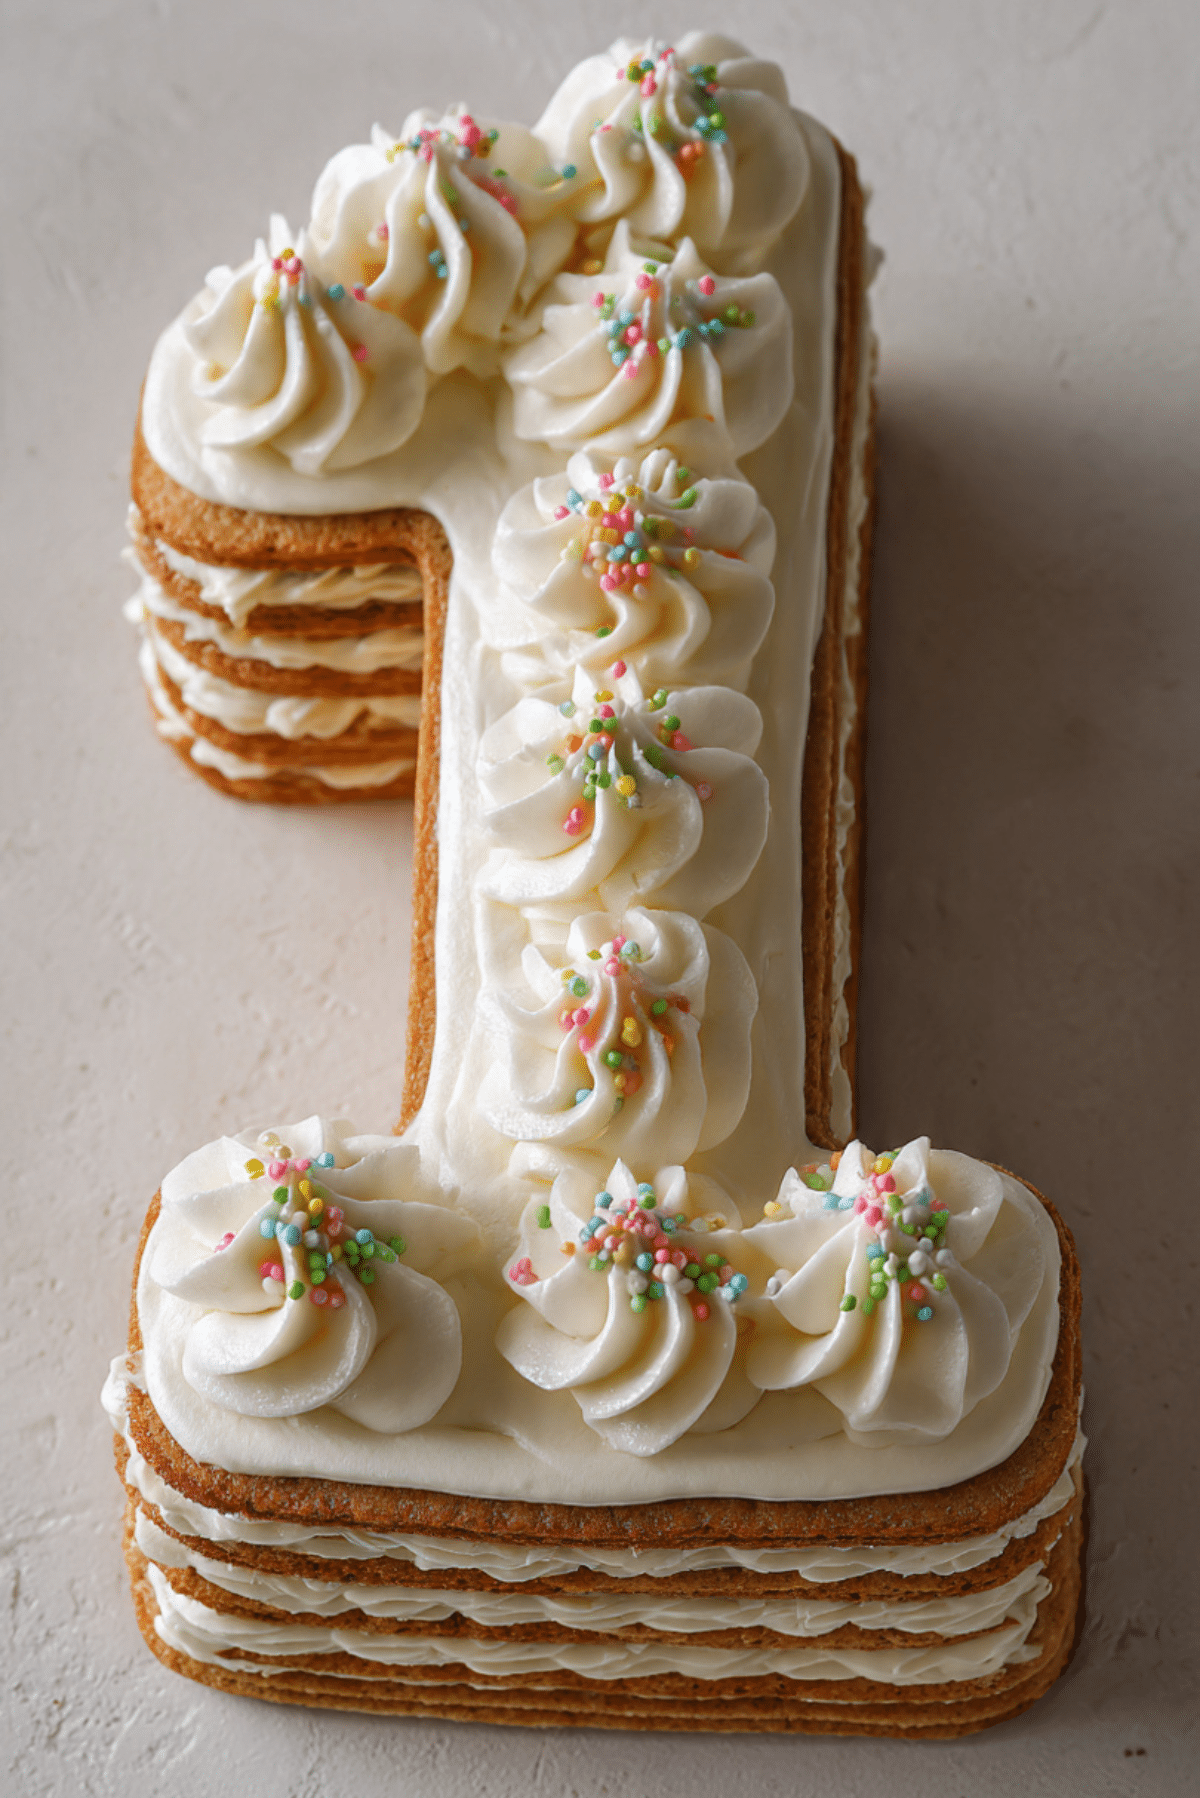
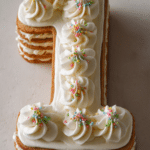
Birthday Number Cake (Biscuit & Cream)
There is something incredibly special about seeing a cake shaped like your age sitting right in front of you. It feels personal, thoughtful, and honestly a little magical. This Birthday Number Cake made with tender biscuits and silky cream is one of those desserts that looks impressive but is surprisingly simple to make. The layers soften overnight into a sliceable, creamy dream that melts in your mouth. Trust me, you are going to love how easy and elegant this feels.
Why This No-Bake Celebration Cake Is Always a Showstopper
What makes this cake so charming is its simplicity. There is no complicated baking process, no delicate sponge layers to worry about. Instead, crisp tea biscuits soften into a tender cake texture as they sit with the cream. The result is light, creamy, and perfectly sliceable. It is festive without being fussy.
The Sweet Tradition Behind Number Cakes
Number cakes have become a favorite for birthdays and milestone celebrations because they add a personal touch. While many versions use sponge cake, this biscuit and cream style is popular in many homes for its ease and make-ahead convenience. It is the kind of dessert that feels homemade in the best possible way.
Why You’ll Keep This Recipe for Every Birthday
Before we dive into the layering, here is why this recipe never fails.
Versatile: Shape it into any number you need.
Budget-Friendly: Made with simple pantry ingredients.
Quick and Easy: No oven required.
Customizable: Decorate with fruits, sprinkles, or chocolate.
Crowd-Pleasing: Light, creamy texture that everyone enjoys.
Make-Ahead Friendly: Actually tastes better the next day.
Great for Leftovers: Stays soft and delicious for days.
Chef’s Tips for the Perfect Slice
A few simple details make all the difference.
- Use full-fat cream for a stable filling
- Let the cake chill at least 8 hours
- Dip biscuits quickly so they do not get soggy
- Use a sharp knife for clean slices
Kitchen Tools You’ll Need
Keeping things organized makes assembly easy.
Mixing bowl: For whipping the cream mixture.
Hand mixer: To create smooth, fluffy cream.
Cake board: To shape and assemble the number.
Sharp knife: For trimming and slicing.
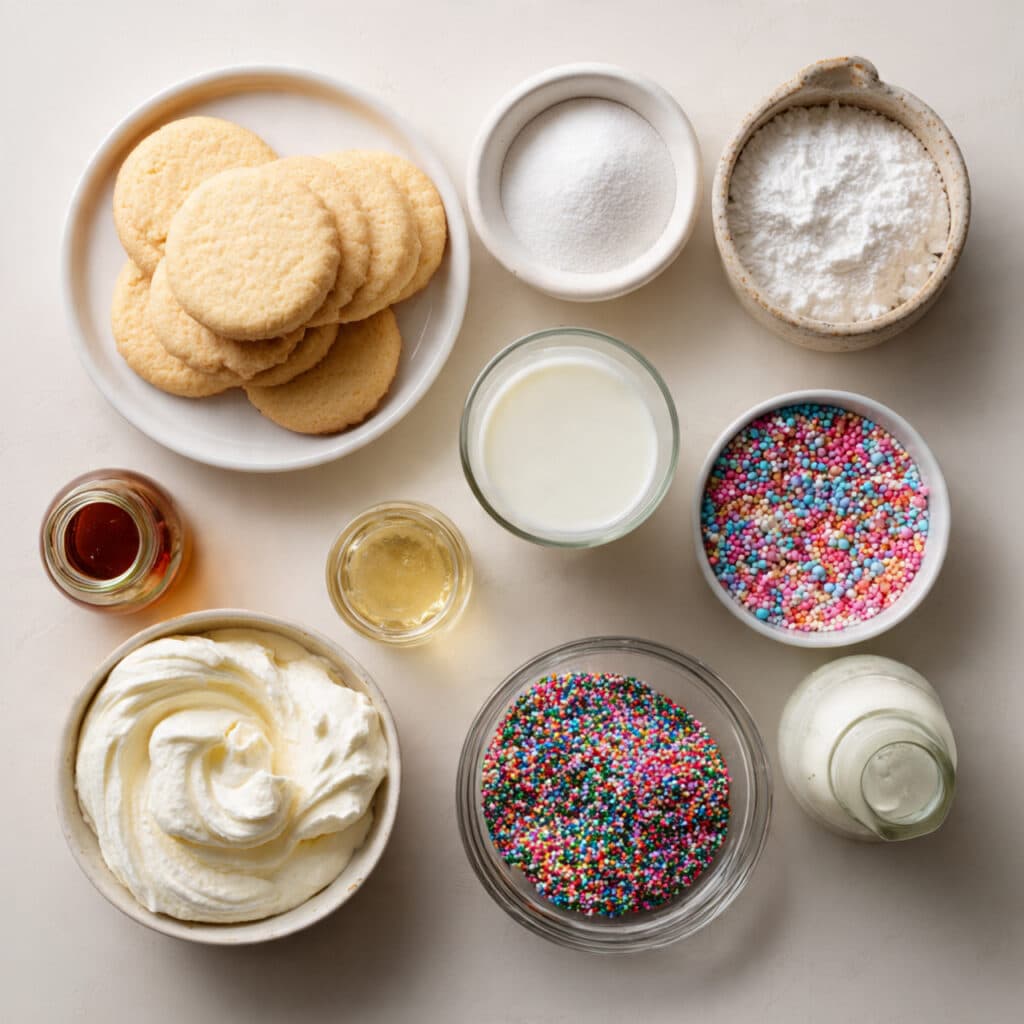
Ingredients You Will Need For This Celebration Cake
Each ingredient works together to create that soft layered texture.
- Tea Biscuits: 400 grams, form the cake layers
- Heavy Whipping Cream: 2 cups, cold
- Powdered Sugar: 1/2 cup, sweetens the cream
- Vanilla Extract: 1 teaspoon, adds warmth
- Milk: 1 cup, for lightly dipping biscuits
- Cream Cheese: 8 ounces, softened for stability
- Colorful Sprinkles: 2 tablespoons, for decoration
Easy Ingredient Swaps
You can adjust based on preference.
Tea Biscuits: Graham crackers
Heavy Cream: Whipping cream alternative
Cream Cheese: Mascarpone
Sprinkles: Fresh berries
Spotlight on the Key Ingredients
Tea Biscuits: They transform from crisp to cake-like after chilling.
Heavy Whipping Cream: Creates that light, airy filling.
And Now Let’s Build the Cake
This is the fun part.
- Preheat Your Equipment: No baking required, but prepare your cake board.
- Combine Ingredients: Beat heavy cream, powdered sugar, vanilla, and cream cheese until smooth and fluffy.
- Prepare Your Cooking Vessel: Place your number template on the cake board.
- Assemble the Dish: Dip biscuits briefly in milk and arrange in the number shape. Spread cream mixture evenly on top. Repeat layers.
- Cook to Perfection: No cooking required, refrigerate for at least 8 hours.
- Finishing Touches: Pipe extra cream on top and decorate with sprinkles.
- Serve and Enjoy: Slice carefully and serve chilled.
Texture and Flavor Experience
The biscuits soften into a tender, cake-like texture while the cream stays smooth and slightly tangy from the cream cheese. Each bite is light yet satisfying, sweet but not overwhelming.
Helpful Tips
- Chill overnight for best texture
- Use a piping bag for neat decoration
- Do not oversoak biscuits
What to Avoid
- Avoid soaking biscuits too long
- Do not skip chilling time
- Avoid over-whipping the cream
Nutrition Facts
Servings: 10
Calories per serving: 340
Note: These are approximate values.
Preparation Time
Prep Time: 30 minutes
Cook Time: 0 minutes
Total Time: 30 minutes plus chilling
Make-Ahead and Storage Tips
This cake can be made a day in advance and stored in the refrigerator for up to 3 days. Keep covered to prevent drying.
How to Serve
Serve chilled with fresh berries or a light dusting of powdered sugar.
Creative Leftover Transformations
Cut leftovers into cubes and layer into dessert cups for mini trifles.
Additional Tips
You can create double-layer numbers for a taller cake.
Make It a Showstopper
Add fresh fruit, chocolate curls, or edible flowers for an elegant finish.
Variations to Try
- Add cocoa powder to the cream
- Layer with sliced strawberries
- Add chocolate chips between layers
- Use flavored biscuits
FAQ’s
Q1: Can I make it two days ahead?
Yes, it keeps well chilled.
Q2: Does it need baking?
No baking required.
Q3: Can I freeze it?
Not recommended due to cream texture.
Q4: Can I use low-fat cream?
Full-fat works best for stability.
Q5: How long does it need to chill?
At least 8 hours.
Q6: Can I make different numbers?
Yes, any number shape works.
Q7: Is it overly sweet?
It is balanced and creamy.
Q8: Can I add fruit?
Absolutely.
Q9: Can I use mascarpone?
Yes, as a substitute.
Q10: Is it kid-friendly?
Very much so.
Conclusion
This Birthday Number Cake made with biscuit and cream layers is simple, beautiful, and full of celebration. It proves that you do not need complicated baking to create something memorable. Once you see those soft layers slice so perfectly, you will want to make it for every birthday that comes around.
PrintBirthday Number Cake (Biscuit & Cream)
A beautiful no-bake birthday number cake made with soft layered biscuits and creamy vanilla filling, perfect for celebrations.
Ingredients
- 400 grams tea biscuits
- 2 cups heavy whipping cream
- 1/2 cup powdered sugar
- 1 teaspoon vanilla extract
- 1 cup milk
- 8 ounces cream cheese, softened
- 2 tablespoons colorful sprinkles
Instructions
- Beat heavy cream, powdered sugar, vanilla, and cream cheese until fluffy.
- Dip biscuits briefly in milk.
- Arrange biscuits in number shape.
- Spread cream mixture on top and repeat layers.
- Refrigerate at least 8 hours.
- Decorate with piped cream and sprinkles before serving.
Notes
- Chill overnight for best texture
- Do not oversoak biscuits
- Decorate just before serving