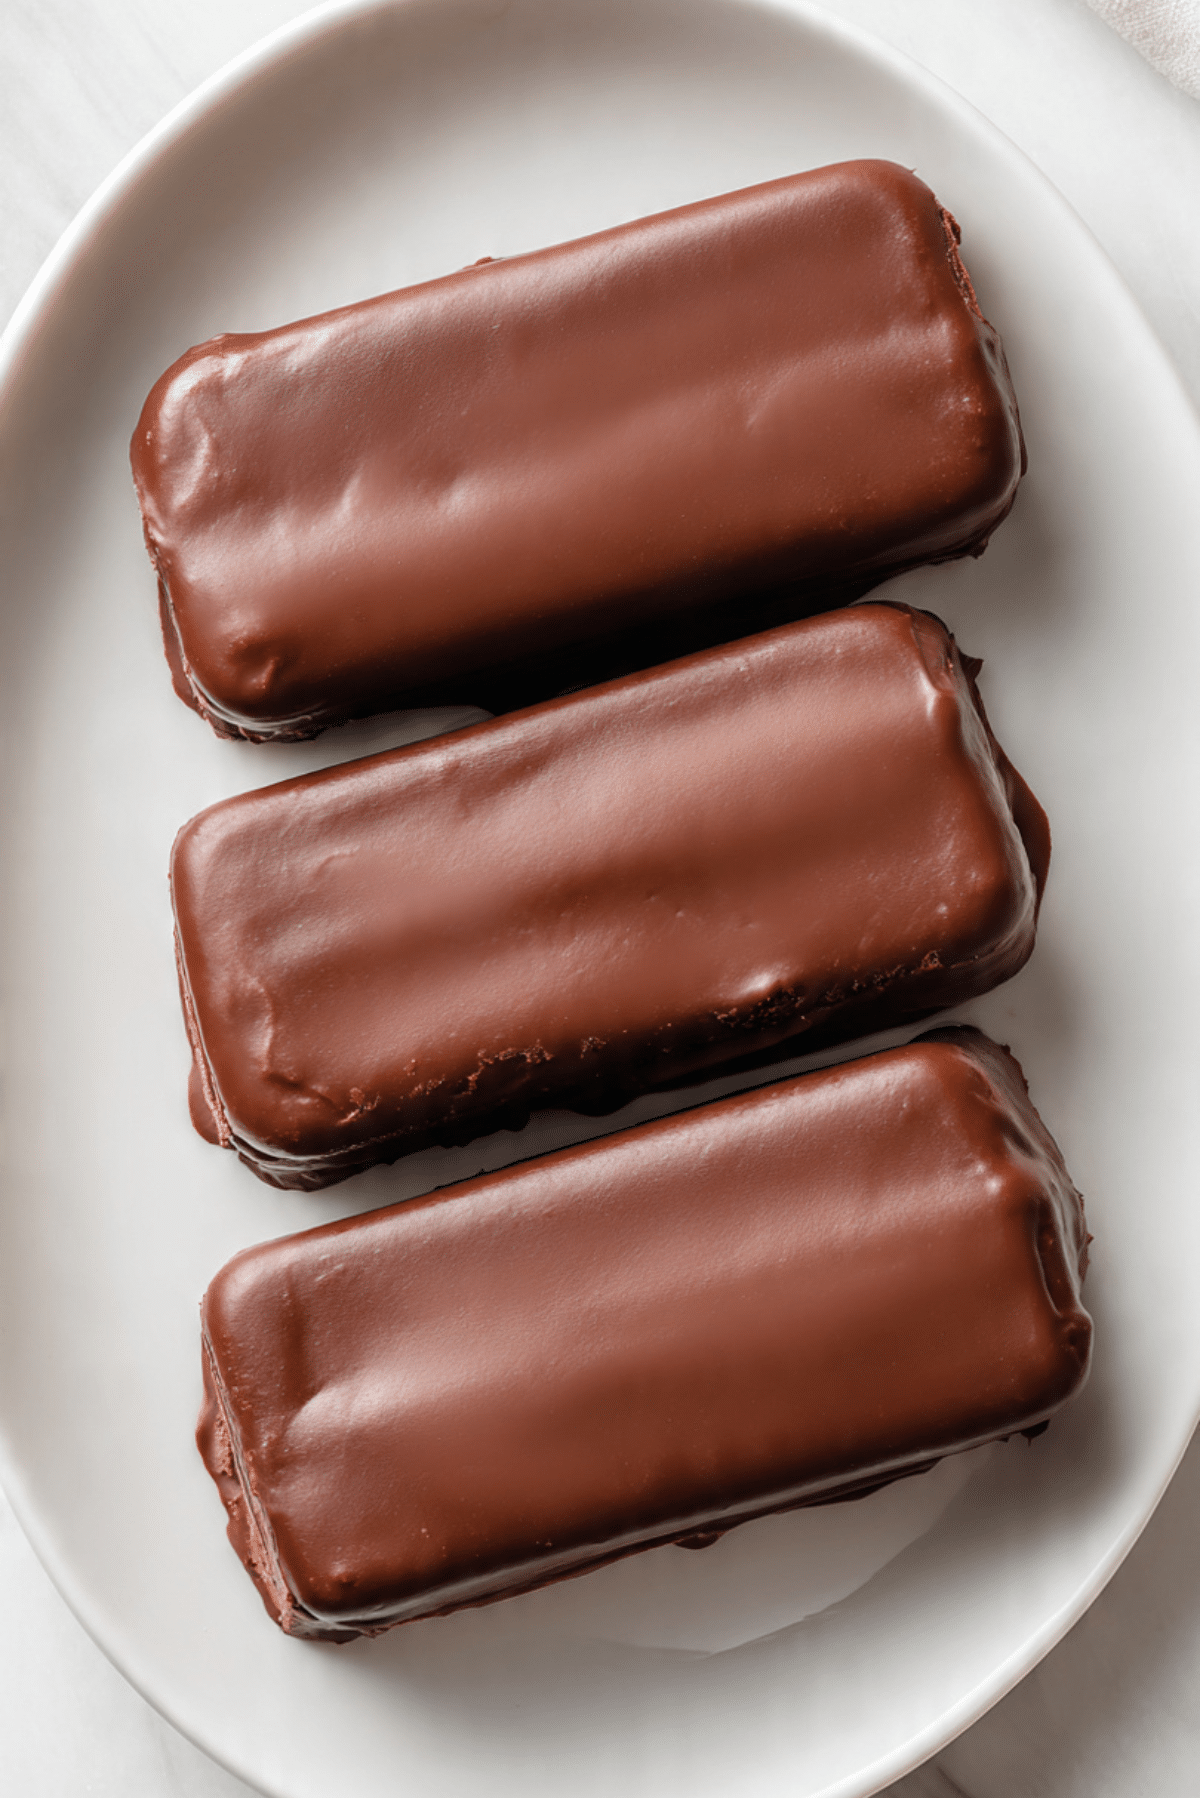
3-Ingredient Chocolate Ice Cream Bars
There is something undeniably nostalgic about biting into a chocolate coated ice cream bar on a warm day. That crisp snap of chocolate followed by the creamy, melting ice cream inside brings back memories of carefree summer afternoons. These 3-Ingredient Chocolate Ice Cream Bars capture that classic joy in the simplest way possible. With just a handful of ingredients and minimal effort, you can create a frozen treat that feels both indulgent and refreshing. Trust me, you’re going to love this.
And now let us dive into what makes these homemade ice cream bars so irresistible.
A Classic Treat Made Effortlessly at Home
Ice cream bars have long been a beloved dessert, but making them at home allows you to control the ingredients and customize the flavors to your liking. This version keeps things beautifully simple while delivering a smooth, creamy interior wrapped in a rich chocolate shell that snaps perfectly with every bite.
Whether you are making them for kids, family gatherings, or just a quiet moment of indulgence, these ice cream bars are guaranteed to impress. They look store bought but taste even better because they are made fresh in your own kitchen.
A Sweet Tradition with a Homemade Twist
Chocolate dipped ice cream bars have been a staple in freezers for decades, often associated with summer fun and joyful celebrations. Creating them at home transforms this nostalgic favorite into a personalized treat. By using high quality chocolate and creamy ice cream, you elevate a simple dessert into something truly special.
This homemade version keeps the essence of the classic while offering flexibility to experiment with flavors and toppings.
Why This Recipe Is a Must Try
Versatile: Perfect for summer parties, family treats, or quick desserts.
Budget-Friendly: Requires only three simple ingredients that are easy to find.
Quick and Easy: Minimal preparation and no baking required.
Customizable: Add sprinkles, crushed nuts, or drizzle with white chocolate for extra flair.
Crowd-Pleasing: Loved by both kids and adults alike.
Make-Ahead Friendly: Prepare and store in the freezer for whenever cravings strike.
Great for Leftovers: These bars keep beautifully in the freezer for weeks.
Pro Tips for Perfect Chocolate Ice Cream Bars
- Use high quality chocolate for a smooth, glossy coating.
- Freeze the ice cream bars thoroughly before dipping to ensure a firm shape.
- Add a small amount of coconut oil to the chocolate for a thinner, easier coating.
- Work quickly when dipping to prevent the ice cream from melting.
Essential Kitchen Tools
Ice Cream Mold or Loaf Pan: Helps shape the bars evenly.
Popsicle Sticks: Provide a sturdy handle for dipping and serving.
Microwave Safe Bowl: Ideal for melting the chocolate smoothly.
Baking Sheet: Used to place the dipped bars while they set.
Parchment Paper: Prevents sticking and ensures easy removal.
Ingredients You Will Need For 3-Ingredient Chocolate Ice Cream Bars
Each ingredient contributes to the perfect balance of flavor and texture.
- Vanilla Ice Cream: 500 grams. Creates a smooth and creamy base for the bars.
- Dark or Milk Chocolate Chips: 200 grams. Forms the rich and crisp outer coating.
- Coconut Oil: 2 tablespoons. Helps the chocolate melt smoothly and creates a glossy shell.
Easy Ingredient Substitutions
Vanilla Ice Cream: Use chocolate, strawberry, or any favorite flavor for variety.
Chocolate Chips: Substitute with dark, milk, or white chocolate depending on your preference.
Coconut Oil: Neutral vegetable oil can be used as an alternative.
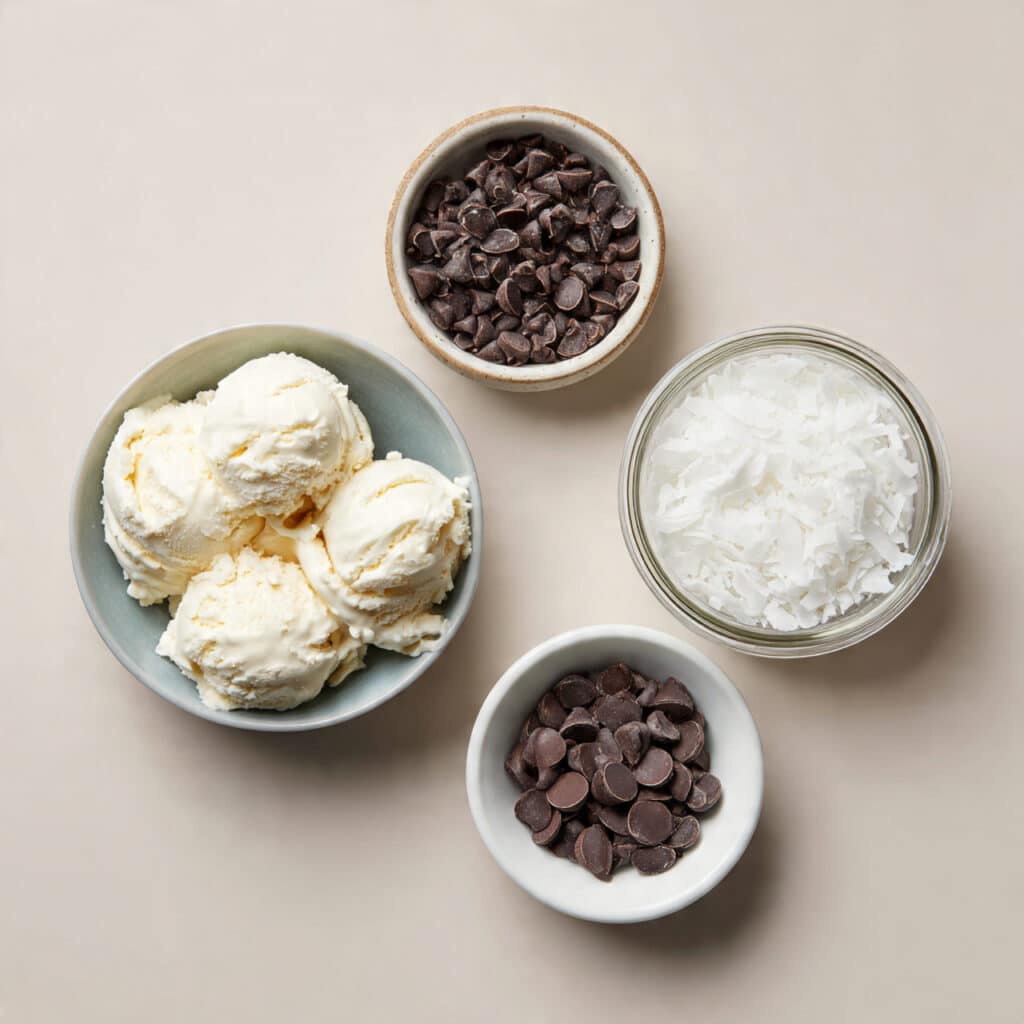
Star Ingredients That Make This Recipe Shine
Vanilla Ice Cream: Provides a creamy, velvety texture that contrasts beautifully with the crisp chocolate shell.
Chocolate Coating: The combination of chocolate and coconut oil creates the signature snap that makes each bite so satisfying.
Let Us Make These Ice Cream Bars Together
Here are the steps you are going to follow to create these delightful frozen treats.
- Preheat Your Equipment: No preheating is required. Line a baking sheet with parchment paper.
- Combine Ingredients: Allow the vanilla ice cream to soften slightly, then spread it evenly into an ice cream mold or loaf pan lined with parchment paper.
- Prepare Your Cooking Vessel: Insert popsicle sticks into the ice cream and freeze for at least 4 hours or until completely firm.
- Assemble the Dish: Remove the frozen ice cream from the mold and cut into bar shapes if using a loaf pan.
- Cook to Perfection: Melt the chocolate chips with the coconut oil in a microwave safe bowl in short intervals, stirring until smooth.
- Finishing Touches: Dip each frozen ice cream bar into the melted chocolate, allowing excess chocolate to drip off before placing it onto the prepared baking sheet.
- Serve and Enjoy: Freeze the dipped bars for an additional 10 minutes until the chocolate shell is fully set, then serve and enjoy.
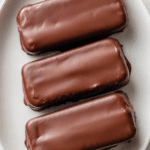
The Perfect Balance of Creamy and Crisp
The beauty of these ice cream bars lies in their contrast. The smooth, creamy ice cream melts gently on the tongue, while the chocolate shell provides a crisp, satisfying snap. The subtle sweetness of vanilla pairs perfectly with the richness of the chocolate, creating a timeless flavor combination that never goes out of style.
Helpful Tips for Best Results
- Freeze the bars thoroughly before dipping to maintain their shape.
- Use a deep container for dipping to ensure an even coating.
- Add toppings immediately after dipping while the chocolate is still soft.
- Store in an airtight container to prevent freezer burn.
Common Mistakes to Avoid
- Dipping bars that are not fully frozen, which causes melting.
- Overheating the chocolate, resulting in a thick or grainy texture.
- Skipping parchment paper, leading to sticking.
- Leaving the bars at room temperature for too long before serving.
Nutrition Facts
Servings: 6 bars
Calories per serving: 280
Note These values are approximate and may vary depending on ingredient brands.
Preparation Time
Prep Time: 10 minutes
Cook Time: 0 minutes
Total Time: 4 hours 10 minutes
Make-Ahead and Storage Tips
These ice cream bars can be prepared in advance and stored in an airtight container in the freezer for up to 2 weeks. Place parchment paper between layers to prevent sticking. Allow them to sit at room temperature for a minute before serving for the perfect texture.
How to Serve
Serve these ice cream bars straight from the freezer for a refreshing treat. They pair beautifully with fresh berries, whipped cream, or a drizzle of caramel sauce for an extra indulgent dessert.
Creative Leftover Transformations
Chop leftover bars into chunks and fold them into milkshakes.
Use them as a topping for sundaes or waffle cones.
Crush and layer them into ice cream parfaits.
Additional Tips
Experiment with flavored ice creams such as cookies and cream or strawberry.
Drizzle with white chocolate for a decorative touch.
Sprinkle with crushed nuts, coconut flakes, or colorful sprinkles before the chocolate sets.
Make It a Showstopper
Arrange the finished ice cream bars on a chilled serving platter and garnish with fresh berries or a drizzle of contrasting chocolate. Their glossy coating and clean shape make them visually stunning and perfect for parties or celebrations.
Variations to Try
Use chocolate ice cream for a double chocolate version.
Add crushed cookies or nuts to the chocolate coating for texture.
Dip the bars halfway for a decorative two tone look.
Roll the freshly dipped bars in sprinkles or coconut flakes for added flair.
FAQ’s
Q1: Can I use any flavor of ice cream?
Yes, any flavor works beautifully depending on your preference.
Q2: How long should I freeze the bars before dipping?
At least 4 hours or until completely firm.
Q3: Can I use white chocolate instead of dark chocolate?
Absolutely, white chocolate creates a sweeter and creamier coating.
Q4: How do I prevent the ice cream from melting while dipping?
Work quickly and keep the bars in the freezer until ready to dip.
Q5: Can I add toppings?
Yes, sprinkles, nuts, and crushed cookies are excellent additions.
Q6: How should I store the bars?
Store them in an airtight container in the freezer for up to 2 weeks.
Q7: Can I make them dairy free?
Yes, use dairy free ice cream and chocolate alternatives.
Q8: Do I need popsicle molds?
No, you can use a loaf pan and cut the ice cream into bars.
Q9: Why is my chocolate coating too thick?
Add a little more coconut oil to thin the chocolate.
Q10: Can I prepare these in advance for parties?
Yes, they are perfect for make ahead desserts and stay fresh in the freezer.
Conclusion
These 3-Ingredient Chocolate Ice Cream Bars are proof that simple recipes can deliver extraordinary results. With their creamy interior and crisp chocolate shell, they offer a refreshing and indulgent treat that is perfect for any occasion. Whether you are making them for a summer gathering or a sweet craving at home, these homemade ice cream bars are guaranteed to delight everyone who tries them.
Print3-Ingredient Chocolate Ice Cream Bars
Creamy vanilla ice cream bars coated in a rich chocolate shell made with just three simple ingredients. A quick, refreshing frozen dessert perfect for summer treats and easy entertaining.
Ingredients
- 500 grams vanilla ice cream
- 200 grams dark or milk chocolate chips
- 2 tablespoons coconut oil
Instructions
- Line a loaf pan or ice cream mold with parchment paper.
- Soften the vanilla ice cream slightly and spread it evenly into the prepared mold.
- Insert popsicle sticks and freeze for at least 4 hours or until completely firm.
- Remove the frozen ice cream from the mold and cut into bar shapes if necessary.
- In a microwave safe bowl, melt the chocolate chips with the coconut oil in short intervals, stirring until smooth.
- Dip each frozen ice cream bar into the melted chocolate, allowing excess chocolate to drip off.
- Place the dipped bars on a parchment lined baking sheet and freeze for an additional 10 minutes until the chocolate shell sets.
- Serve immediately or store in an airtight container in the freezer.
Notes
- Ensure the ice cream bars are fully frozen before dipping to maintain their shape.
- Work quickly to prevent melting during the dipping process.
- Store in an airtight container for up to 2 weeks.
- Add sprinkles or crushed nuts before the chocolate sets for extra texture.